How to Organize Your Pantry Like a Pro (Step-by-Step Guide)
Last updated: February 20, 2026
This article may contain affiliate links. If you make a purchase through these links, we may earn a small commission at no extra cost to you. Learn more
Is your pantry a chaotic mess where cereal boxes fall out every time you open the door? You're not alone. A disorganized pantry doesn't just waste space—it wastes money, time, and creates unnecessary stress every single day.
The good news? Transforming your pantry from disaster zone to organized dream is easier than you think. With the right system and a few hours of focused effort, you can create a pantry that's not only functional but actually enjoyable to use.
In this comprehensive guide, I'll walk you through the exact step-by-step process to organize your pantry like a professional organizer. No fluff, no complicated systems—just proven strategies that actually work.
Why Pantry Organization Matters More Than You Think
A well-organized pantry isn't just about aesthetics. It directly impacts your daily life in ways you might not realize.
When you can see everything at a glance, you stop buying duplicates of items you already have. This alone can save hundreds of dollars per year on groceries. Plus, you'll waste less food because nothing gets forgotten in the back corner until it expires.
An organized pantry also saves you time. No more digging through stacks of cans or shifting boxes around to find what you need. Meal prep becomes faster and less stressful when ingredients are easy to locate.
Step 1: Empty Everything Out (Yes, Everything)
The first step is the most important—and the most intimidating. You need to completely empty your pantry.
I know this feels overwhelming, especially if you have a large pantry. But trust me, you can't properly organize around existing items. Pull everything out and place items on your kitchen counter, table, or floor.
This is your chance to see exactly what you're working with. You'll likely discover forgotten items, expired products, and duplicates you didn't know you had. It's also the perfect opportunity to give your pantry a deep clean before restocking.
Step 2: Clean Every Surface Thoroughly
With your pantry empty, now's the time to clean it properly. Wipe down every shelf, corner, and wall.
Use a mixture of warm water and all-purpose cleaner to remove dust, crumbs, and sticky residue. Don't forget to vacuum or sweep the floor—you'll be amazed at how much debris accumulates in pantry corners.
If you notice any spills, sticky spots, or stains, tackle them now. A clean foundation makes organizing so much more satisfying and prevents pests from being attracted to food residue. Speaking of pests, if you've already spotted tiny flies around your fruit or produce, check out our guide on how to get rid of fruit flies before they take over your kitchen.
Step 3: Check Expiration Dates and Purge Ruthlessly
As you look at all your pantry items, check every single expiration date. This is non-negotiable.
Toss anything that's expired, stale, or questionable. That flour you bought two years ago for a recipe you never made? Gone. The stale crackers? Trash. Be ruthless here—expired food takes up valuable space and provides no value.
Also get rid of items you know you'll never use. If you bought something experimental and nobody liked it, donate it if it's still good or toss it if it's not. This isn't the time to hold onto things out of guilt.
Step 4: Create Functional Zones (The Game-Changer)
Here's where the magic happens. Instead of randomly placing items back in your pantry, you're going to create zones.
Zones group similar items together, making everything easier to find and maintain. Think of your pantry like a grocery store—breakfast items in one area, baking supplies in another, snacks in their own section.
Common zones include: breakfast foods (cereal, oatmeal, pancake mix), baking supplies (flour, sugar, baking powder), canned goods, pasta and grains, snacks, oils and condiments, and spices. Adjust these categories based on what you actually store.
The key is keeping items you use together in the same zone. Coffee, filters, and sweeteners should all be near each other. Pasta, pasta sauce, and Italian seasonings belong together. This makes cooking and meal prep infinitely easier.
Place your most-used items at eye level for easy access. Less frequently used items (like special occasion serving platters or bulk purchases) can go on higher or lower shelves.
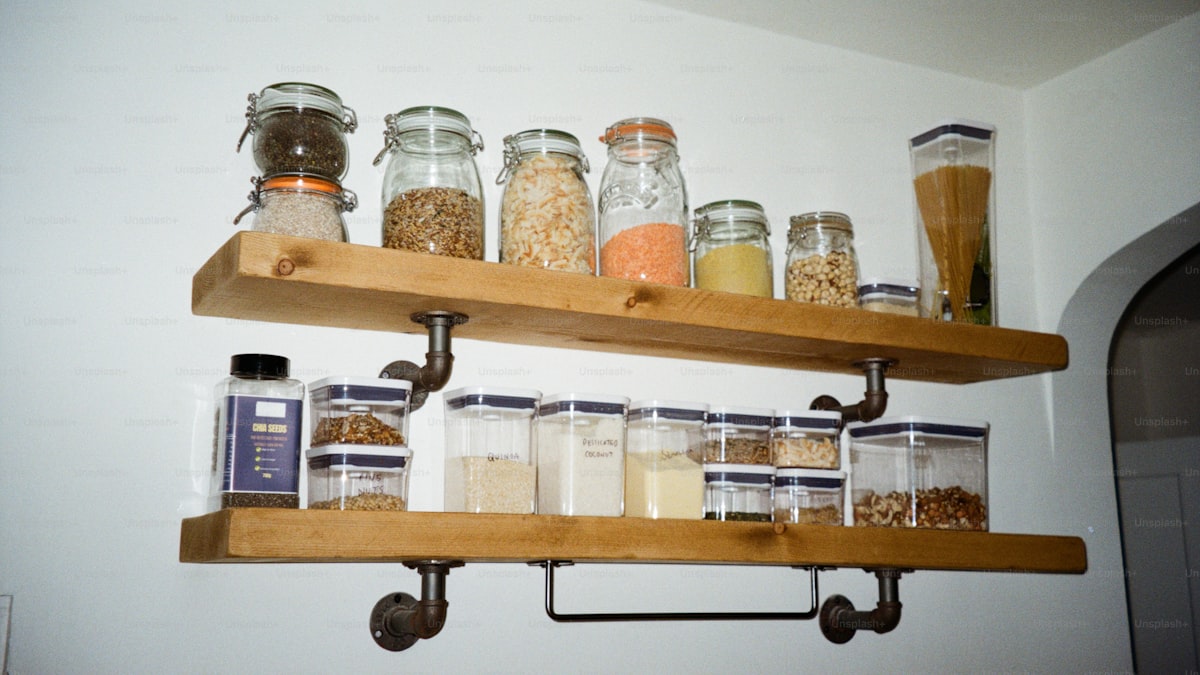
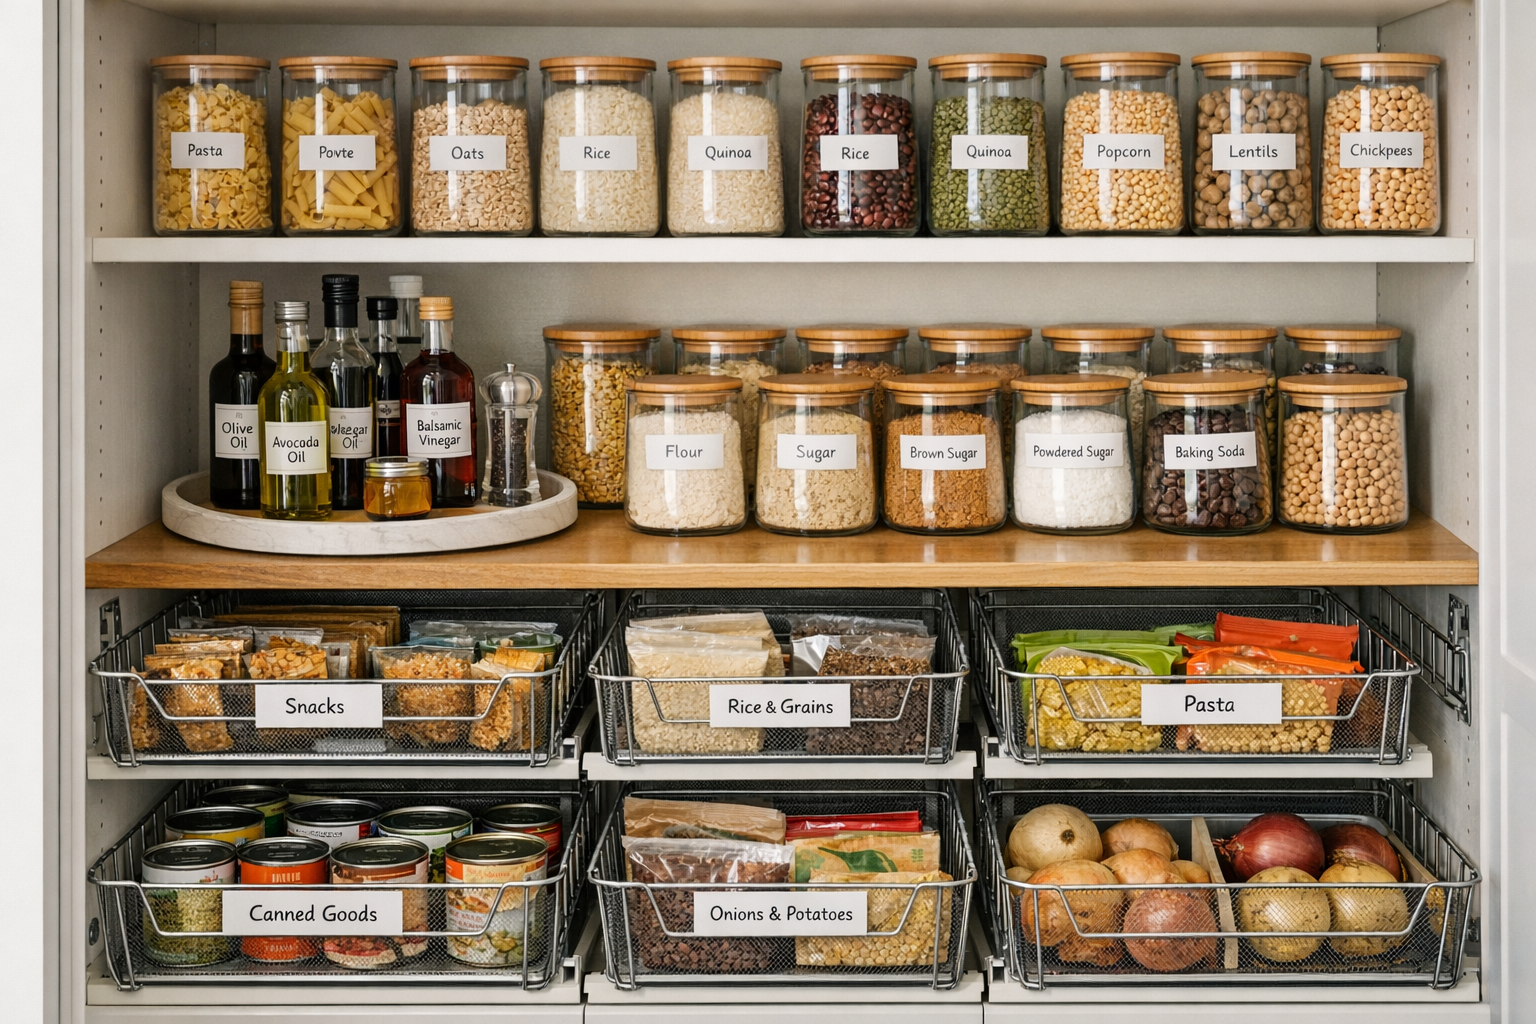
Step 5: Choose the Right Storage Containers
Storage containers are where pantry organization goes from good to great. The right containers protect food, save space, and make your pantry look cohesive.
Clear airtight containers are the gold standard for pantry organization. They keep food fresh longer, prevent pests, and let you see exactly what you have at a glance. You'll never grab what you think is flour only to discover it's powdered sugar again.
For dry goods like flour, sugar, rice, pasta, cereal, and snacks, transfer them from their original packaging into clear containers. Square or rectangular containers use space more efficiently than round ones—they stack better and eliminate wasted gaps.
OXO Good Grips POP Containers
The gold standard for pantry organization. Airtight push-button seal, stackable design, and crystal-clear so you always know what's inside. Available in sets of multiple sizes.
Check Price on Amazon →Recommended Storage Solutions
Airtight Food Storage Containers: Look for sets with multiple sizes to accommodate everything from pasta to cereal. The OXO Good Grips POP containers are professional organizers' favorites for good reason—they're airtight, stackable, and the push-button seal is genuinely satisfying to use.
Wire Baskets: Perfect for corralling bags of chips, onions and potatoes, or packaged snacks. Wire allows air circulation (important for produce) while keeping items contained. The mDesign wire baskets are affordable and come in multiple sizes.
Lazy Susans: Game-changers for corner spaces or deep shelves. Place oils, vinegars, or condiments on a turntable and you'll never lose items in the back again. Simple and effective.
Shelf Risers: These create vertical storage space by adding an extra level to your shelves. Perfect for canned goods, spices, or small jars. You can suddenly see and access everything instead of stacking items on top of each other.
Door Racks: Don't waste the back of your pantry door. Over-the-door organizers or mounted racks are perfect for spices, small packets, or lightweight items. This is prime real estate that most people ignore.
Can Organizers: Stackable can racks or dispensers keep canned goods tidy and make it easy to rotate stock. Some even dispense cans from the front while you load from the back—perfect for using oldest items first.
For items that don't need containers (like canned goods or packaged snacks), use bins or baskets to keep similar items grouped together. This prevents the "avalanche effect" when you remove one item.
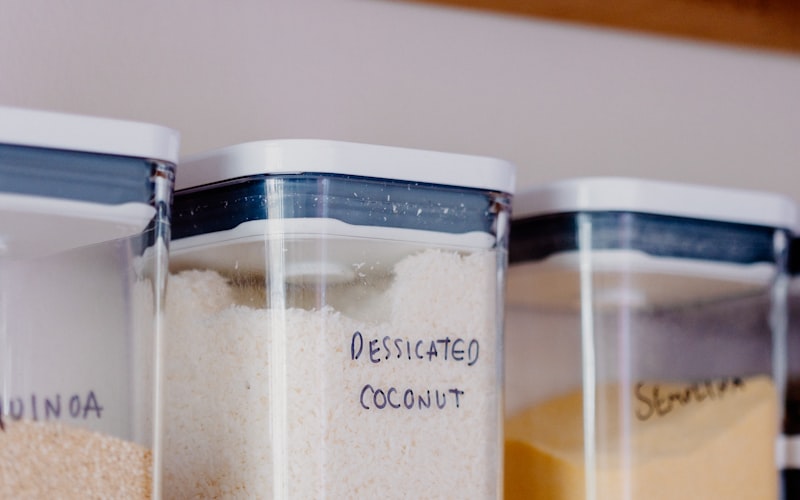
Step 6: Implement a Labeling System That Works
Labels are the secret to maintaining your organized pantry long-term. They help everyone in your household know where things belong.
Label everything—containers, bins, baskets, even shelf edges. When every item has a designated home, there's no excuse for things to get misplaced.
You don't need a fancy label maker (though they're nice). Chalkboard labels, printable labels, or even masking tape with a permanent marker works perfectly fine. The important thing is that labels are clear and visible.
For food containers, include both the item name and the expiration date if applicable. For flour, sugar, and other staples, you might also want to note whether it's all-purpose or bread flour, white or brown sugar, etc.
Shelf labels are particularly helpful if you share your kitchen with family members or roommates. Label shelves "Breakfast," "Snacks," "Baking," etc., and everyone will know where to return items after use.
Step 7: Maximize Space with Shelf Risers and Turntables
Once you have your containers and zones established, it's time to maximize every inch of available space.
Shelf risers are absolute game-changers. They effectively double your usable space by creating a two-tier system on a single shelf. Use them for canned goods so you can see labels on cans in the back row, or for spices so nothing gets lost behind larger bottles.
Turntables (lazy Susans) solve the deep shelf problem. Place one in a corner or on a deep shelf and suddenly everything is accessible with a quick spin. They're perfect for oils, vinegars, sauces, or anything in bottles.
Don't forget about vertical space. Stackable containers or bins let you build upward instead of just outward. Just make sure you're not stacking so high that items on top become difficult to reach or unsafe.
If you have adjustable shelving, take advantage of it. Move shelves to accommodate the actual height of what you're storing instead of wasting vertical space. Most items don't need 12 inches of clearance.
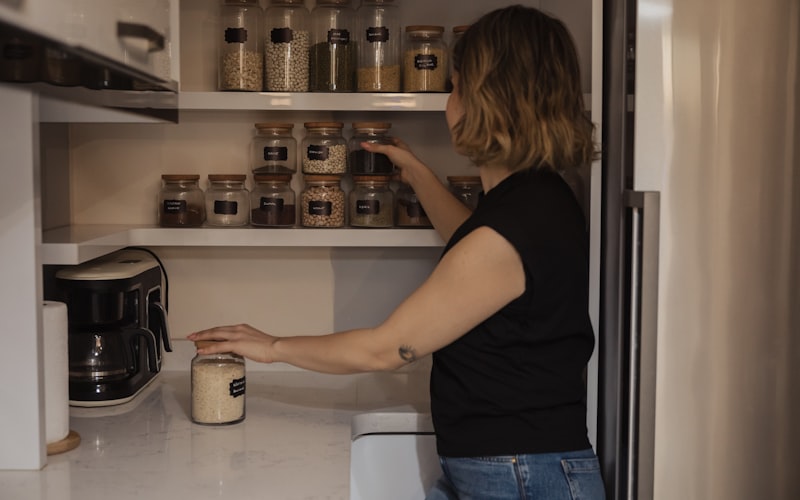
Step 8: Stock Your Pantry Strategically
Now comes the satisfying part—putting everything back in its designated zone.
Start with heavier items on lower shelves for safety and accessibility. Place everyday items at eye level where they're easiest to grab. Reserve top shelves for lightweight, occasionally used items or bulk purchases.
As you stock each zone, think about frequency of use. The cereal you eat every morning should be front and center, while the specialty flour you use twice a year can go toward the back.
Group items by meal or function when possible. Keep all taco night ingredients together, all smoothie supplies in one basket, all baking essentials in one zone. This speeds up cooking and helps with grocery planning.
Face labels forward so you can identify items at a glance. In clear containers, this is easy. For canned goods and packages, take the extra 30 seconds to turn labels outward.
Maintenance: How to Keep Your Pantry Organized
The brutal truth? Even the best-organized pantry falls apart without regular maintenance.
Set a reminder to do a quick 10-minute pantry reset once a week. Push items forward, wipe up any spills, and return misplaced items to their zones. This prevents small messes from becoming big problems.
Every month, do a more thorough check. Verify expiration dates, take inventory of what you're running low on, and clean any shelves that need attention. This is also a good time to rotate stock if you buy in bulk.
The key to long-term success is making sure everyone in your household knows the system. If you live with family, give them a quick tour of the new organization. Show them where things belong and why. When everyone's on board, maintenance becomes a shared responsibility.
Consider keeping a running grocery list on the inside of your pantry door. When you use the last of something or notice you're running low, add it immediately. This prevents the "I thought we had pasta" moments and helps you avoid duplicate purchases.
Budget-Friendly Pantry Organization Tips
Professional pantry organization doesn't require spending hundreds on containers and accessories.
Start with what you have. Shoe boxes, small cardboard boxes, and even cleaned food containers can work as organizers while you figure out your system. Once you know what works, invest in proper containers gradually.
Shop secondhand for containers and baskets. Thrift stores and Facebook Marketplace often have unused organization supplies at a fraction of retail price. Just make sure everything is clean and in good condition.
Focus your budget on containers for items you use most often. If you bake frequently, invest in good flour and sugar containers. If you eat a lot of cereal, get proper cereal containers. You don't need to containerize everything at once.
Dollar stores carry surprisingly good pantry organization supplies. Wire baskets, small bins, and basic containers are often identical to name-brand versions at a quarter of the price.
Common Pantry Organization Mistakes to Avoid
Even with the best intentions, certain mistakes can sabotage your pantry organization efforts.
Don't over-buy containers before you measure. I see this all the time—people get excited, buy a bunch of containers, and then realize they don't fit on their shelves or don't hold as much as needed. Measure your space and your food quantities first.
Avoid creating a system that's too complicated. If your organization requires a flowchart to understand, it won't last. Simple, intuitive systems are the ones people actually maintain.
Don't neglect the vertical space or the back of the door. These are prime organizing opportunities that many people overlook. Use every available inch strategically.
Resist the urge to keep expired food "just in case." It's taking up valuable space and you're not going to use it. Be honest with yourself and purge ruthlessly.
Finally, don't try to organize around existing clutter. That's why Step 1 is emptying everything. You can't create an effective system while working around chaos.
Taking Your Organization Further
Once your pantry is organized, you might find yourself wanting to tackle other kitchen areas. The same principles apply everywhere.
The space under your kitchen sink is often just as chaotic as an unorganized pantry. Use similar zoning and containment strategies to transform that area too.
An organized pantry also supports better grocery shopping habits. If you can actually see what you have, you'll buy only what you need. Check out these strategies to cut your grocery bill in half while maintaining a well-stocked kitchen. Once your pantry is dialed in, you might want to tackle your refrigerator next—our guide on how to organize your fridge and keep food fresh applies similar principles to cold storage.
Don't forget about your appliances either. A clean dishwasher runs more efficiently and a clean kitchen just feels better. Small maintenance tasks compound into a kitchen you genuinely enjoy spending time in. If you're on a full home organization kick, our room-by-room guide to declutter your home provides a systematic approach to tackling every space.
Frequently Asked Questions
How long does it take to organize a pantry?
For a standard pantry, plan on 3-4 hours from start to finish. This includes emptying everything, cleaning, sorting, and restocking. Larger walk-in pantries might take 6-8 hours. Don't rush it—taking your time ensures you create a system that actually works for your needs.
Do I really need to transfer food into containers?
You don't have to, but it makes a significant difference. Airtight containers keep food fresher longer, protect against pests, save space through better stacking, and create a cohesive look. Start with items you use most frequently and you'll immediately notice the benefits.
What's the best way to organize spices?
Store spices in a dedicated zone at eye level or on a pull-out drawer if you have one. Alphabetical order works for some people, but organizing by cuisine type (Italian, Mexican, Asian) or frequency of use often makes more sense for home cooks. Use a tiered shelf riser or lazy Susan so you can see all labels at once.
How do I maintain pantry organization with kids?
Create a designated kid-friendly zone at their eye level with grab-and-go snacks. Use clear containers or bins so they can see options without opening everything. Label with pictures for young kids who can't read yet. Make putting things back part of the routine—kids are surprisingly good at maintaining systems when they understand them.
Your Organized Pantry Awaits
Organizing your pantry transforms one of the most-used spaces in your home from a source of stress into a source of calm.
Yes, it takes time upfront. Yes, it requires some investment in containers and supplies. But the daily benefits—saved time, saved money, reduced food waste, and less stress—compound quickly.
You don't need to be a professional organizer or have an Instagram-worthy pantry. You just need a system that works for you and your household, and the commitment to maintain it with small, regular efforts.
Start this weekend. Empty that pantry, create your zones, and set yourself up for easier, more enjoyable cooking every single day. Your future self will thank you every time you open that pantry door and everything is exactly where it should be.
Ready to tackle that pantry? You've got this.
Get weekly home tips that actually work
Join thousands of homeowners getting practical cleaning hacks, DIY fixes, and money-saving tips every week. Free, and you can unsubscribe anytime.

Written by
Beth SullivanFounder & Editor-in-Chief
Beth Sullivan is the founder of Practical Home Guides. With over a decade of hands-on experience tackling every home challenge imaginable, she started this site to share the practical, no-nonsense solutions she wishes she had found years ago. When she's not testing cleaning hacks or organizing pantries, you'll find her in the garden or working on her next DIY project.
Recommended Products
Looking for specific product recommendations? Check out our tested picks.
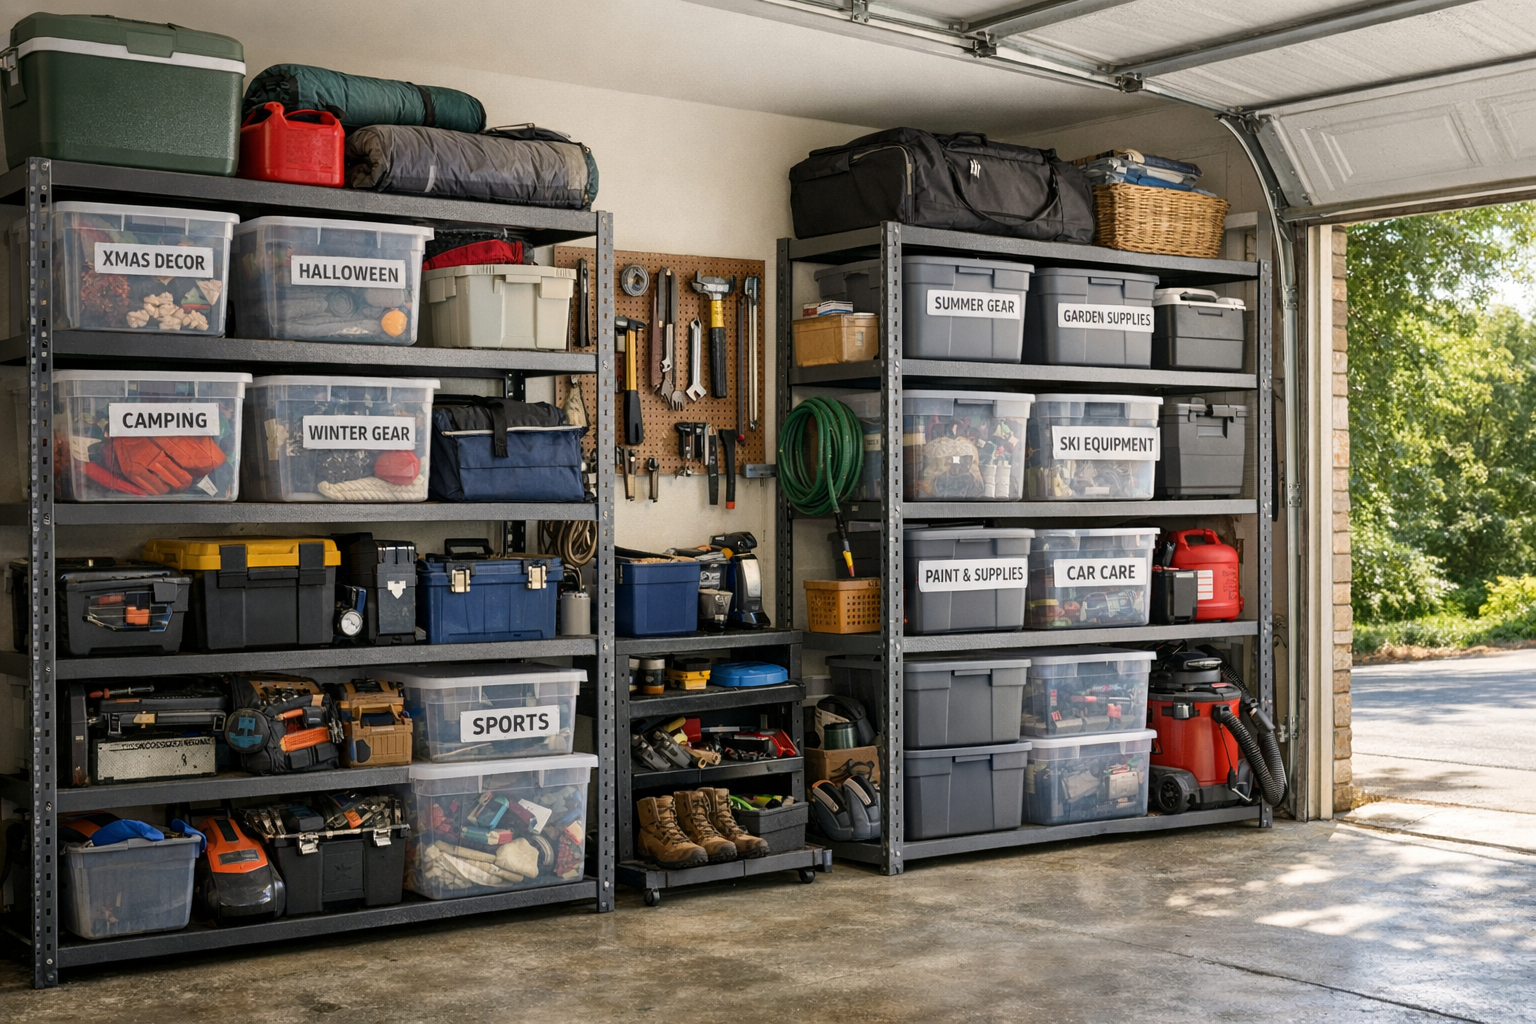
Best Garage Shelving Systems (2026 Tested)
Wire shelving, freestanding steel, wall-mounted, and overhead — we tested the garage shelving systems that hold real weight without sagging.
5 Best Closet Organizer Systems Under $100 (2026)
Transform your cluttered closet without spending a fortune. We compared the top closet organizer systems under $100 — here are the 5 best for different closet sizes and needs.
Best Storage Bins and Organizers for Every Room (2026)
The best storage bins, baskets, and organizers for closets, pantries, bathrooms, and garages. Practical picks at every price point to get your home organized.
Related Articles
How to Swap Winter and Summer Wardrobes (And Cut Your Closet in Half)
The seasonal wardrobe swap is the highest-leverage closet declutter you can do. Here's the system that takes 90 minutes and dramatically simplifies dressing for months.
How to Set Up Garage Pegboard Zones (Pro Mechanic Style)
A pegboard wall keeps every tool in its own spot. Here's the zone-based layout pro mechanics use — adapted for home garages.
How to Organize Deep Pantry Shelves Without Wasting Food
Deep pantry shelves are where food goes to be forgotten. Here's the system that keeps everything visible and rotated — even on 24-inch deep shelves.
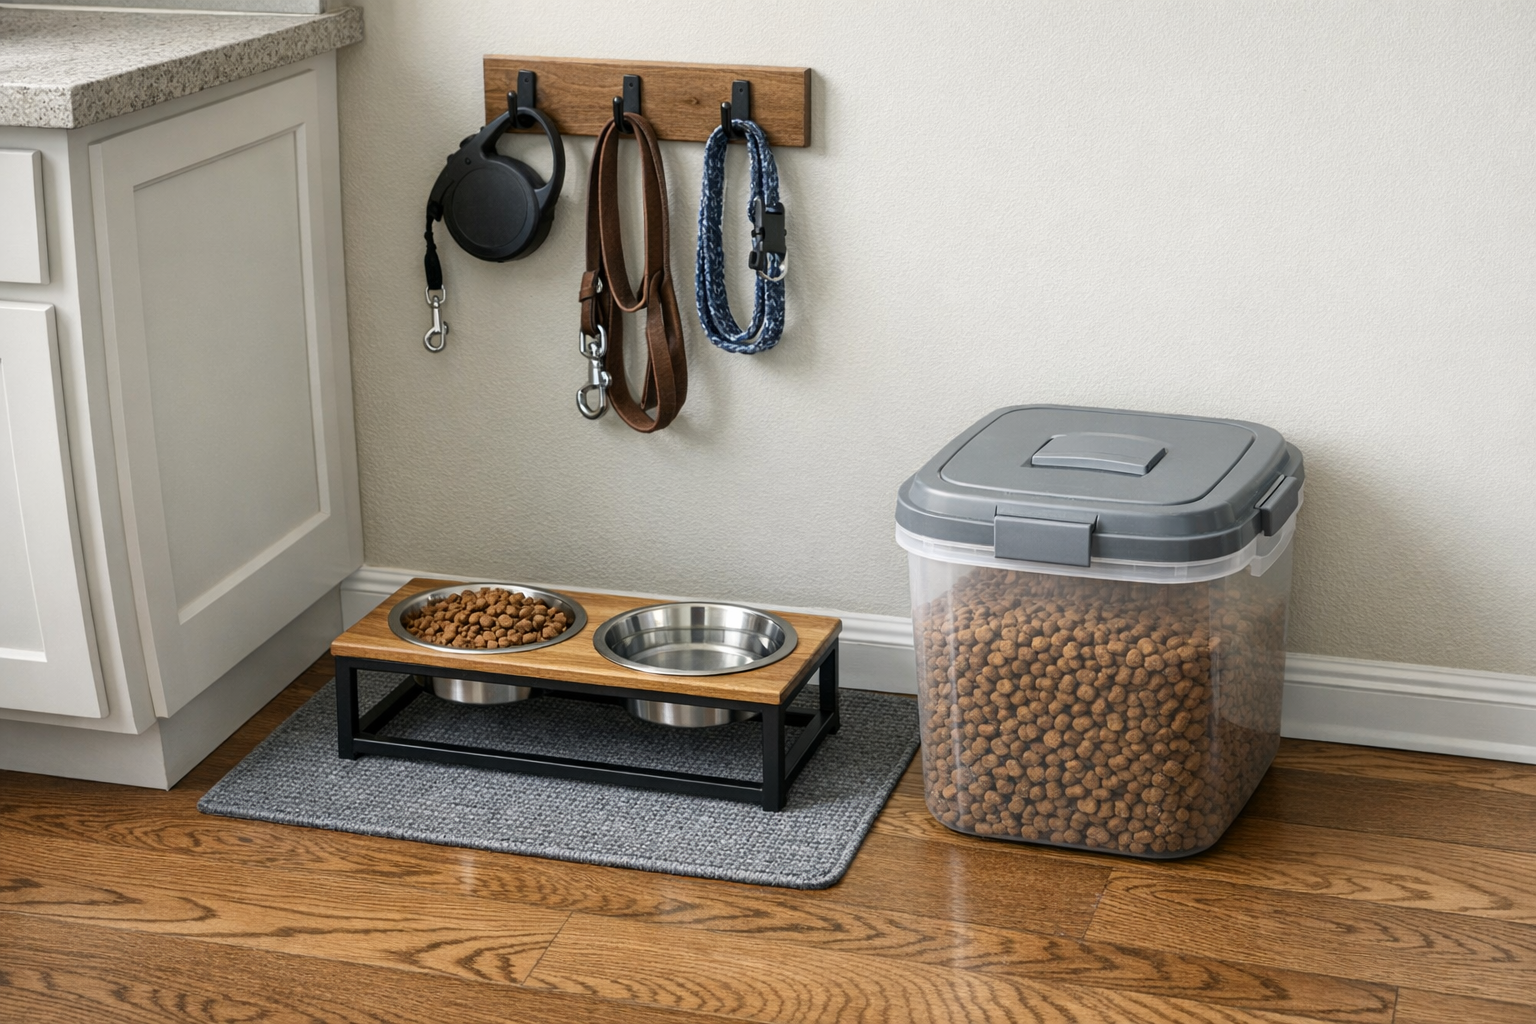
How to Organize Pet Supplies and Build a Tidy Feeding Station
Stop tripping over kibble bags and digging through a chaotic pet drawer. A simple feeding station system that works for one pet or five.