How to Swap Winter and Summer Wardrobes (And Cut Your Closet in Half)
This article may contain affiliate links. If you make a purchase through these links, we may earn a small commission at no extra cost to you. Learn more
Quick Answer
How to Swap Winter and Summer Wardrobes (And Cut Your Closet in Half)
Pull all winter-only clothing (sweaters, heavy boots, parkas) and store in vacuum bags or labeled bins. Move summer clothing to the front of the closet. Try on anything you didn't wear last summer — donate what doesn't fit or feel right. Total time: 90 minutes per person.
The seasonal wardrobe swap is the highest-impact closet project most people skip. 90 minutes once a year and you stop looking at sweaters in July, your morning routine speeds up dramatically, and the closet stops feeling cramped.
Here's the system.
Why It's Worth Doing
Three benefits compound:
- Faster mornings — you only see seasonal-relevant clothes
- Better decluttering — items in the "wrong season" pile naturally surface what you actually wear
- Clothes last longer — heavy sweaters compressed and stored stay nicer than crammed in a closet
Most households save 30 to 60 percent of closet space with proper seasonal storage.
What You'll Need
- 4 to 6 clear stackable storage bins OR a few vacuum compression bags
- A roll of painters tape and a Sharpie for labels
- Three garbage bags or boxes for sorting (donate, repair, trash)
- A hanging closet organizer for shelf-folded items if you have one
Step 1: Pull Everything Winter-Only
Walk through the closet and pull anything you only wear in cold weather:
- Heavy wool sweaters
- Cashmere
- Flannel shirts (heavy-weight)
- Heavy down jackets, parkas, ski jackets
- Wool coats
- Snow boots, winter boots
- Heavy scarves, gloves, beanies
- Long underwear, thermal layers
Pile on the bed or floor. Don't sort yet.
Step 2: Pull Anything You Didn't Wear Last Winter
Within the winter pile, pull anything you didn't wear at all last winter. Be honest — most people have 30 percent unworn items.
Try them on. If anything doesn't fit, isn't flattering, or just feels wrong — donate. Don't store unworn clothes for another year. Storage costs space and creates clutter that never goes away.
Step 3: Decide Storage Method
Two options:
Vacuum Compression Bags
Vacuum bags shrink bulky items to a quarter of their size. Best for:
- Heavy parkas
- Wool sweaters
- Down jackets
- Big blankets
Pros: Maximum space savings. Bags slide under the bed or into a closet shelf. Cons: Vacuum cycles compress fibers — some delicate fabrics shouldn't be compressed long-term.
Clear Storage Bins
Clear lidded storage bins are gentler on clothes and let you see contents.
Pros: Better for delicates and vintage items. Easier access. Cons: Take up more space than vacuum bags.
Most people use a mix — vacuum for bulky non-delicate, bins for everything else.
Step 4: Wash Before Storing
Always wash clothes before storing for the season. Body oils, sweat, and food residue attract moths and become impossible to remove after months.
For dry-clean-only items, take to the cleaners before storing — they'll be ready for next winter.
Add a few cedar blocks or lavender sachets per bin to prevent moths and freshen scent.
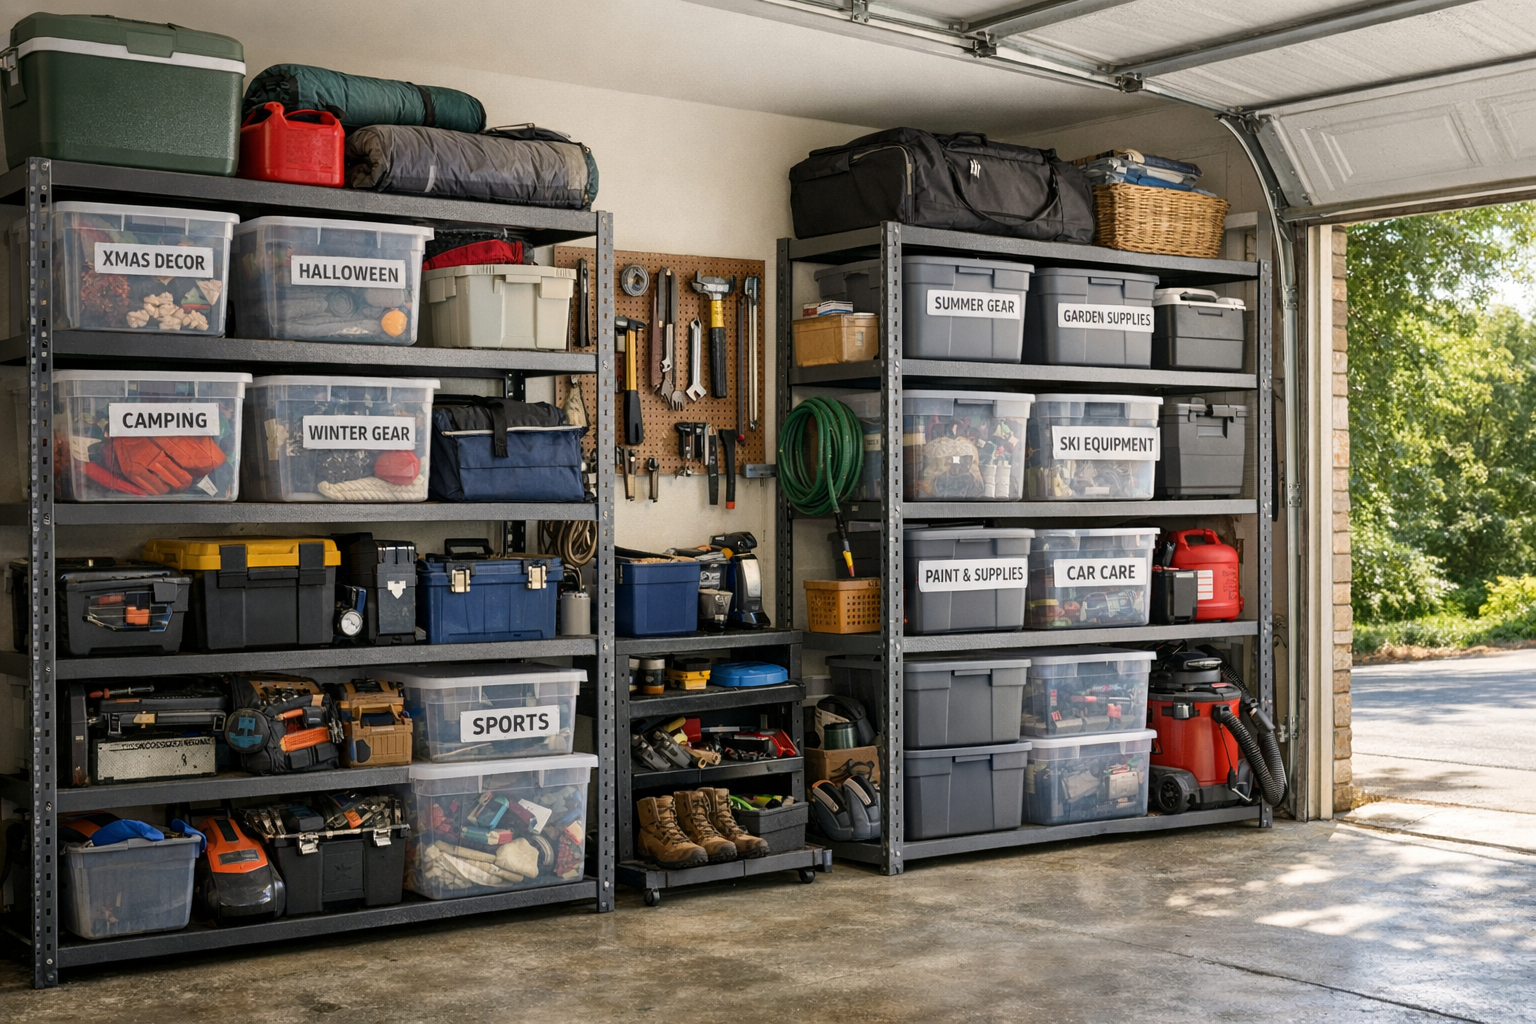
Step 5: Label and Stack
Label every bin or bag with category and season:
- "Winter Sweaters - 2025-26"
- "Winter Coats and Outerwear"
- "Boots and Heavy Shoes"
A label maker helps but a Sharpie on tape works fine.
Store bins on top closet shelves, in the basement, in the attic, or under beds. Anywhere dry and not in everyday closet space.
Step 6: Bring Out Summer Clothing
If you stored summer clothes last fall, reverse the process. Pull bins, wash anything that smells musty, hang or fold and put away.
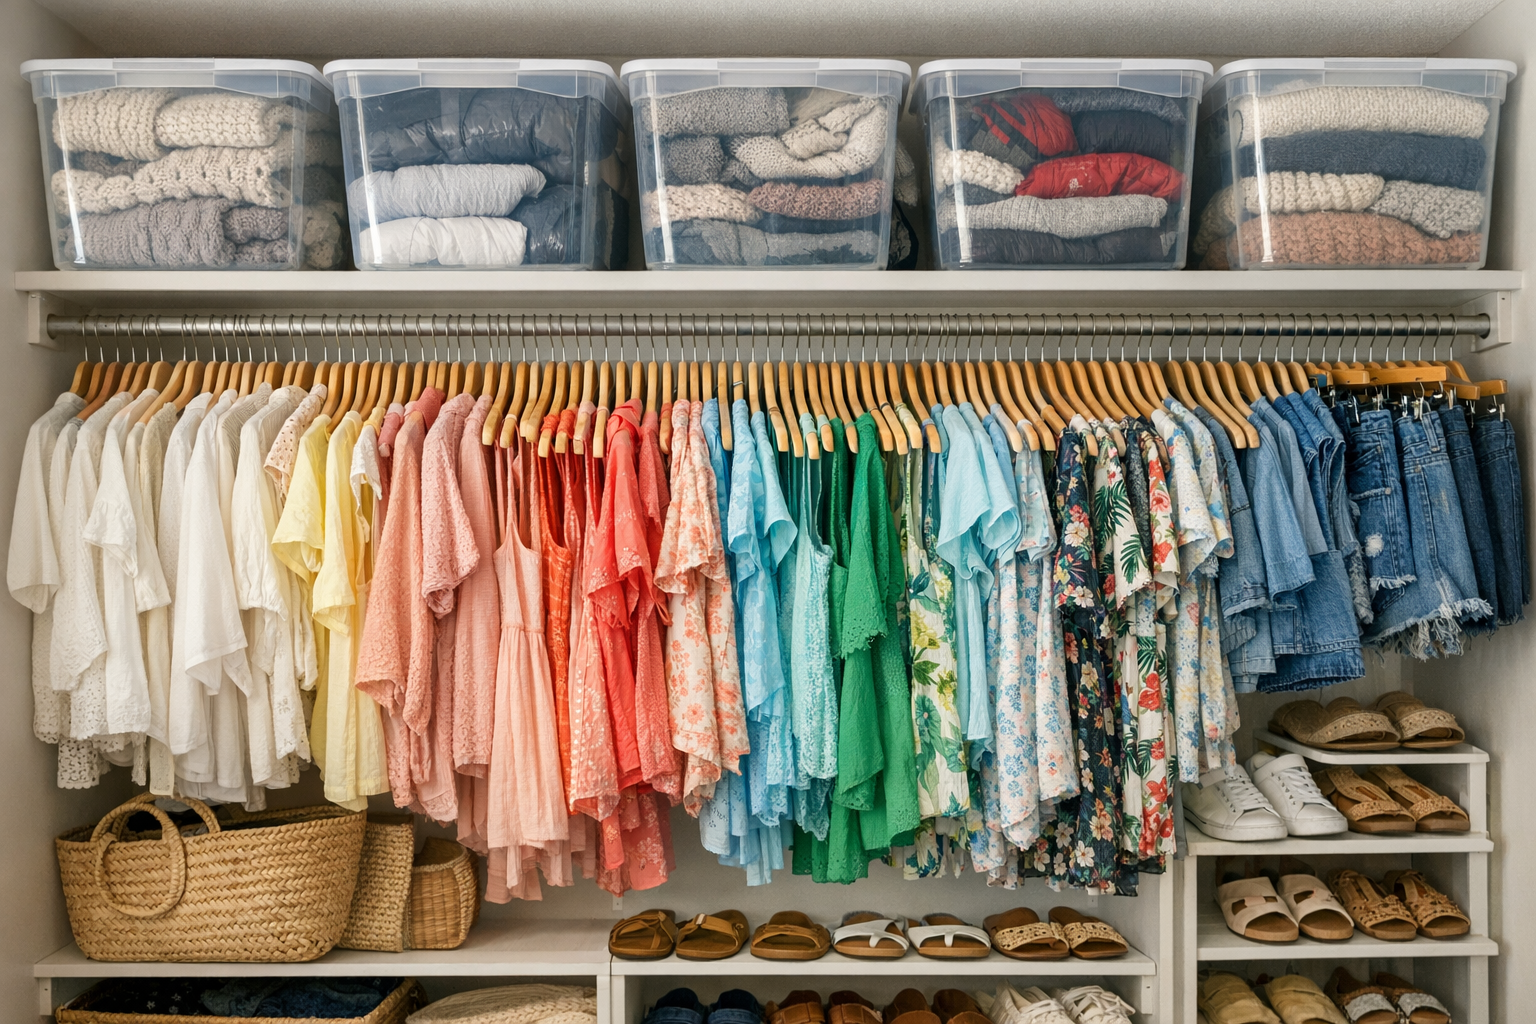
Step 7: Reorganize the Active Closet
With winter items out, the closet feels half-empty. Reorganize for summer:
- Hang dresses, shirts, and lightweight pants together
- Move shorts and t-shirts to the most accessible drawer
- Group active wear separately
- Pull out any "in between" items (light sweaters for cool mornings)
A few slim velvet hangers can replace bulky plastic hangers and gain noticeable closet space.
Step 8: Identify Gaps Before Summer Heat Hits
Now that you can see your full summer wardrobe, note what you actually need to add — not want, need:
- Replacement basics (white t-shirts, athletic shorts)
- Items that wore out last summer
- Anything you donated and want to replace
Buy in late spring sales rather than peak summer prices.
Common Mistakes
- Storing dirty clothes. Body oils set permanently and attract moths.
- Storing in plastic dry-cleaning bags. Trap moisture and turn clothes yellow.
- Storing in damp basements. Mildew. Use a dehumidifier or store elsewhere.
- Keeping unworn winter clothes "just in case." Donate. The closet is more valuable than the unworn item.
Frequently Asked Questions
How often should I do a wardrobe swap?
Twice a year — early spring (now) and early fall. The whole project should take 60 to 90 minutes once you have a system.
Are vacuum bags safe for delicate fabrics?
Avoid for cashmere, silk, leather, and anything with structure (suit jackets). Use breathable storage bags or clear bins for those.
How do I prevent moths in storage?
Wash before storing, add cedar blocks or lavender sachets, use sealed bins or vacuum bags. Real cedar (not cedar oil) deters moths for 6 to 12 months — refresh annually with a cedar block sander to renew the scent.
What about kids' clothes that may not fit next year?
Same approach but more aggressive donating. Kids grow fast — clothes that don't fit are clutter. Pass to a younger relative or donate.
Final Thoughts
The seasonal swap is the highest-leverage closet project. 90 minutes, twice a year, and your daily wardrobe stays clean and relevant year-round. Skip it for one year and the closet becomes a museum of off-season clutter.
Get weekly home tips that actually work
Join thousands of homeowners getting practical cleaning hacks, DIY fixes, and money-saving tips every week. Free, and you can unsubscribe anytime.

Written by
Priya PatelKitchen & Lifestyle Writer
Priya Patel is a former restaurant pastry chef turned home-cooking obsessive. She writes about meal prep, kitchen organization, and the small appliances actually worth your counter space. Priya tests recipes and gadgets out of a tiny Brooklyn galley kitchen, so she has strong opinions about what earns its footprint.
Recommended Products
Looking for specific product recommendations? Check out our tested picks.
Best Garage Shelving Systems (2026 Tested)
Wire shelving, freestanding steel, wall-mounted, and overhead — we tested the garage shelving systems that hold real weight without sagging.
5 Best Closet Organizer Systems Under $100 (2026)
Transform your cluttered closet without spending a fortune. We compared the top closet organizer systems under $100 — here are the 5 best for different closet sizes and needs.
Best Storage Bins and Organizers for Every Room (2026)
The best storage bins, baskets, and organizers for closets, pantries, bathrooms, and garages. Practical picks at every price point to get your home organized.
Related Articles

The Complete Home Organization System: A Room-by-Room Master Plan
A room-by-room home organization master plan with a proven system, product picks, and a realistic schedule to organize your entire house without burning out.
Hurricane Season Prep: June 1 Home Readiness Checklist for Coastal Areas
A June 1 hurricane readiness checklist for coastal homes: build your emergency kit, harden the property, and stockpile supplies before the season peaks in fall.

Graduation Gift: Tech Essentials for College Success
The 2026 graduation tech gift list that balances budget and function: laptop, noise-canceling earbuds, power bank, and the upgrades worth your money.

Summer Bedroom Comfort: Cooling Bedding & Sleep Setup Guide
A sleep coach's guide to staying cool in hot weather: breathable bedding, pillow placement, and temperature hacks for better rest from May through August.