How to Fix a Dripping Showerhead (5-Minute Fix)
This article may contain affiliate links. If you make a purchase through these links, we may earn a small commission at no extra cost to you. Learn more
Quick Answer
How to Fix a Dripping Showerhead (5-Minute Fix)
To fix a dripping showerhead, unscrew it from the shower arm, wrap 5-6 layers of fresh Teflon tape clockwise around the threads, and screw it back on hand-tight plus a quarter turn with an adjustable wrench. If the drip continues, replace the rubber washer inside the showerhead connector or soak the head in white vinegar for 2 hours to dissolve mineral buildup.
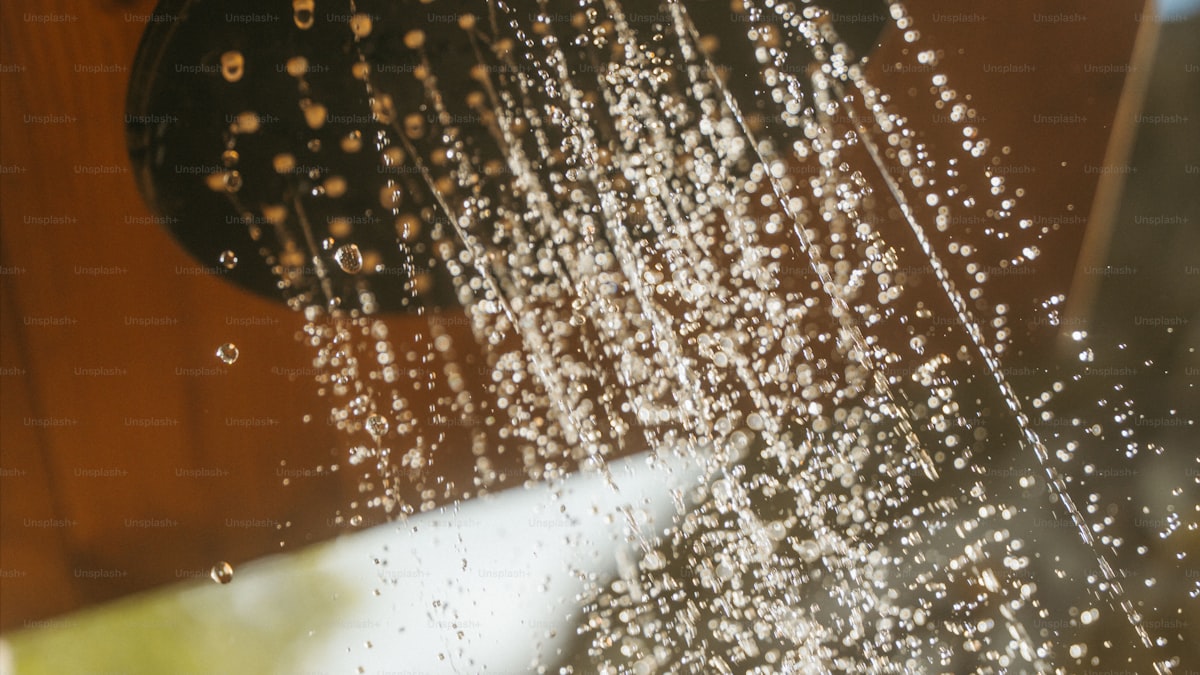
A dripping showerhead is one of those small household problems that's easy to shrug off---until you realize it's been running around the clock for weeks. Even a slow drip of one drop per second wastes over 3,000 gallons of water per year, adding an unnecessary $35 or more to your annual water bill. Multiply that across a couple of bathrooms and you're looking at real money down the drain.
The good news? Most dripping showerheads can be fixed in about five minutes with no plumbing experience and a single trip to the hardware store---if you even need one. In many cases, a roll of Teflon tape you already have in a junk drawer is all it takes.
In this guide, I'll walk you through the four most common causes of a dripping showerhead, show you how to fix each one step by step, and help you decide whether your showerhead needs a repair or a full replacement. If you've already tackled other plumbing projects like fixing a leaky faucet, this one is even easier.
Why Is My Showerhead Dripping?
Before you grab a wrench, it helps to understand what's actually causing the drip. A showerhead that leaks after you've turned off the water usually points to one of four problems. Identifying the right cause will save you time and make sure the fix sticks.
Loose Connection at the Shower Arm
The most common reason a showerhead drips is a loose or poorly sealed connection where the showerhead threads onto the shower arm (the pipe that comes out of the wall). Over time, vibration, thermal expansion, and simple use can loosen this joint. Without a tight seal, water seeps past the threads and drips out even when the valve is off.
Worn-Out Rubber Washer
Inside the connector nut of most showerheads, there's a small rubber washer (also called a gasket) that creates a watertight seal between the showerhead and the shower arm. After years of exposure to hot water and mineral deposits, this washer hardens, cracks, or compresses flat---and water finds its way through.
Mineral Buildup Blocking the Holes
If you live in an area with hard water, calcium and lime deposits can clog the nozzle holes in your showerhead. When enough holes are blocked, water pressure forces residual water backward through the connection point, resulting in a slow drip. You'll usually notice uneven spray patterns alongside the dripping.
Faulty Shower Cartridge Valve
If your showerhead drips steadily rather than the occasional drop, and re-tightening the connection doesn't help, the problem may not be the showerhead at all. A worn cartridge valve or stem inside the wall---the part that actually turns water on and off---can fail to fully shut off water flow. This is a deeper repair that may require a plumber, but it's worth ruling out the simpler causes first.
What Tools and Materials Do You Need?
One of the best things about this repair is how little you need. Chances are you already have most of these items at home.
Tools:
- Adjustable wrench or slip-joint pliers
- Old towel or rag (to protect the finish)
- Old toothbrush (for scrubbing)
- Small bowl or plastic bag
Materials:
- Plumber's tape (Teflon tape) --- costs about $1 at any hardware store
- Replacement showerhead washers --- sold in multi-packs for a few dollars
- White distilled vinegar (for dissolving mineral buildup)
If your showerhead is old, corroded, or you've been wanting an upgrade, you might skip the repair entirely and install a new water-saving showerhead. A modern low-flow model can cut shower water usage by 40 percent or more, which pairs nicely with other strategies in our guide on how to lower your water bill.
How to Fix a Dripping Showerhead with Teflon Tape
This is the fastest, most common fix. If your showerhead drips from the connection point where it meets the shower arm, worn or missing thread sealant tape is almost always the culprit. Here's exactly how to fix it.
Step 1: Turn Off the Water
You don't need to shut off your main water supply for this repair. Simply make sure the shower valve is turned completely off. As long as no water is flowing through the pipes, you're good to go.
Step 2: Remove the Showerhead
Wrap the connector nut (the wide part where the showerhead threads onto the arm) with a rag or cloth to protect the finish. Grip it with an adjustable wrench and turn counterclockwise. Most showerheads will loosen easily. If it's stuck, try applying a few drops of penetrating oil and wait 10 minutes before trying again.
Once loose, unscrew the rest by hand. Set the showerhead aside.
Step 3: Clean the Threads
Look at the shower arm threads (the pipe coming out of the wall). You'll likely see old, shredded Teflon tape clinging to the threads. Peel off all the old tape and wipe the threads clean with a rag. Remove any mineral residue with an old toothbrush.
Step 4: Apply Fresh Teflon Tape
Hold the end of the Teflon tape against the threads and wrap it clockwise (when viewed from the end of the pipe). This direction is critical---if you wrap counterclockwise, the tape will unravel as you screw the showerhead back on.
Wrap 5 to 6 layers around the threads, keeping the tape tight and flat with no wrinkles. The tape should cover all the exposed threads but not extend past the end of the pipe.
Step 5: Reattach the Showerhead
Thread the showerhead back onto the arm by hand, turning clockwise until snug. Then give it an additional quarter turn with the wrench (with the rag still protecting the finish). Don't overtighten---you can crack the connector nut or strip the threads.
Step 6: Test for Leaks
Turn on the shower and let it run for a minute. Check the connection point for any drips. Turn the shower off and watch for another minute. If the connection is dry, you're done. The entire fix should take less than five minutes.
How to Replace a Showerhead Washer
If re-taping the threads didn't stop the drip, the rubber washer inside the showerhead connector is likely the problem. Here's how to replace it.
- Remove the showerhead from the shower arm following the same steps above.
- Look inside the connector nut. You'll see a flat rubber washer (gasket) sitting inside the opening. It may be black, white, or blue.
- Pry out the old washer with a flathead screwdriver or your fingernail. If it crumbles or comes out in pieces, that confirms it was the source of the leak.
- Insert a new washer of the same size. Showerhead washer assortment packs are available at any hardware store and include multiple sizes for a couple of dollars.
- Re-tape the threads with fresh Teflon tape (always a good idea while you have the head off).
- Reattach the showerhead hand-tight plus a quarter turn with the wrench.
- Test the connection by running the shower and then turning it off.
This fix takes about 10 minutes and costs virtually nothing. It's the same principle behind fixing a leaky faucet---a worn rubber seal is almost always the root cause.
How to Remove Mineral Buildup from a Showerhead
If your showerhead sprays unevenly, shoots water at odd angles, or drips because clogged nozzles are forcing water backward through the connection, mineral buildup is the problem. A simple vinegar soak will dissolve calcium and lime deposits without any scrubbing.
The Vinegar Soak Method
- Remove the showerhead from the shower arm.
- Fill a bowl or bucket with enough white distilled vinegar to fully submerge the showerhead.
- Soak for 2 to 4 hours. For heavy buildup, soak overnight. The acetic acid in vinegar dissolves calcium, lime, and other mineral deposits.
- Scrub the nozzle holes with an old toothbrush after soaking. For stubborn deposits, use a toothpick or safety pin to clear individual holes.
- Rinse thoroughly with clean water.
- Re-tape and reattach the showerhead to the shower arm.
The Bag Method (No Removal Needed)
If you'd rather not remove the showerhead, fill a plastic bag with vinegar and secure it around the showerhead with a rubber band or twist tie so the head is submerged. Leave it overnight and remove the bag in the morning. Run the shower for a minute to flush out loosened deposits.
This cleaning method also improves water pressure and spray quality, which makes your showers feel noticeably better. It's a great maintenance habit to adopt every six months, especially in hard water areas. Mineral buildup causes similar problems in other fixtures and appliances---it's the same issue I address in our guide on how to unclog a drain without chemicals.
When Should You Replace vs. Repair a Showerhead?
Not every dripping showerhead is worth saving. Sometimes replacement is the faster, smarter, and more cost-effective option. Here's how to decide.
Repair your showerhead if:
- The drip started recently and the showerhead is less than 5 years old
- The connection just needs re-taping or a new washer
- Mineral buildup is the main issue and a vinegar soak restores performance
- The showerhead model is in good physical condition with no cracks or corrosion
Replace your showerhead if:
- The showerhead is visibly corroded, cracked, or pitted
- It's an older model without a WaterSense label (pre-2010 showerheads can use 5+ gallons per minute versus 2 gallons or less for modern models)
- You've repaired it multiple times and the drip keeps coming back
- The internal threads are stripped or cross-threaded
A quality replacement showerhead costs $20 to $60, and swapping one takes the same five minutes as the Teflon tape fix. If you're trying to reduce water and energy usage across your home, upgrading to a low-flow model is one of the simplest changes you can make. Combined with other fixes like caulking your bathtub to prevent water damage, these small bathroom improvements add up to meaningful savings.
What About a Faulty Shower Cartridge Valve?
If you've re-taped the threads, replaced the washer, and cleaned out mineral buildup---but the showerhead still drips steadily---the problem is likely behind the wall. A worn cartridge valve or compression stem inside the shower valve body can fail to fully stop water flow.
Signs that the valve is the issue include a drip that starts immediately after you turn off the water (rather than a slow residual drip), difficulty turning the shower fully off, or a handle that feels loose or spins freely.
Replacing a shower cartridge valve is a more involved repair. It requires shutting off the main water supply, removing the handle and trim plate, and extracting the cartridge from inside the wall. While it's doable for experienced DIYers, many homeowners prefer to call a plumber for this one. Expect to pay $150 to $300 for a professional cartridge replacement.
If you're comfortable with intermediate plumbing work and have already handled projects like fixing a running toilet, a cartridge replacement is within reach. Otherwise, there's no shame in bringing in a professional for in-wall plumbing work.
How Much Water Does a Dripping Showerhead Waste?
Understanding the financial impact helps motivate a quick fix. Here's what that drip is costing you:
- 1 drip per second: 3,000+ gallons per year (~$35 in water costs)
- 5 drips per second: 15,000+ gallons per year (~$175 in water costs)
- Steady trickle: 20,000+ gallons per year (~$250+ in water costs)
That's water being heated and wasted, which means it's also adding to your energy bill. A dripping hot water showerhead is essentially paying to heat water that goes straight down the drain unused. Fixing the drip is one of the most effective strategies you can combine with other approaches to lower your water bill.
Frequently Asked Questions
Can a dripping showerhead increase my water bill?
Yes, and by more than most people expect. A showerhead dripping at one drop per second wastes over 3,000 gallons of water per year, which translates to roughly $35 in added water costs. A faster drip or steady trickle can waste 15,000 to 20,000 gallons annually, potentially adding $175 to $250 or more to your bill. If you have multiple dripping fixtures, the cumulative impact is even greater. Fixing the drip is one of the easiest ways to reduce your water bill immediately.
Do I need to turn off the main water supply to fix a dripping showerhead?
No, not for the most common fixes. Since you're working on the showerhead connection (downstream of the shower valve), you just need to make sure the shower valve is fully turned off. The valve stops water flow to the showerhead, so you can safely remove and reattach the head without shutting off supply lines. The only exception is if you're replacing the shower cartridge valve itself, which does require shutting off the main water supply or the bathroom shut-off valves.
How often should I replace the Teflon tape on my showerhead?
Under normal conditions, a properly applied layer of Teflon tape lasts 5 to 10 years. You don't need to re-tape on a schedule. Instead, replace the tape whenever you remove the showerhead for cleaning or maintenance, or when you notice dripping at the connection point. Using 5 to 6 layers of tape wrapped tightly in the clockwise direction ensures a long-lasting seal.
Why does my showerhead drip for a few minutes after I turn off the water?
A brief drip lasting 1 to 2 minutes after turning off the shower is normal and not a sign of a problem. Water trapped inside the showerhead and shower arm drains out by gravity. This is especially common with rain-style showerheads that have large internal reservoirs. However, if the dripping continues beyond a few minutes or persists for hours, that indicates a worn washer, loose connection, or faulty valve that needs repair.
Can I use pipe joint compound instead of Teflon tape?
Yes, pipe joint compound (also called pipe dope) works as an alternative to Teflon tape for sealing showerhead threads. Some plumbers actually prefer it because it's less prone to user error---you simply brush it onto the threads and screw the fitting together. However, Teflon tape is cleaner, easier for beginners, widely available, and creates an excellent seal when applied correctly. For most homeowners tackling a showerhead fix, Teflon tape is the better choice.
Wrapping Up: Five Minutes to a Drip-Free Shower
A dripping showerhead is one of the fastest and most satisfying DIY fixes you can tackle around the house. In most cases, a $1 roll of Teflon tape and five minutes of your time is all it takes to stop the drip, save thousands of gallons of water per year, and knock a few dollars off every water bill.
Start with the Teflon tape fix. If that doesn't solve it, check the washer. If the spray pattern is uneven, try a vinegar soak. These three simple approaches resolve the vast majority of dripping showerheads without spending more than a few dollars.
And once you've conquered this fix, keep the momentum going. Tackling small repairs like this---along with projects like caulking your bathtub and unclogging drains naturally---keeps your home in great shape and your maintenance costs low. Every drip you stop is money that stays in your pocket instead of going down the drain.
Get weekly home tips that actually work
Join thousands of homeowners getting practical cleaning hacks, DIY fixes, and money-saving tips every week. Free, and you can unsubscribe anytime.

Written by
Beth SullivanFounder & Editor-in-Chief
Beth Sullivan is the founder of Practical Home Guides. With over a decade of hands-on experience tackling every home challenge imaginable, she started this site to share the practical, no-nonsense solutions she wishes she had found years ago. When she's not testing cleaning hacks or organizing pantries, you'll find her in the garden or working on her next DIY project.
Recommended Products
Looking for specific product recommendations? Check out our tested picks.

Best Cordless String Trimmers (2026 Tested)
Battery-powered string trimmers have caught up to gas. We tested the top models on bermuda, fescue, and overgrown areas to find the picks worth your money.

Best Basement Dehumidifiers (2026 Buyer's Guide)
Damp basements destroy stored items, grow mold, and stink. We tested dehumidifiers for capacity, durability, and energy use to find the picks worth the money.

Best Wet/Dry Shop Vacs (2026 Tested)
Whether you need to clean a flooded basement, dust the garage, or pick up workshop debris, here are the wet/dry shop vacs worth the money.

Best Electric Leaf Blowers (2026 Buyer's Guide)
Cordless and corded electric leaf blowers tested for power, runtime, and noise. Our picks for small yards, large yards, and pro-grade home use.

Best Cordless Lawn Mowers (2026 Spring Buyer's Guide)
Battery-powered mowers have caught up to gas. We tested the top cordless mowers on grass length, slopes, and runtime to find the picks worth your money.

5 Best Cordless Drills for Homeowners (2026)
Find the right cordless drill for home projects without overspending. We compared the top drills for DIYers — here are the 5 best for everyday home use.

Best Home Tool Kits for Beginners (2026)
The best home tool kits for new homeowners and renters. We compare 6 tool sets from basic to comprehensive, so you can handle common repairs without calling a handyman.
Related Articles

How to Paint a Front Door (Pro-Quality Result in One Afternoon)
A fresh-painted front door is the highest-impact curb appeal upgrade. Here's the step-by-step that gets a smooth pro finish in 4 hours — no peeling, no brush marks.
How to Prevent Summer AC Breakdowns (April Tune-Up Checklist)
Most AC failures happen in the first 90F week. A 30-minute April tune-up prevents 80 percent of those breakdowns and extends the unit's life by years.
Best Cordless String Trimmers (2026 Tested)
Battery-powered string trimmers have caught up to gas. We tested the top models on bermuda, fescue, and overgrown areas to find the picks worth your money.
How to Fix Sticky Kitchen Cabinet Doors (Without Replacing Hardware)
Cabinet doors that bind, rub, or won't close all the way are almost always a hinge adjustment problem. Here's the 10-minute fix.