How to Fix a Loose Door Handle or Knob in 10 Minutes
This article may contain affiliate links. If you make a purchase through these links, we may earn a small commission at no extra cost to you. Learn more
Quick Answer
How to Fix a Loose Door Handle or Knob in 10 Minutes
Most loose door handles are fixed by tightening the screws on the mounting plate. Look for visible screws on the rose plate (the round plate against the door). If there are no visible screws, find the small slot or pinhole on the handle neck, press it with a flathead screwdriver or pin to release the handle, then tighten the screws underneath. The whole fix takes under 10 minutes with just a Phillips screwdriver.

A loose door handle is one of those small household annoyances that nags at you every single day. You grab the handle, it wobbles or spins, and you have to fiddle with it just to get the door open. It feels broken, but in almost every case, the fix is absurdly simple. We are talking about tightening a couple of screws -- a repair that takes less than 10 minutes and requires nothing more than a screwdriver you probably already own.
The problem is that most people don't know where the screws are. Modern door handles are designed to hide their mounting hardware for a clean look, which means the fix isn't always obvious at first glance. That is exactly what this guide is for. We will walk you through how to identify your handle type, locate the screws (visible or hidden), tighten everything back up, and handle the occasional curveball like a stripped screw hole. By the end, you will have a rock-solid door handle and the confidence to fix every other wobbly knob in your house.
Why Door Handles Come Loose
Understanding why your handle loosened in the first place helps you prevent it from happening again. There are three main culprits.
Normal wear and tear. Every time you grab a door handle and twist or push, you are applying rotational force to the mounting hardware. Over months and years, this repeated torque gradually loosens the screws that hold everything together. High-traffic doors like bathrooms, bedrooms, and front entries loosen fastest because they get used dozens of times a day.
Vibration and settling. Doors get slammed, houses settle, and seasonal temperature swings cause wood to expand and contract. All of this micro-movement works screws loose over time, the same way a picture frame slowly tilts on the wall after a few months.
Stripped screw holes. If the screws have been removed and reinstalled a few times -- or if someone overtightened them in the past -- the screw holes in the wood can become stripped. The wood fibers get chewed up and the screws no longer have solid material to grip. This is the one scenario where simply tightening the screws won't work on its own, but we have a reliable fix for that too (more on that below).
The good news is that a loose handle almost never means the handle itself is broken. Nine times out of ten, the hardware is perfectly fine and just needs to be snugged back into position.
Identify Your Handle Type
Before you start, take a quick look at what kind of door handle you are dealing with. The repair approach is the same for all of them, but knowing your type helps you locate the screws faster.
Lever handles are the long, horizontal handles you push down to open. These are extremely common on interior doors in homes built or renovated in the last 20 years. They tend to loosen more than round knobs because the lever creates more rotational force on the mounting plate.
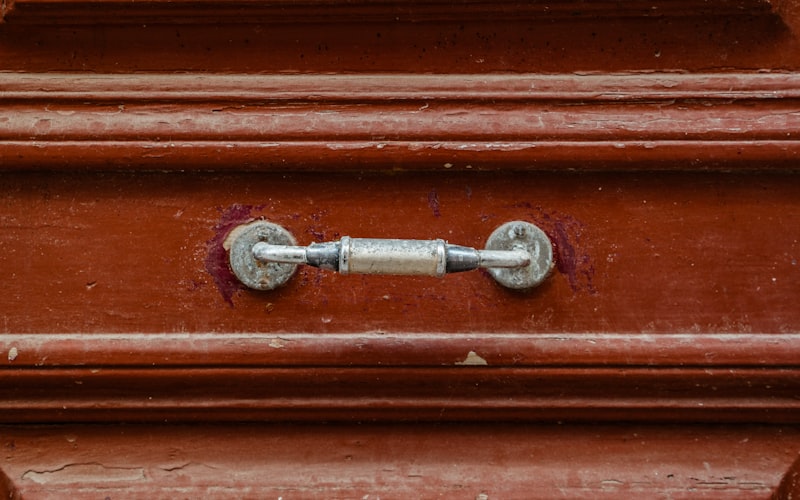
Round knobs are the classic spherical or egg-shaped handles you grip and turn. These are still found on millions of interior doors and are the standard in many older homes. They typically loosen where the knob meets the rose plate (the decorative plate that sits flat against the door surface).
Privacy and passage sets refer to function, not shape. Privacy sets have a lock button (used on bedrooms and bathrooms) and passage sets have no lock (used on hallways and closets). Both can come with either lever or knob styles. The repair is the same regardless of function.
Deadbolts are the heavy-duty locks on exterior doors. These can loosen over time too, and the fix follows the same general principle -- tightening the mounting screws that hold the two halves of the lock assembly together through the door.
Tools You Will Need
This is one of the most tool-light repairs in all of home maintenance. For most loose door handles, you need exactly one tool: a Phillips screwdriver. That is it.
For handles with hidden screws, you may also need a small flathead screwdriver, a pin, or a thin Allen wrench to press the release mechanism. A flashlight can help you spot the small slot or pinhole on the handle neck.
If you are dealing with stripped screw holes, grab some wooden toothpicks and wood glue (or a door handle tightening kit that includes everything you need). We will cover that repair in its own section below.
Fixing Handles With Visible Screws
This is the easiest scenario and the one you will encounter most often on older or builder-grade hardware. If you can see screw heads on the rose plate (the round or square plate that sits against the door surface), you are in luck.
Step 1: Tighten the Rose Plate Screws
Look at the rose plate on one side of the door. You should see two screws, usually positioned at the top and bottom of the plate (or at the 3 o'clock and 9 o'clock positions). These screws pass through the door and thread into the rose plate on the opposite side, clamping the entire assembly together.
Using your Phillips screwdriver, tighten both screws until snug. Do not overtighten -- you want them firm, not cranked down with all your strength. Overtightening can strip the screw holes or crack a plastic rose plate. A quarter turn past snug is plenty.
Step 2: Check the Other Side
Flip to the other side of the door and check those screws too. Sometimes only one side has visible screws, and the other side's plate is held in place by the tension of the through-bolts. Either way, make sure everything feels solid.
Step 3: Test the Handle
Grab the handle and give it a firm wiggle. It should feel tight against the door with no play or wobble. Open and close the door a few times to make sure the latch operates smoothly. You are done.
That is genuinely the entire repair for visible-screw handles. If that solved your problem, take a victory lap around the house and tighten every other loose knob while you are at it.

Fixing Handles With Hidden Screws
Most modern door handles hide the mounting screws behind the handle or under a decorative cover for a cleaner appearance. This makes the handle look sleek, but it also makes the repair slightly less obvious. The key is finding the release mechanism.
Step 1: Find the Slot or Pinhole
Look at the neck of the handle -- the narrow part between the handle itself and the rose plate. You are looking for one of two things:
- A small slot (a thin rectangular opening) on the underside or side of the neck
- A tiny pinhole (a round hole about the size of a paperclip tip)
Some handles have a small button or tab instead. If you can't find anything, look closely at the seam where the rose plate meets the door surface. Some plates have a small notch along the edge that lets you pry the plate off.
Step 2: Release the Handle
If you found a slot, insert a small flathead screwdriver and press inward while pulling the handle away from the door. The handle should slide off the spindle.
If you found a pinhole, insert a pin, paperclip, or small Allen wrench into the hole and press. While pressing, pull the handle straight off. Some handles require you to press and twist simultaneously.
Step 3: Remove the Rose Plate Cover
With the handle removed, you should see the rose plate still against the door. Many decorative rose plates are a two-piece design: a thin cover plate that snaps or screws over a mounting plate underneath. Look for a small slot around the edge of the cover plate. Insert a flathead screwdriver and gently pry it off, or twist it counterclockwise if it threads on.
Underneath, you will find the mounting screws -- the same two screws you would see on a visible-screw setup.
Step 4: Tighten and Reassemble
Tighten the mounting screws with your Phillips screwdriver until snug. Replace the decorative cover plate (snap it back on or thread it clockwise), slide the handle back onto the spindle until it clicks into place, and test the handle for wobble.
The whole process takes about five minutes once you know where to look. The first time might take a couple of extra minutes as you figure out the release mechanism, but after that, you will be able to do it with your eyes closed.
Fixing Stripped Screw Holes (The Toothpick Trick)
If you tighten the screws and they just spin without getting tight, the screw holes in the door are stripped. The wood fibers have been chewed up and the screws have nothing left to grip. This is a common problem on doors that have had their hardware removed and reinstalled, or on softer wood doors that have seen years of use.
The fix is a classic carpenter's trick that works beautifully every time.
Step 1: Remove the Screws and Handle Assembly
Take the screws all the way out and remove the handle hardware from the door so you can access the bare screw holes.
Step 2: Fill the Holes With Toothpicks
Dip two or three wooden toothpicks in wood glue and push them into the stripped screw hole. Pack them in snugly -- you want to fill the hole as completely as possible. If toothpicks are too small for the hole, use a wooden golf tee or small wooden dowel instead. Break or cut the toothpicks flush with the door surface.
Step 3: Let the Glue Dry
Wait at least 30 minutes for the wood glue to set. An hour is better if you have the patience. The glue bonds the toothpicks to the surrounding wood, creating a solid plug of new material.
Step 4: Reinstall the Screws
Drive the screws back into the filled holes. The screws will cut new threads into the fresh wood, gripping tightly as if the holes were brand new. Reinstall the rest of the handle hardware and test for wobble.
This trick works on the exact same principle as patching a hole in drywall -- you are restoring the substrate so the fastener has solid material to bite into. It is permanent and reliable, and you can repeat it if the holes ever strip out again in the future. For a more heavy-duty repair, you can use wood filler or epoxy putty instead of toothpicks, but the toothpick method is faster and works perfectly for door handle screws.
Tightening a Loose Deadbolt
Deadbolts loosen for the same reasons as door handles -- repeated use and vibration work the mounting screws loose over time. The fix is straightforward but worth covering on its own because the hardware is slightly different.
A deadbolt has two main components: the exterior cylinder (the part with the keyhole) and the interior thumbturn. These two halves are held together by long screws that pass through the door, just like a door handle assembly.
To tighten a loose deadbolt, remove the interior thumbturn plate (it usually has two visible screws or a hidden-screw design similar to what we described above). Tighten the two long mounting screws that connect the interior and exterior halves. While you are at it, check the screws on the strike plate (the metal plate on the door frame where the bolt slides in) and tighten those as well. A loose strike plate can make the deadbolt feel wobbly even when the lock itself is tight.
If your exterior door handle has been giving you trouble alongside the deadbolt, this is a good time to address both. And if the door itself is stiff or creaky while you are working on it, our guide on how to fix a squeaky door covers that repair in detail.

When to Replace Instead of Repair
In most cases, tightening the screws completely solves a loose door handle. But there are a few situations where replacement makes more sense than repair.
The spindle is worn or broken. The spindle is the square metal bar that runs through the door and connects the two handles. If the spindle is rounded off, bent, or cracked, the handle will feel loose no matter how tight the mounting screws are. Spindles are sometimes sold separately, but often it is easier and cheaper to replace the entire handle set.
The handle mechanism is damaged. If the spring inside the handle no longer returns it to the horizontal position (for levers) or if the latch does not retract when you turn the knob, internal components are worn out. This is a replacement situation.
The rose plate is cracked or warped. Plastic rose plates can crack from overtightening or impact. Metal plates can bend. Either way, a damaged plate won't sit flush against the door, causing persistent wobble.
You want an upgrade. If your handles are builder-grade brass from 1998 and you have been meaning to update the look of your doors, a loose handle is a perfectly good excuse to swap in something new. A quality replacement door handle for an interior door runs between $15 and $40, and installation takes about 15 minutes per door since you are reusing the existing holes.
Frequently Asked Questions
Why does my door handle keep coming loose after I tighten it?
If your handle loosens again within a few weeks of tightening, there are two likely explanations. First, the screw holes may be partially stripped, meaning the screws feel tight initially but slowly work loose because they don't have solid wood to grip. Try the toothpick trick described above to give the screws fresh material. Second, the door may be getting heavy use or frequent slamming, which accelerates loosening. In that case, consider applying a small drop of threadlocker (the blue, removable kind) to the screw threads before reinstalling them. This adhesive prevents screws from vibrating loose while still allowing removal with a screwdriver when needed.
Can I fix a loose door handle without removing it from the door?
It depends on the handle type. If your handle has visible screws on the rose plate, you can tighten them without removing anything -- just grab your screwdriver and snug them up. That is a 60-second fix. However, if your handle uses hidden screws, you will need to remove at least the handle and the decorative cover plate to access the mounting screws. There is no way around it, but the process is still quick and requires no special skills.
My door handle turns but the latch does not move. Is that the same problem?
Not quite. A handle that turns without retracting the latch usually means the spindle (the square bar connecting the two handles through the door) has come disconnected or is worn down. This is different from a loose handle, which wobbles but still operates the latch. Try removing one handle and checking whether the spindle is properly seated in the latch mechanism. If the spindle is rounded off or too short, you will need a replacement spindle or a new handle set. This is also a good time to make sure the latch plate is not misaligned with the strike plate on the frame -- if you have noticed the door not latching properly, that is a separate alignment issue worth addressing.
Do I need to fix both sides of the door or just the loose side?
Always fix both sides. The two handles share the same mounting screws -- the long bolts that pass through the door connect the rose plates on both sides. Even if only one side feels loose, the screws holding both sides are the same screws. Tightening them firms up the entire assembly. While you have the screwdriver in hand, give the strike plate screws a turn as well, and check that the latch moves freely. Addressing everything at once means you won't be back at this door again anytime soon.
Keep the Momentum Going
Fixing a loose door handle is one of the most satisfying small repairs you can do around the house. It takes almost no time, costs nothing, and delivers an immediate result you feel every time you use the door. That solid, wobble-free grip is a reminder that most household problems are a lot simpler than they seem.
While you have your screwdriver out, walk through your house and test every door handle, knob, and deadbolt. Tighten anything that wobbles. Check the strike plates. The whole-house sweep takes about 20 minutes, and you will be surprised how many handles have gradually loosened without you noticing.
If you are on a roll with quick home fixes, there is plenty more you can tackle this weekend. A squeaky door takes five minutes with a can of lubricant. A stuck window usually just needs its track cleaned. And a small drywall patch is a 30-minute project that makes a room look dramatically better. Each of these builds your confidence and saves real money compared to calling in a professional for every little issue. Your home -- and your doors -- will feel noticeably more solid for the effort.
Get weekly home tips that actually work
Join thousands of homeowners getting practical cleaning hacks, DIY fixes, and money-saving tips every week. Free, and you can unsubscribe anytime.

Written by
Beth SullivanFounder & Editor-in-Chief
Beth Sullivan is the founder of Practical Home Guides. With over a decade of hands-on experience tackling every home challenge imaginable, she started this site to share the practical, no-nonsense solutions she wishes she had found years ago. When she's not testing cleaning hacks or organizing pantries, you'll find her in the garden or working on her next DIY project.
Recommended Products
Looking for specific product recommendations? Check out our tested picks.

Best Cordless String Trimmers (2026 Tested)
Battery-powered string trimmers have caught up to gas. We tested the top models on bermuda, fescue, and overgrown areas to find the picks worth your money.

Best Basement Dehumidifiers (2026 Buyer's Guide)
Damp basements destroy stored items, grow mold, and stink. We tested dehumidifiers for capacity, durability, and energy use to find the picks worth the money.

Best Wet/Dry Shop Vacs (2026 Tested)
Whether you need to clean a flooded basement, dust the garage, or pick up workshop debris, here are the wet/dry shop vacs worth the money.

Best Electric Leaf Blowers (2026 Buyer's Guide)
Cordless and corded electric leaf blowers tested for power, runtime, and noise. Our picks for small yards, large yards, and pro-grade home use.

Best Cordless Lawn Mowers (2026 Spring Buyer's Guide)
Battery-powered mowers have caught up to gas. We tested the top cordless mowers on grass length, slopes, and runtime to find the picks worth your money.

5 Best Cordless Drills for Homeowners (2026)
Find the right cordless drill for home projects without overspending. We compared the top drills for DIYers — here are the 5 best for everyday home use.

Best Home Tool Kits for Beginners (2026)
The best home tool kits for new homeowners and renters. We compare 6 tool sets from basic to comprehensive, so you can handle common repairs without calling a handyman.
Related Articles

How to Paint a Front Door (Pro-Quality Result in One Afternoon)
A fresh-painted front door is the highest-impact curb appeal upgrade. Here's the step-by-step that gets a smooth pro finish in 4 hours — no peeling, no brush marks.
How to Prevent Summer AC Breakdowns (April Tune-Up Checklist)
Most AC failures happen in the first 90F week. A 30-minute April tune-up prevents 80 percent of those breakdowns and extends the unit's life by years.
Best Cordless String Trimmers (2026 Tested)
Battery-powered string trimmers have caught up to gas. We tested the top models on bermuda, fescue, and overgrown areas to find the picks worth your money.
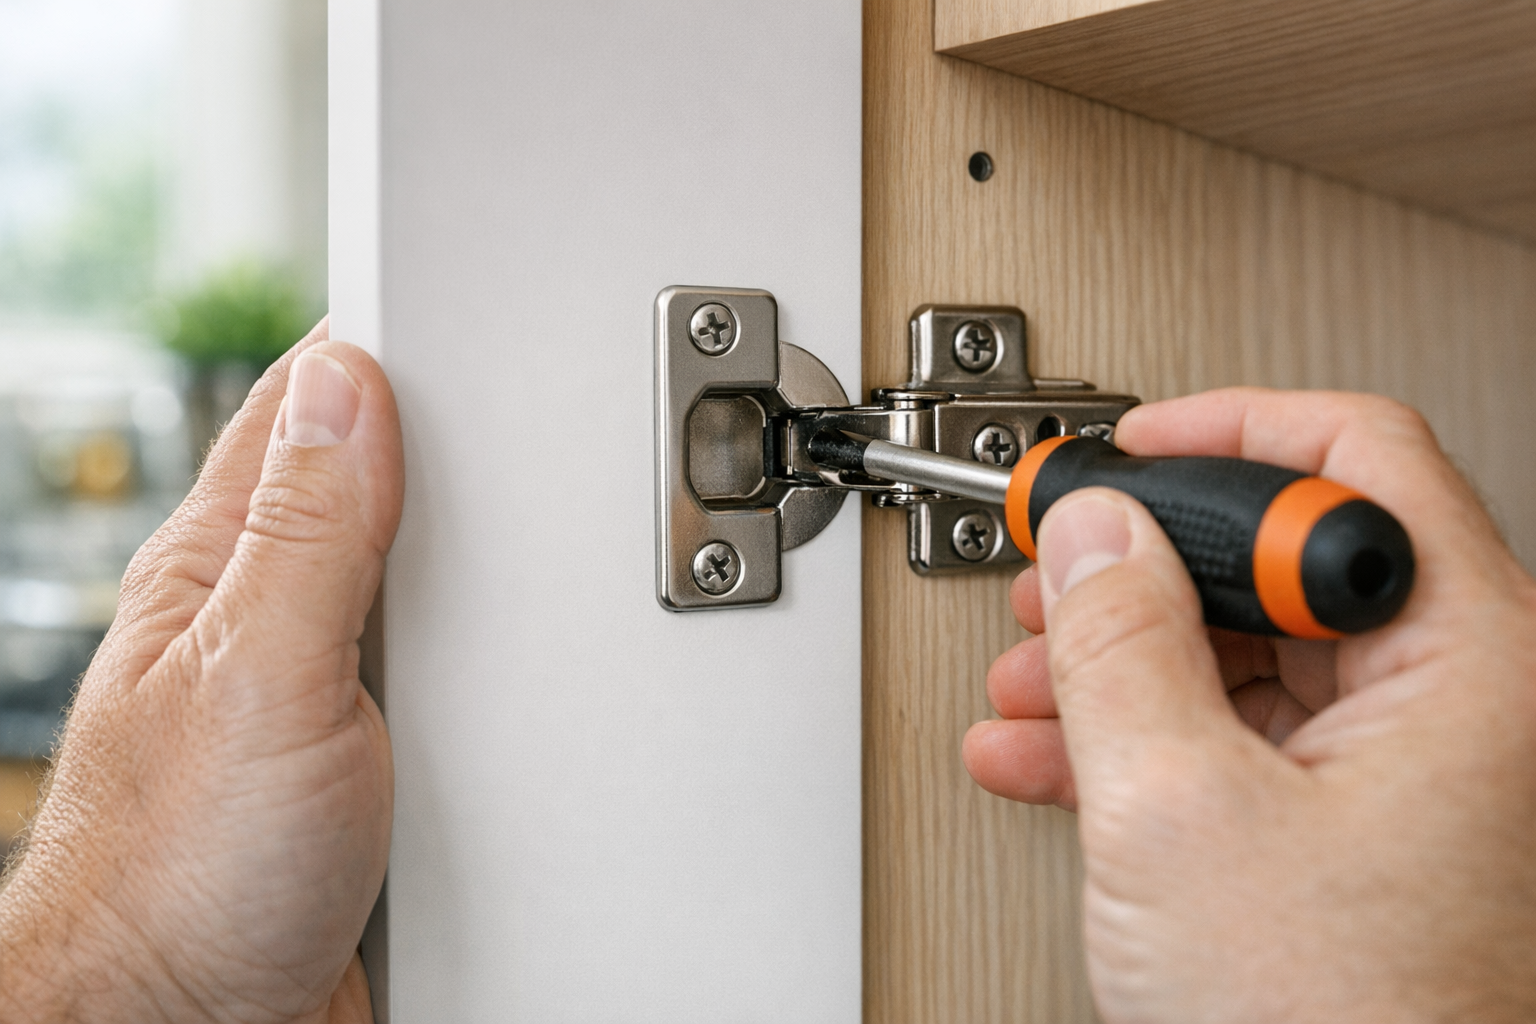
How to Fix Sticky Kitchen Cabinet Doors (Without Replacing Hardware)
Cabinet doors that bind, rub, or won't close all the way are almost always a hinge adjustment problem. Here's the 10-minute fix.