How to Fix a Slow-Draining Sink (5 Easy Methods)
This article may contain affiliate links. If you make a purchase through these links, we may earn a small commission at no extra cost to you. Learn more
Quick Answer
How to Fix a Slow-Draining Sink (5 Easy Methods)
For most slow drains, start by removing and cleaning the drain stopper — it's usually clogged with hair and soap scum. If that doesn't fix it, pour half a cup of baking soda followed by half a cup of vinegar down the drain, wait 30 minutes, then flush with boiling water. For stubborn clogs, use a drain snake (also called a zip-it tool) to pull out the blockage. A plunger also works well — fill the sink with a few inches of water, then plunge vigorously 15-20 times.
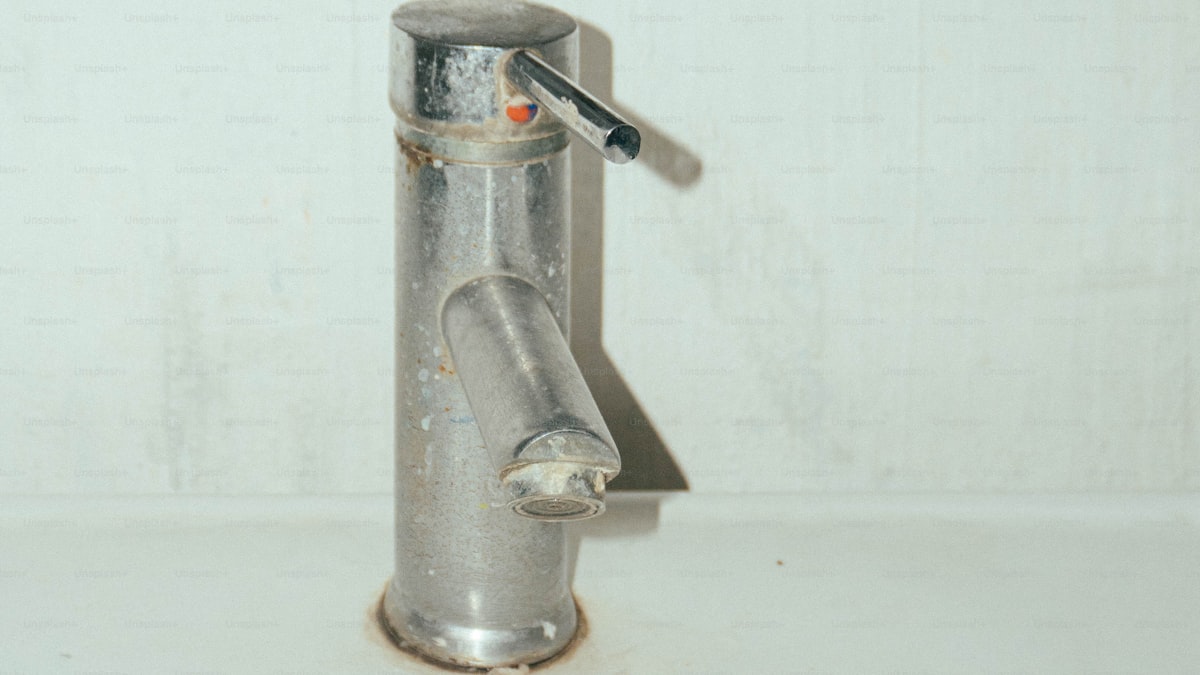
A slow-draining sink is one of those small annoyances that quietly becomes a bigger headache over time. You turn on the faucet, water pools around the basin, and you find yourself standing there waiting for it to finally disappear. It happens in kitchens and bathrooms alike, and it almost always gets worse if you ignore it.
The good news is that a slow drain is one of the easiest household problems to fix yourself. In most cases, the cause is sitting right at the surface, and you can have water flowing freely again in under 15 minutes. No plumber, no harsh chemicals, no special skills required.
In this guide, I'll walk you through five reliable methods to fix a slow-draining sink, starting with the simplest and working up from there. Chances are you already have everything you need.
Why Is My Sink Draining Slowly?
Before you grab any tools, it helps to understand what's causing the problem. Most slow drains come down to a few common culprits, and knowing the likely cause points you toward the right fix.
Hair and soap scum are the top offenders in bathroom sinks. Every time you wash your hands or brush your teeth, loose hair and soap residue slide down the drain. Over time, they form a sticky mass just below the stopper that traps more debris with every use.
Grease and food particles are the kitchen sink equivalent. Even small amounts of cooking oil, butter, or food scraps coat the inside of your pipes and gradually narrow the passage. Eventually, water struggles to push past the buildup.
Mineral deposits from hard water leave a chalky residue inside pipes that accumulates over months and years. This is a slower process, but it's a common contributor in areas with hard water.
P-trap blockage is another possibility. The P-trap is the curved section of pipe directly below your sink. It's designed to hold a small amount of water to block sewer gases, but it can also collect debris that restricts flow.
In rare cases, a slow drain can signal a venting problem or an issue deeper in your plumbing system. But the vast majority of the time, the fix is simple and close to the surface. Let's work through the solutions.
Method 1: Clean the Drain Stopper
This is where you should always start because it solves the problem roughly half the time, especially in bathroom sinks. The drain stopper or strainer sits right at the opening and catches an incredible amount of hair, soap scum, and gunk that you can't see from above.
How to Do It
Most bathroom sink stoppers lift straight out or twist counterclockwise to release. Some are connected to a pivot rod underneath the sink. If yours doesn't pull out easily, reach under the sink and find the small metal rod attached to the back of the drain pipe. Unscrew the nut holding it in place and the stopper will lift right out.
Once the stopper is out, you'll probably see exactly why your drain was slow. There's usually a slimy mass of hair, soap residue, and debris wrapped around the base. Pull it off with a paper towel or old rag, then scrub the stopper clean with an old toothbrush and warm soapy water.
While the stopper is out, shine a flashlight down the drain. If you see more buildup clinging to the inside of the drain pipe, use a pair of needle-nose pliers or a bent wire to pull out whatever you can reach.
Reinstall the stopper, run the water, and see if the problem is solved. If the drain is still sluggish, move on to Method 2.
To keep hair from causing future problems, consider installing a sink drain strainer that catches debris before it enters the pipe.
Method 2: Baking Soda and Vinegar
If cleaning the stopper didn't fully resolve the issue, this natural approach tackles buildup that's deeper in the pipe. The combination creates a fizzing reaction that breaks down organic material like soap scum, grease, and minor blockages without damaging your plumbing.
How to Do It
Start by removing any standing water from the sink so the mixture can reach the clog directly. Pour half a cup of baking soda down the drain. Use a spoon to push it down if it sits at the surface.
Follow immediately with half a cup of white vinegar. You'll hear the satisfying fizz as the reaction starts working. Cover the drain opening with a stopper, wet cloth, or small plate to force the fizzing action downward into the pipe rather than back up at you.
Let it sit for at least 30 minutes. For particularly stubborn buildup, you can leave it for several hours or even overnight.
After the waiting period, flush the drain with a full kettle of boiling water. Pour it slowly in two or three stages, giving the hot water time to push loosened debris through the pipes.
This method is safe for all pipe types and doubles as a great deodorizer. For a deeper dive on chemical-free drain cleaning techniques, check out our guide on how to unclog a drain without chemicals.
Method 3: Use a Drain Snake
When the clog is deeper than the stopper and beyond the reach of baking soda, a drain snake is your best friend. These inexpensive tools physically pull out whatever is blocking your pipe, and they work on clogs that no amount of flushing will dissolve.
The simplest option is a plastic zip-it tool, a flat, barbed strip that slides down the drain and hooks onto hair and debris as you pull it back out. For deeper clogs, a hand-crank drain auger reaches several feet into your plumbing.
How to Do It
Remove the drain stopper to create a clear opening. Insert the drain snake zip-it tool slowly down the drain. If you're using a zip-it, push it down as far as it will go, then pull it back out in one steady motion. The barbs along the edges will grab hair and gunk on the way out.
If you're using a crank-style auger, feed the cable into the drain while turning the handle clockwise. When you feel resistance, you've found the clog. Keep turning to either break through the blockage or hook onto it so you can pull it out.
Fair warning: what comes out of the drain is not pleasant to look at or smell. Have a trash bag or bucket ready, and some paper towels for cleanup.
After snaking, flush the drain with hot water for a full minute to wash away any remaining debris. Your drain should now be flowing freely. A zip-it tool costs a couple of dollars and is one of the most useful things you can keep under the sink. A crank-style auger is a worthwhile investment if you deal with slow drains more than once or twice a year.
Method 4: Plunge the Sink
A standard cup plunger is not just for toilets. It's an effective tool for sink drains that creates pressure to dislodge clogs stuck in the pipe. This method works well when the clog is solid enough that flushing alone can't clear it.
How to Do It
Start by plugging the overflow hole near the top of the sink. In bathroom sinks, this is the small opening near the rim. Stuff it with a wet rag or cover it with duct tape. If you skip this step, the air pressure will escape through the overflow instead of pushing the clog.
Fill the sink with about three inches of water. This creates the seal that makes plunging effective. The plunger needs water, not air, to generate real pressure.
Place the plunger squarely over the drain and press down firmly to create a tight seal. Pump the plunger vigorously 15 to 20 times using quick, forceful strokes. Keep the seal tight throughout.
On the last stroke, pull the plunger away sharply. If the water drains quickly, you've cleared the clog. If not, repeat the process two or three more times. Persistence usually pays off with plunging.
Once the drain is clear, run hot water for a minute to flush away any loosened material. This is also a good time to follow up with the baking soda and vinegar method for a thorough cleaning. Plunging is a quick, no-cost solution that works surprisingly well on partial blockages, especially in kitchen sinks where grease is the main culprit.
Method 5: Clean the P-Trap
If you've tried the first four methods and your sink is still draining slowly, it's time to go directly to the source. The P-trap, that U-shaped or J-shaped pipe section directly beneath your sink, is a common place for debris to collect. Cleaning it out is more involved than the other methods, but it's still a straightforward DIY job.

How to Do It
Place a bucket or large bowl directly under the P-trap to catch water and debris. There's always water sitting in the trap, and it will pour out as soon as you disconnect the pipe.
Using a plumbers wrench or channel locks, loosen the slip nuts on both ends of the P-trap by turning them counterclockwise. Many modern P-traps have hand-tightened plastic nuts that you can loosen without tools at all. Once both nuts are loose, carefully lower the P-trap section and dump its contents into the bucket.
You'll likely find a collection of hair, soap scum, grease, or other debris inside. Clean the trap thoroughly with a bottle brush or old toothbrush and warm soapy water. While the trap is off, also check the pipe stubs going into the wall and up from the sink for any visible blockage.
Reassemble the P-trap by hand-tightening the slip nuts first, then snugging them gently with your wrench. Do not overtighten, as this can crack plastic fittings or strip the threads.
Run water and check for leaks at both connections. Tighten slightly if needed. Your drain should now flow like new. If you're building up your home repair toolkit, our guide on the best home tool kits covers everything you need for jobs like this.
When to Call a Plumber
Most slow drains are easy to fix at home, but some situations call for professional help. Knowing when to stop and pick up the phone saves you time and prevents accidental damage to your plumbing.
Multiple slow drains at once. If more than one sink, shower, or tub is draining slowly at the same time, the problem is likely in your main sewer line rather than individual drains. That's beyond DIY territory and requires professional equipment to diagnose and fix.
Sewage smell coming from the drain. An occasional musty odor can be normal, but a persistent sewage smell suggests a venting issue, a dried-out P-trap, or a blockage in the main line. A plumber can camera-inspect your pipes to pinpoint the source.
The clog keeps coming back. If you clear the same drain every few weeks and the problem returns, there may be a structural issue like pipe damage, tree root intrusion, or an improper slope in the drain line. Repeated clogs in the same location warrant professional inspection.
Water backing up into other fixtures. If running water in the bathroom sink causes your bathtub to gurgle or back up, you're dealing with a shared drain line blockage that needs professional attention.
For other common plumbing fixes you can handle yourself, check out our guides on how to fix a leaky faucet and how to fix a dripping showerhead.
How to Prevent Slow Drains
Once your sink is draining properly again, a few simple habits will keep it that way. Prevention is always easier than repair, and these steps take almost no effort.
Use a drain cover or hair catcher. A drain cover hair catcher in your bathroom sink costs a few dollars and catches the hair and debris that cause most clogs. Clean it out weekly and you'll rarely deal with slow drains again.
Run hot water after every use. A 15-second flush of hot water after brushing your teeth, shaving, or washing dishes helps push soap residue and small particles through the pipe before they can build up.
Do a monthly baking soda flush. Once a month, pour half a cup of baking soda followed by half a cup of vinegar down each drain, wait 30 minutes, and flush with hot water. This preventive maintenance dissolves buildup before it becomes a problem.
Never pour grease down the drain. This is the single biggest cause of kitchen sink clogs. Let cooking grease cool and solidify, then scrape it into the trash. Even small amounts of oil coat your pipes and attract food particles that create blockages over time.
Clean drain stoppers regularly. Pull out your bathroom sink stopper once a month and wipe off any accumulated hair and residue. It takes 30 seconds and prevents the gradual buildup that leads to slow drains.
Frequently Asked Questions
Why does my bathroom sink drain slowly but my kitchen sink is fine?
Bathroom sinks are far more prone to clogs because of hair and soap scum. Every time you wash your face, brush your teeth, or shave, loose hair and thick soap residue flow into the drain and gradually accumulate around the stopper and inside the pipe. Kitchen sinks typically handle thinner liquids with higher water volume, which keeps them clearer. If your bathroom sink is slow, start with Method 1 (cleaning the stopper) since that's almost always where the buildup is.
Is it safe to pour boiling water down the drain?
Boiling water is safe for metal and copper pipes and is one of the easiest ways to dissolve soap and grease buildup. However, if your home has PVC (plastic) pipes, which are common in newer construction, boiling water can soften the joints and potentially cause leaks. For PVC pipes, use very hot tap water instead of a full boil. If you're not sure what type of pipes you have, look under the sink. White or gray plastic pipes are PVC; anything metal is safe for boiling water.
How often should I clean my drains to prevent clogs?
A monthly maintenance routine works well for most households. Pour half a cup of baking soda and half a cup of vinegar down each drain once a month, let it fizz for 30 minutes, and flush with hot water. For bathroom drains in homes with long-haired residents, cleaning the drain stopper every two weeks is a good habit. High-use kitchen sinks benefit from a weekly hot water flush and monthly deep clean.
Can a slow drain cause bigger plumbing problems if I ignore it?
Yes. A slow drain means there's a partial blockage somewhere in the pipe, and that blockage will only grow over time. What starts as a minor annoyance can become a complete clog that causes standing water or even overflow. In kitchen sinks, trapped food and grease can also create foul odors and attract drain flies. Fixing a slow drain when you first notice it takes a few minutes. Waiting until it's fully blocked often means a more involved repair or a plumber visit.
Fix It Now, Prevent It Later
A slow-draining sink is a small problem with an easy fix, but only if you deal with it before it turns into a full blockage. Start with the simplest method, cleaning the drain stopper, and work your way through the list if needed. Most slow drains clear up with the first or second approach.
The real win is prevention. A cheap hair catcher, a monthly baking soda flush, and the habit of running hot water after each use will keep your drains flowing smoothly year-round. These are the kinds of small, practical habits that save you from bigger headaches and unnecessary repair costs down the road.
Now that you've got drain maintenance covered, you might want to tackle a few more common fixes around the house. Our guides on fixing a leaky faucet and fixing a dripping showerhead are great next steps for building your home repair confidence.
Get weekly home tips that actually work
Join thousands of homeowners getting practical cleaning hacks, DIY fixes, and money-saving tips every week. Free, and you can unsubscribe anytime.

Written by
Beth SullivanFounder & Editor-in-Chief
Beth Sullivan is the founder of Practical Home Guides. With over a decade of hands-on experience tackling every home challenge imaginable, she started this site to share the practical, no-nonsense solutions she wishes she had found years ago. When she's not testing cleaning hacks or organizing pantries, you'll find her in the garden or working on her next DIY project.
Recommended Products
Looking for specific product recommendations? Check out our tested picks.

Best Cordless String Trimmers (2026 Tested)
Battery-powered string trimmers have caught up to gas. We tested the top models on bermuda, fescue, and overgrown areas to find the picks worth your money.

Best Basement Dehumidifiers (2026 Buyer's Guide)
Damp basements destroy stored items, grow mold, and stink. We tested dehumidifiers for capacity, durability, and energy use to find the picks worth the money.

Best Wet/Dry Shop Vacs (2026 Tested)
Whether you need to clean a flooded basement, dust the garage, or pick up workshop debris, here are the wet/dry shop vacs worth the money.

Best Electric Leaf Blowers (2026 Buyer's Guide)
Cordless and corded electric leaf blowers tested for power, runtime, and noise. Our picks for small yards, large yards, and pro-grade home use.

Best Cordless Lawn Mowers (2026 Spring Buyer's Guide)
Battery-powered mowers have caught up to gas. We tested the top cordless mowers on grass length, slopes, and runtime to find the picks worth your money.

5 Best Cordless Drills for Homeowners (2026)
Find the right cordless drill for home projects without overspending. We compared the top drills for DIYers — here are the 5 best for everyday home use.

Best Home Tool Kits for Beginners (2026)
The best home tool kits for new homeowners and renters. We compare 6 tool sets from basic to comprehensive, so you can handle common repairs without calling a handyman.
Related Articles

How to Paint a Front Door (Pro-Quality Result in One Afternoon)
A fresh-painted front door is the highest-impact curb appeal upgrade. Here's the step-by-step that gets a smooth pro finish in 4 hours — no peeling, no brush marks.
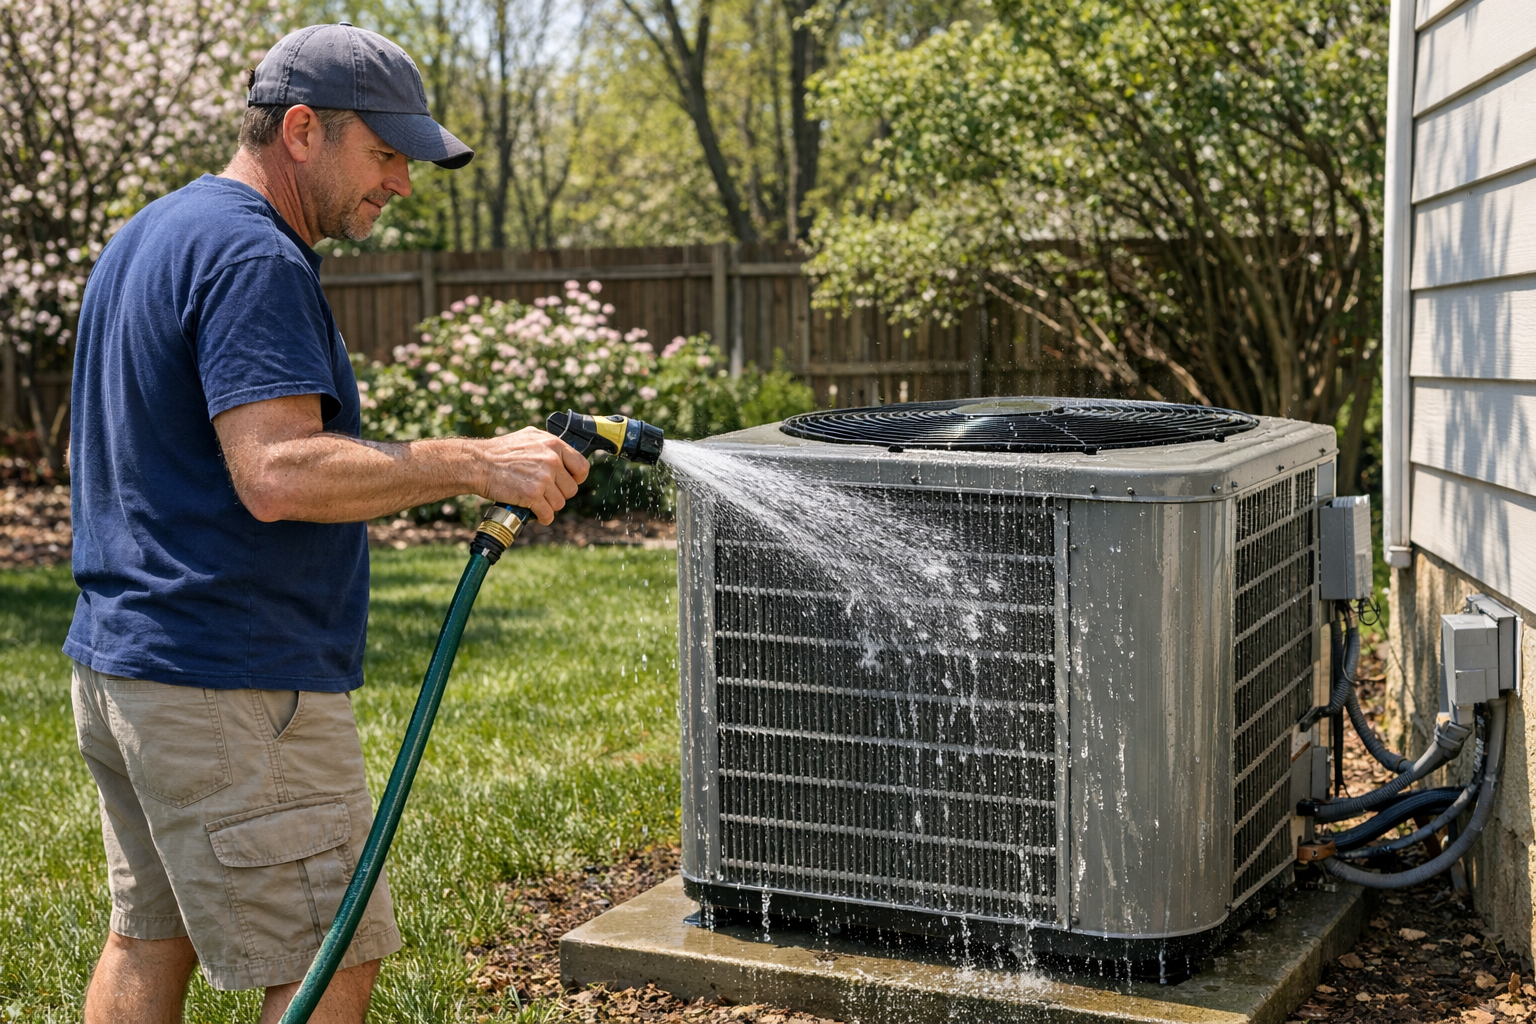
How to Prevent Summer AC Breakdowns (April Tune-Up Checklist)
Most AC failures happen in the first 90F week. A 30-minute April tune-up prevents 80 percent of those breakdowns and extends the unit's life by years.
Best Cordless String Trimmers (2026 Tested)
Battery-powered string trimmers have caught up to gas. We tested the top models on bermuda, fescue, and overgrown areas to find the picks worth your money.
How to Fix Sticky Kitchen Cabinet Doors (Without Replacing Hardware)
Cabinet doors that bind, rub, or won't close all the way are almost always a hinge adjustment problem. Here's the 10-minute fix.