How to Install Floating Shelves (Even Without Studs)
This article may contain affiliate links. If you make a purchase through these links, we may earn a small commission at no extra cost to you. Learn more
Quick Answer
How to Install Floating Shelves (Even Without Studs)
Mark the shelf position with painter's tape and use a level to draw a straight line. Find studs with a stud finder -- if you can hit at least one stud, use a lag screw for that bracket and a heavy-duty drywall anchor for the other. If no studs are available, use toggle bolts or snap-toggle anchors rated for 50+ pounds each. Pre-drill all holes, install the mounting bracket, slide the shelf onto it, and secure with the set screw. The whole job takes 15-20 minutes per shelf once you have the hang of it.
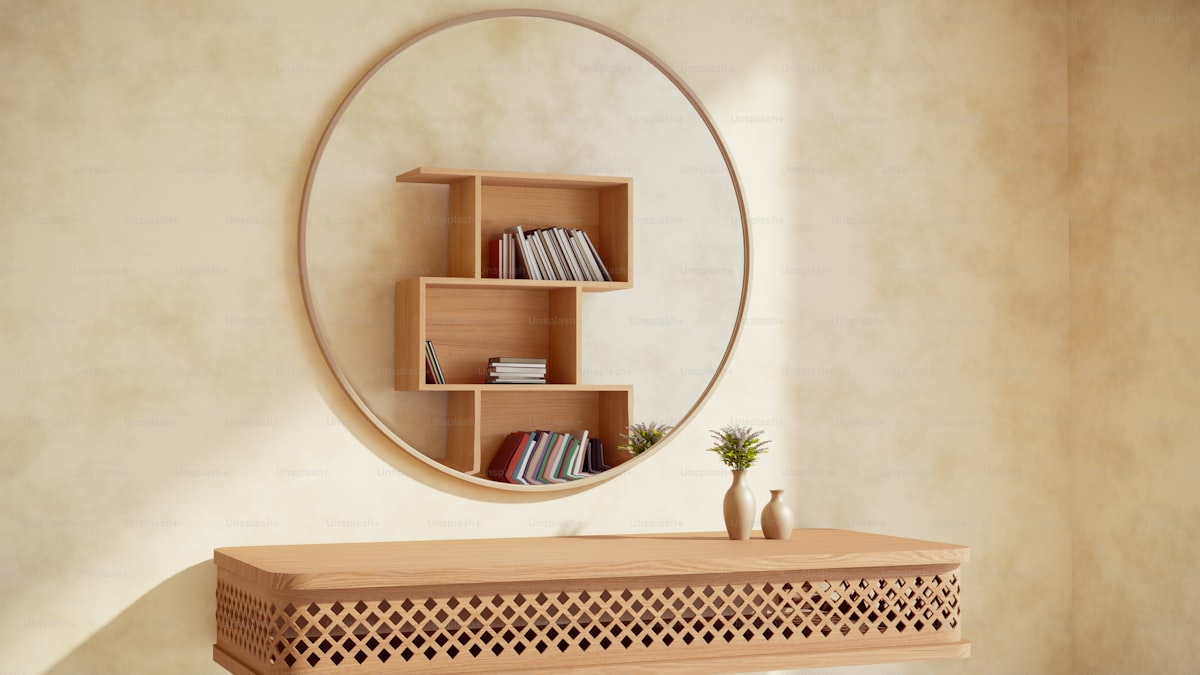
Floating shelves are one of the best upgrades you can make to any room. They add storage, display space, and a clean modern look -- all without the visual bulk of traditional bracketed shelves. The problem is that most people assume they need a stud behind every mounting point or that the installation is more complicated than it really is. Neither is true.
Whether you are mounting into studs, hollow drywall, or old plaster walls, there is a reliable method for getting your shelves up, level, and strong enough to hold real weight. If you have ever hung a picture frame or fixed a loose door handle, you already have the basic skills. The tools are simple, the hardware is affordable, and the whole installation takes about 15-20 minutes per shelf.
What Tools Do You Need to Install Floating Shelves?
Gather everything before you start so you are not making mid-project trips to the hardware store.
Essential tools:
- Stud finder (electronic models are more reliable than magnetic ones)
- Torpedo level or 24-inch level
- Power drill or driver -- check out our best cordless drills for homeowners guide if you need one
- Drill bit set (a bit smaller than your screws for pilot holes, plus a larger bit for anchors)
- Pencil, painter's tape, and tape measure
- Phillips screwdriver (for the set screw)
Hardware (depending on wall type):
- Wood screws or lag screws (for stud mounting)
- Toggle bolts or snap-toggle anchors (for drywall without studs)
- Drywall anchors (for lighter loads on drywall)
- Molly bolts (for plaster walls)
The shelves themselves:
- Floating shelves with concealed bracket system (most kits include mounting hardware, but the included anchors are often flimsy -- we recommend upgrading)
If you are building out a beginner tool kit, a stud finder, level, and decent drill pay for themselves across dozens of projects. The total cost runs about $20-50 per shelf plus $10-20 in hardware. Compare that to the $75-150 a handyman would charge per shelf, and you can see why this is worth doing yourself.
Heavy-Duty Floating Shelf Bracket Set
Industrial steel concealed brackets that support up to 75 lbs per shelf. Includes all mounting hardware for both stud and drywall installation. Works with any 1-inch thick wood shelf.
Check Price on Amazon →How Do You Find Studs and Plan Your Shelf Layout?
Five minutes of planning saves you from misaligned shelves, unnecessary holes, and the frustration of having to patch drywall later.
Step 1: Decide on shelf height and position. Hold the shelf against the wall at different heights and stand back to see how it looks. For functional shelves, mount them 18-24 inches apart vertically. For decorative display shelves, 12-16 inches of spacing looks balanced. Use painter's tape to mark each shelf position -- tape is easier to reposition than pencil marks.
Step 2: Run your stud finder across the wall. Slowly sweep your stud finder horizontally across the wall at your planned shelf height. Mark the edges of each stud with a pencil. Studs are typically spaced 16 inches apart (sometimes 24 inches in older homes).
Step 3: Map the studs to your bracket positions. Most brackets have two or three mounting points. Ideally, at least one lands on a stud. If you can hit two studs, even better. If no studs fall where you need them, do not panic -- we will cover stud-free methods next.
Step 4: Draw a perfectly level line. Place your level against the wall and draw a light pencil line across the full shelf width. Do not eyeball it, and do not use the ceiling or floor as a reference (they are almost never level). A shelf that is even 1/4 inch off is obvious from across the room.
How Do You Mount Floating Shelves Into Studs?
Mounting into studs is the strongest and most straightforward method. Two studs is ideal and will let the shelf hold 50-75 pounds or more.
Step 1: Mark your drill holes. Hold the mounting bracket against the wall, aligned with your level line. Mark the screw hole positions through the bracket holes onto the wall.
Step 2: Pre-drill pilot holes. Using a bit slightly smaller than your screws (typically 1/8-inch for #10 wood screws or 3/16-inch for lag screws), drill pilot holes at each position. Pre-drilling prevents the wood from splitting and makes driving screws much easier.
Step 3: Attach the mounting bracket. Drive the screws through the bracket and into the studs using your drill on a low torque setting. Tighten until the bracket is snug with zero wobble -- firm contact, not crushed drywall.
Step 4: Check level one more time. Set your level on top of the mounted bracket. If it is slightly off, loosen the screws, adjust, and retighten. It is easier to correct this now than after the shelf is on.
Step 5: Slide the shelf onto the bracket. Most floating shelf systems use a bracket with protruding rods or a French cleat. Slide the shelf over the bracket until it sits flush against the wall, then tighten the set screw on the bottom (if your shelf has one) to lock it in place.
Step 6: Test the hold. Press down firmly on the shelf and give it a side-to-side wiggle. It should feel solid and immovable. Gradually add weight over the first day rather than loading it up immediately. If all your mounting points hit studs, you can be done in 10 minutes per shelf.

How Do You Install Floating Shelves on Drywall Without Studs?
This is the situation that makes most people nervous. Standard drywall is only 1/2 inch thick, and a screw driven directly into it will pull out under very little weight. But with the right anchors, drywall can support surprisingly heavy loads.
Understanding Your Anchor Options
Not all drywall anchors are created equal. Here is what works and what does not for floating shelves.
Plastic expansion anchors (the ones that come in the box): Hold 10-25 pounds each in ideal conditions, but fail unpredictably under sustained loads. We do not recommend them for floating shelves unless you are hanging something very light.
Self-drilling screw-in anchors: These zinc or nylon anchors hold 25-50 pounds each and work for medium-weight shelves. Better than plastic, but not ideal for heavy loads.
Toggle bolts (butterfly anchors): The classic heavy-duty option. A spring-loaded metal toggle passes through the drywall and opens behind it, spreading the load across a large area. Quality toggle bolts hold 50-75 pounds each in 1/2-inch drywall. These are our top recommendation for stud-free installation.
Snap-toggle anchors: An upgraded toggle bolt that stays in place even if you remove the screw. Easier to install and comparable in strength. Worth the small extra cost.
Step-by-Step: Installing With Toggle Bolts
Step 1: Mark and drill the holes. Using your level line and bracket as a guide, mark all mounting hole positions. Drill holes using the bit size specified on the toggle bolt package (usually 1/2 inch). The holes are bigger than you expect -- that is normal and necessary for the toggle wings to pass through.
Step 2: Prepare the toggle bolts. Thread the screw through the bracket hole first, then thread the toggle wings onto the screw. The wings should fold toward the screw head, not away from it -- if they face the wrong direction, they will not open behind the wall.
Step 3: Insert the toggles through the wall. Squeeze the wings flat and push them through the holes. You will feel them spring open on the other side. Pull the screw gently toward you to seat the toggle against the back of the drywall.
Step 4: Tighten the screws. While maintaining gentle outward tension on the screw, tighten the bolt with your screwdriver or drill on low speed. The toggle will clamp the bracket firmly to the wall. Tighten until snug -- do not overtighten or you will crush the drywall.
Step 5: Level check and shelf installation. Confirm the bracket is level, slide the shelf on, tighten the set screw, and test the hold as described in the stud-mounting section.
Weight limits: With two heavy-duty toggle bolts in 1/2-inch drywall, you can safely support 40-60 pounds on a 24-inch shelf. If you need more capacity, add a third mounting point or use a longer shelf with three brackets.
How Do You Install Floating Shelves on Plaster Walls?
Plaster walls are common in homes built before the 1960s, and they present unique challenges. Plaster is harder than drywall and often has wooden lath strips behind it. The good news is that plaster is generally stronger than drywall when properly anchored. The bad news is that it cracks easily if you drill too aggressively.
Step 1: Find the lath and studs. Your stud finder may struggle with plaster walls because lath strips confuse the sensor. Instead, use a strong magnet to locate nails holding lath to studs -- a vertical line of nails means you have found a stud.
Step 2: Drill carefully with the right bit. Use a masonry bit to get through the plaster without cracking it. Start with a 1/8-inch pilot hole and drill slowly with light pressure. If you hit lath, switch to a standard wood bit.
Step 3: Choose your hardware. If you hit a stud, use wood screws or lag screws just like a standard stud mount. If you are between studs, use molly bolts or toggle bolts. Molly bolts work particularly well in plaster -- drill a hole sized for the bolt, tap it flush with a hammer, then tighten the screw to expand the anchor behind the plaster.
Step 4: Mount the bracket and install the shelf. Follow the same steps described in the sections above. Always drill at least 2 inches away from any existing crack to avoid extending the damage.
How Do You Get Floating Shelves Perfectly Level Every Time?
A shelf that is even slightly off level is one of those things you will notice every single time you walk into the room. Here are the techniques that guarantee a level result.
Use a quality level and trust it over your eyes. A 24-inch level gives you more accuracy than a shorter one because it spans a larger section of the shelf width. Place it on the bracket (not the wall) and adjust until the bubble is perfectly centered. Do not use the ceiling or floor as a reference line -- in most homes, they are not perfectly level, and measuring from them can make a truly level shelf look crooked.
Mark both ends first, then connect. For longer shelves (36 inches or more), mark the bracket height at both ends using a tape measure from the floor. Then place the level between those two marks and draw a connecting line. Adjust one end up or down as needed until the level confirms the line is true.
Check level at every stage. Check after drawing your line. Check after mounting the bracket. Check after sliding the shelf on. Small shifts can happen at each stage, and catching them early is easy -- catching them after the shelf is loaded with books is not.
The laser level shortcut: If you plan to install multiple shelves, a self-leveling laser level is a worthwhile investment. It projects a perfectly level line across the wall without you holding anything in place -- especially helpful when you are working solo.

What Are the Most Common Floating Shelf Mistakes?
Knowing what to avoid is just as important as knowing what to do. Here are the mistakes we see most often.
Using the included hardware without checking the wall type. Most shelf kits include plastic anchors rated for only 15-20 pounds. If you are loading the shelf with books or dishes, upgrade to toggle bolts or mount into studs.
Skipping the pilot hole. Driving a screw directly into a stud without a pilot hole can split the wood. Driving an anchor into drywall without a properly sized hole can crack the drywall. Take the extra 30 seconds to pre-drill at every mounting point.
Overloading the shelf. Every shelf and bracket system has a weight rating -- respect it. Distribute weight evenly rather than concentrating it at one end, and keep heavy items closer to the wall where the bracket provides the most support.
Not accounting for the bracket length. Some concealed bracket rods extend 6-8 inches into the shelf. If your shelf is only 8 inches deep, that leaves very little wood at the front edge. The bracket should extend no more than 60-70% of the shelf depth.
Ignoring the wall condition. Crumbling plaster, water-damaged drywall, or large patched areas may not hold anchors reliably. If your wall has damage, repair it first. Our guide on how to patch a hole in drywall covers everything from nail holes to large patches.
Mounting too high or too low. For display shelves, eye level (about 57-60 inches from the floor) is the sweet spot. For functional storage, mount them where you can comfortably reach without stretching.
How Can You Style and Load Your Floating Shelves?
Getting the shelves up is only half the project. How you arrange items on them makes the difference between a shelf that looks intentional and one that looks cluttered.
The rule of thirds. Divide your shelf into three visual sections. Place a taller item in one, a grouping of smaller items in another, and leave the third more open.
Mix heights and keep weight distributed. Alternate between tall and short objects -- lean a framed photo behind a small plant, stack books horizontally with a decorative object on top. Keep heavier items closer to the wall where the bracket provides the most support, and distribute weight evenly to avoid stressing one side.
Leave breathing room. A shelf packed edge to edge looks cluttered. Leave 2-3 inches of space at each end and between groupings.
Consider the room's overall design. Natural wood shelves warm up a modern space. White shelves disappear against white walls. Dark shelves create contrast and drama. If you are painting a room, choose your shelf finish after settling on your wall color.
Frequently Asked Questions
How much weight can floating shelves actually hold?
It depends on the bracket strength, the wall mounting method, and the shelf material. A quality steel bracket mounted into two studs can support 50-75 pounds. The same bracket in drywall with toggle bolts typically holds 30-50 pounds. Thin particleboard shelves will sag under less weight than solid wood, regardless of bracket strength. Always check the weight rating on both the shelf and the bracket and use the lower number as your maximum.
Can I install floating shelves on tile or brick walls?
Yes, but you need masonry drill bits and appropriate anchors. For tile, drill slowly with a carbide-tipped masonry bit to avoid cracking, then switch to a standard bit once you are through to the wall material behind it. For brick or concrete, use a hammer drill with a masonry bit and masonry anchors. Masonry walls are extremely strong -- once properly anchored, the shelf will hold more weight than almost any other wall type.
Do I need to find studs, or can I rely entirely on drywall anchors?
You do not absolutely need studs, but hitting at least one stud per shelf dramatically increases weight capacity and long-term reliability. For lightweight decorative shelves under 15 pounds, quality drywall anchors alone are fine. For shelves holding books, dishes, or anything with real heft, anchor into at least one stud per bracket. If no studs are available, use heavy-duty toggle bolts rated for 50+ pounds each and stay well under the combined capacity. And if a stud-finding attempt leaves you with extra holes, our drywall patching guide has you covered.
My shelf looks level but appears crooked against the ceiling. What is going on?
This is extremely common. In most homes, the ceiling is not perfectly level -- it can be off by 1/4 inch or more across a room. When you mount a truly level shelf, it can look tilted because your eye uses the ceiling as a reference. The shelf is correct; the ceiling is the problem. You have two options: keep the shelf truly level (recommended, so items sit correctly and do not slide), or split the difference by tilting the shelf very slightly between true level and the ceiling line.
Final Thoughts
Installing floating shelves is one of those home projects that delivers a huge visual impact for a small investment of time and money. A single shelf can transform a bare wall into a functional display, and a set of three can completely change the character of a room. The installation is straightforward -- find your mounting points, get everything level, use hardware that matches your wall type, and take the time to do it right.
The most important takeaway is that you do not need studs everywhere to hang strong, reliable shelves. Toggle bolts and snap-toggle anchors make drywall-only installation completely viable for most household loads. Just upgrade from the flimsy hardware that comes in the box and you will be surprised how solid the result feels.
If this is one of your first DIY projects, you have picked a great one to start with. The skills you build here -- finding studs, drilling pilot holes, using anchors, working with a level -- carry over directly to dozens of other improvements. From here, you might tackle painting a room like a pro, saving money on home repairs by doing more projects yourself, or building your confidence with other quick fixes around the house. Every project gets easier once you have done one successfully, and floating shelves are a genuinely satisfying place to begin.
Get weekly home tips that actually work
Join thousands of homeowners getting practical cleaning hacks, DIY fixes, and money-saving tips every week. Free, and you can unsubscribe anytime.

Written by
Beth SullivanFounder & Editor-in-Chief
Beth Sullivan is the founder of Practical Home Guides. With over a decade of hands-on experience tackling every home challenge imaginable, she started this site to share the practical, no-nonsense solutions she wishes she had found years ago. When she's not testing cleaning hacks or organizing pantries, you'll find her in the garden or working on her next DIY project.
Recommended Products
Looking for specific product recommendations? Check out our tested picks.

Best Cordless String Trimmers (2026 Tested)
Battery-powered string trimmers have caught up to gas. We tested the top models on bermuda, fescue, and overgrown areas to find the picks worth your money.

Best Basement Dehumidifiers (2026 Buyer's Guide)
Damp basements destroy stored items, grow mold, and stink. We tested dehumidifiers for capacity, durability, and energy use to find the picks worth the money.

Best Wet/Dry Shop Vacs (2026 Tested)
Whether you need to clean a flooded basement, dust the garage, or pick up workshop debris, here are the wet/dry shop vacs worth the money.

Best Electric Leaf Blowers (2026 Buyer's Guide)
Cordless and corded electric leaf blowers tested for power, runtime, and noise. Our picks for small yards, large yards, and pro-grade home use.

Best Cordless Lawn Mowers (2026 Spring Buyer's Guide)
Battery-powered mowers have caught up to gas. We tested the top cordless mowers on grass length, slopes, and runtime to find the picks worth your money.

5 Best Cordless Drills for Homeowners (2026)
Find the right cordless drill for home projects without overspending. We compared the top drills for DIYers — here are the 5 best for everyday home use.

Best Home Tool Kits for Beginners (2026)
The best home tool kits for new homeowners and renters. We compare 6 tool sets from basic to comprehensive, so you can handle common repairs without calling a handyman.
Related Articles

How to Paint a Front Door (Pro-Quality Result in One Afternoon)
A fresh-painted front door is the highest-impact curb appeal upgrade. Here's the step-by-step that gets a smooth pro finish in 4 hours — no peeling, no brush marks.
How to Prevent Summer AC Breakdowns (April Tune-Up Checklist)
Most AC failures happen in the first 90F week. A 30-minute April tune-up prevents 80 percent of those breakdowns and extends the unit's life by years.
Best Cordless String Trimmers (2026 Tested)
Battery-powered string trimmers have caught up to gas. We tested the top models on bermuda, fescue, and overgrown areas to find the picks worth your money.
How to Fix Sticky Kitchen Cabinet Doors (Without Replacing Hardware)
Cabinet doors that bind, rub, or won't close all the way are almost always a hinge adjustment problem. Here's the 10-minute fix.