Backyard Lighting Design: Create Ambiance for Summer Evenings
This article may contain affiliate links. If you make a purchase through these links, we may earn a small commission at no extra cost to you. Learn more
Quick Answer
Backyard Lighting Design: Create Ambiance for Summer Evenings
Great backyard lighting works in three layers: ambient (string lights overhead, warm 2700K), task (path lights and brighter fixtures near the grill and steps), and accent (uplighting on trees and walls). Map your yard into zones, run everything off GFCI-protected outlets, and stick to low-voltage 12V or solar for the parts you install yourself. You'll spend $200 to $600 and one weekend, not $2,000 on an installer.
I wire houses for a living, and the single most common request I get every spring isn't a panel upgrade or a new circuit. It's "Can you make my backyard not look like a parking lot at night?" Most people have one harsh floodlight bolted over the back door, throwing a flat white glare across the patio, and they wonder why nobody wants to sit out there after dark.
The fix isn't more light. It's the right light in the right places, layered the way a good restaurant patio is layered. You don't need an electrician for most of it, you don't need to dig trenches, and you don't need to spend what a pro charges. What you need is a plan, a respect for the rules around water and electricity, and a few hundred dollars of gear. Here's exactly how I'd approach your yard.
Start With Zones, Not Fixtures
Before you buy a single light, walk your yard at dusk and break it into zones based on what actually happens there. This is the step everyone skips, and it's why so many backyards end up with a random scatter of lights that still feel dim and disorganized.
In almost every yard I look at, there are three kinds of zones:
- Gathering zones — the patio, the dining table, the seating area around the fire pit. These want soft, warm, overhead ambient light. Nobody wants a spotlight in their eyes while they eat.
- Movement zones — paths, steps, the walk from the back door to the grill. These need task lighting: enough to see your footing without flooding the whole yard.
- Feature zones — a nice oak, a stone wall, a fence line, an ornamental tree. These get accent lighting (uplighting) that adds depth and drama once the sun is gone.
Sketch it on paper. Mark where your existing outdoor outlets are, because that dictates a lot. If your dining zone is 40 feet from the nearest outlet, you've just learned something important before spending a dime. Getting the patio surface and seating sorted first helps too — if you're still in cleanup mode out there, my spring deck and patio refresh guide walks through the deep clean and reseal that should happen before you hang anything.
The Electrical Rules That Actually Matter
I'll keep this short because the rules are simple, but they're non-negotiable. Water and 120-volt power are a genuinely dangerous combination, and outdoor lighting lives in the rain.
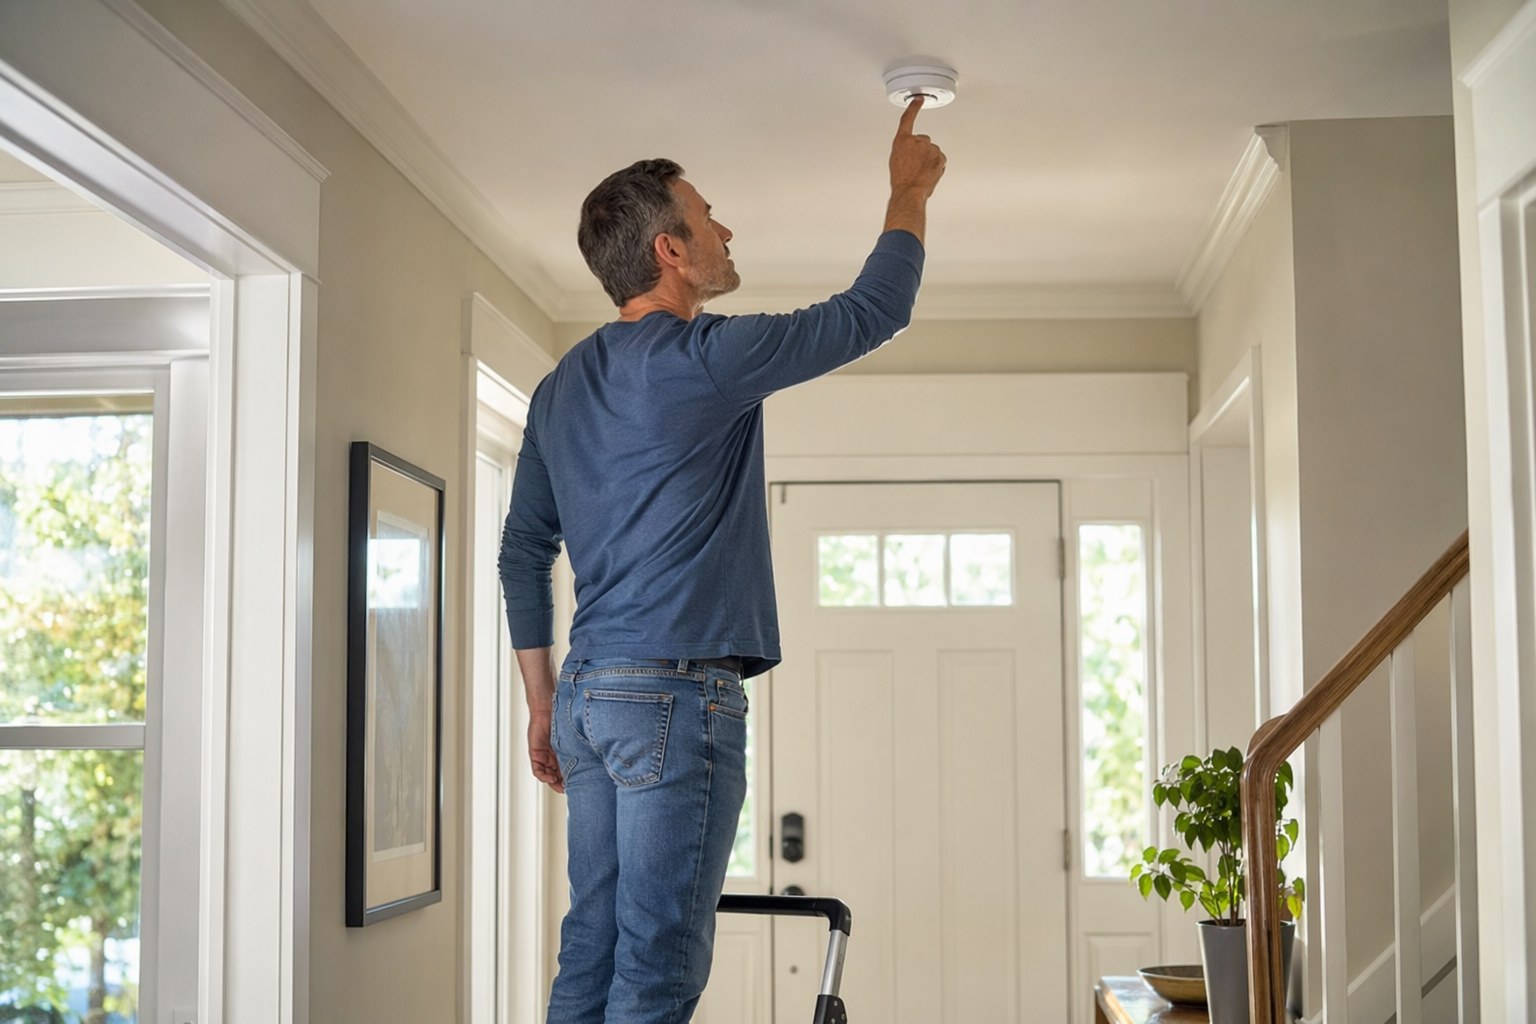
Every outdoor outlet must be GFCI-protected. A ground-fault circuit interrupter trips in a fraction of a second if current starts leaking through water or through a person. If your existing exterior outlet isn't a GFCI (no little TEST and RESET buttons on the face), that's the first thing to fix. Swapping a standard outlet for a GFCI outlet is a 20-minute job if you're comfortable with basic wiring — it's the same skill set as replacing a light switch, just with a couple more terminals. If you're not comfortable, this is the one part I'd genuinely call an electrician for. It's cheap insurance.
Use a weatherproof "in-use" cover. Standard outlet covers only seal when nothing's plugged in. For an outlet running lights all season, you want a bubble-style in-use cover that keeps rain off the plug while a cord is connected.
Outdoor Electrical Outlet GFCI Waterproof
A weather-rated GFCI receptacle with an in-use bubble cover that keeps rain off the plug. The safe foundation for any outdoor lighting setup running off 120V.
Check Price on Amazon →Match the cord and fixture rating to the location. Anything plugged in outdoors needs to be rated for outdoor or wet/damp use. Indoor extension cords degrade fast outside and are a real fire risk. And keep the low-voltage stuff and the 120-volt stuff mentally separate — the low-voltage system below is where most of your DIY confidence should live, because it physically cannot shock you.
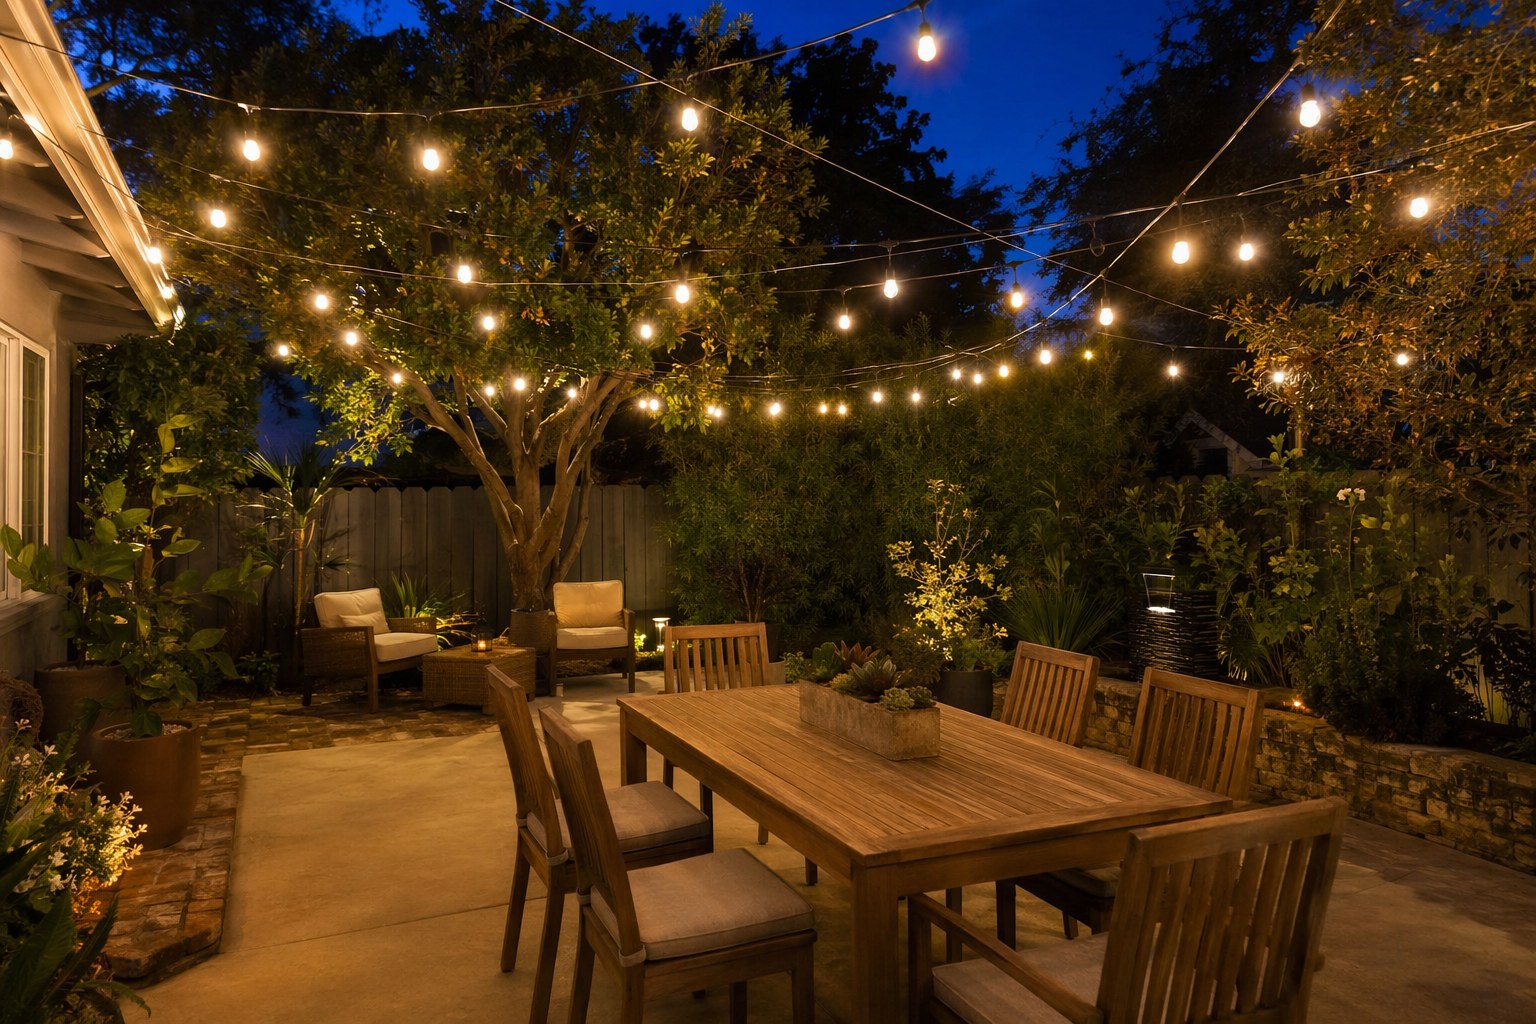
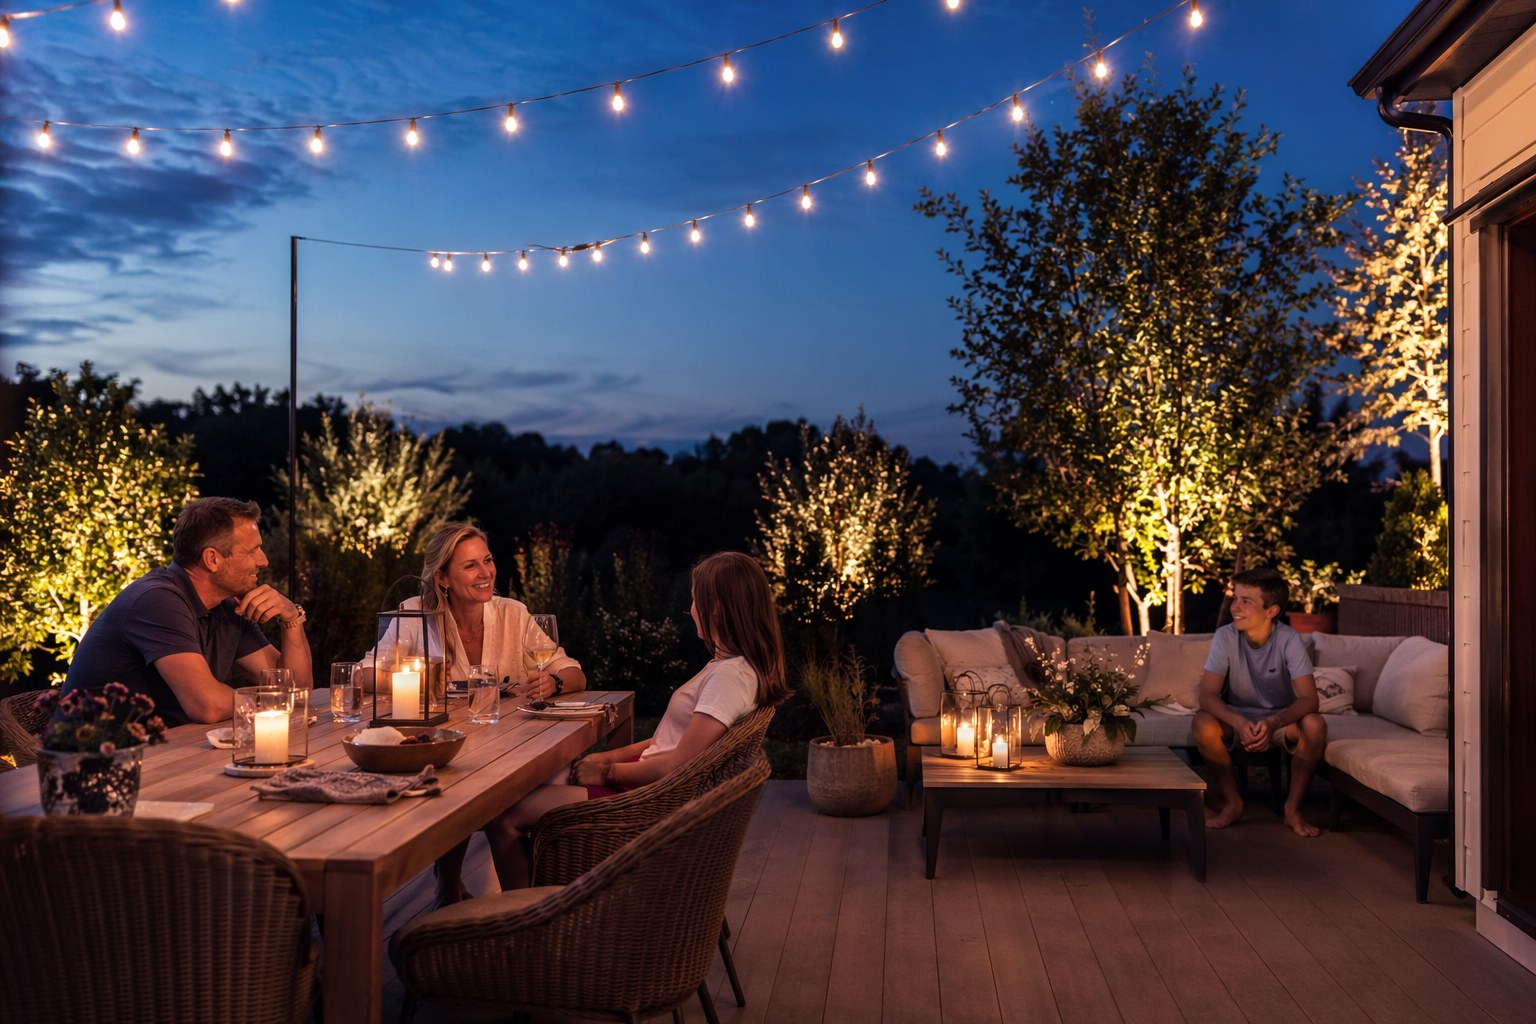
Layer One: Ambient Light With String Lights
String lights do more for backyard ambiance than any other single product, dollar for dollar. They create a warm "ceiling" of light over a gathering zone that instantly makes the space feel like a room rather than a yard. This is the layer I'd install first.
Go with commercial-grade LED bistro lights, not the flimsy seasonal kind. The difference is real: the good ones use a thick gauge wire, shatter-resistant bulbs, and they're rated for years outdoors. A 48 to 50 foot run covers most patios with room to spare, and LED versions sip power — you can run several strands off one outlet without tripping anything.
Outdoor String Lights LED Bistro 50ft
Commercial-grade LED bistro lights with shatter-resistant bulbs and weatherproof sockets. One 50ft strand covers a typical patio; warm 2700K bulbs give that golden cafe glow.
Check Price on Amazon →A few things I've learned hanging dozens of these:
- Color temperature is everything. Buy bulbs in the 2200K to 2700K range — that warm, candle-to-amber glow. Anything labeled "daylight" or 5000K will make your patio look like a loading dock. This one spec separates a magical backyard from a clinical one.
- Use guide wire for long runs. Don't hang the light strand itself across a 30-foot gap; it'll sag and stress the sockets. String a stainless steel guide wire (aircraft cable) between anchor points first, then zip-tie the lights to it. It stays taut for years.
- Anchor into something solid. House fascia, a pergola, the posts of a privacy fence, or DIY string-light poles set in buckets of concrete. Crisscross them over the dining table for that overhead cafe canopy.
- Put them on a timer or smart plug. A $15 outdoor timer means the lights come on at dusk and off at midnight without you thinking about it. Set it once.
If your dining zone is still a work in progress, a string-light canopy pairs beautifully with a budget DIY patio table and bench build — build the table, then hang the lights directly over it.
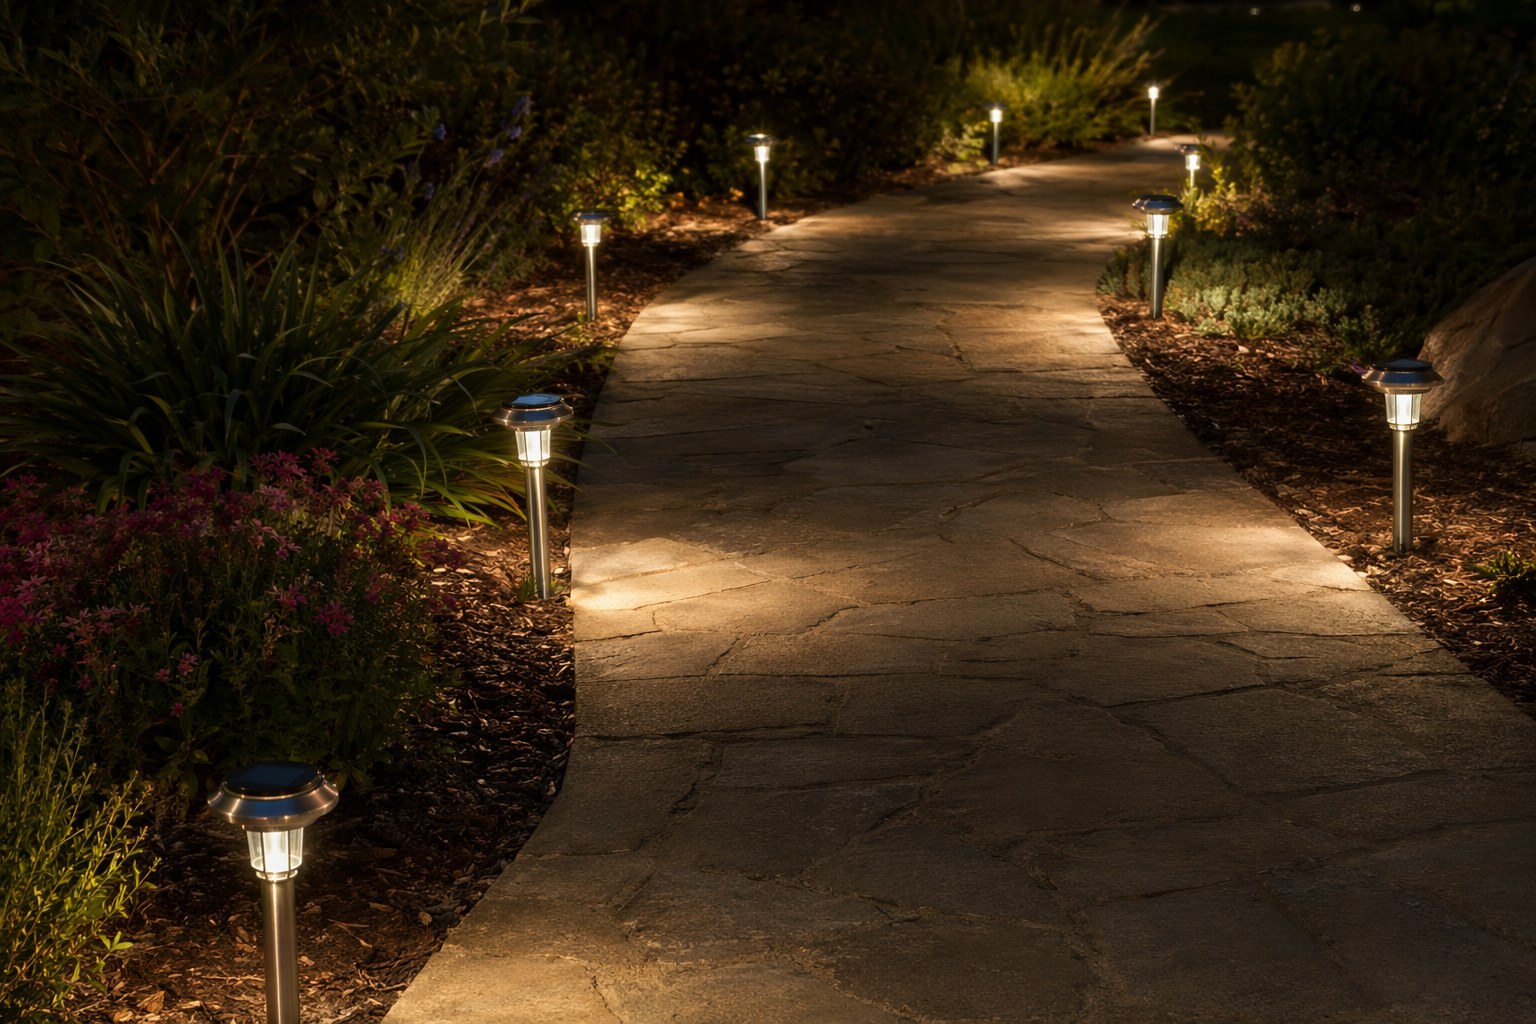
Layer Two: Task Lighting For Paths And Work Zones
Ambient light sets the mood, but you still need to see where you're walking and what you're cooking. That's task lighting, and it should be brighter and more directional than your string lights — but aimed down, never out into people's eyes.
Paths and steps. This is where solar path lights earn their keep. They install in literally minutes — no wiring, no transformer, just push the stake into the ground where it gets sun during the day. A 10-pack spaced every 6 to 8 feet defines a walkway clearly. Modern solar units with decent batteries hold a charge through the night far better than the junk from a decade ago.
Solar Path Lights LED Stainless Steel 10 Pack
Stainless steel solar stake lights that charge by day and glow all evening with zero wiring. Space them 6 to 8 feet apart to define paths, beds, and step edges safely.
Check Price on Amazon →A safety note from years of service calls: light your steps. More backyard injuries happen on unlit deck stairs and grade changes than anywhere else. Put a dedicated light at the top and bottom of every set of steps, no exceptions.
The grill and prep area. Cooking needs more light than ambiance. A small wall-mounted or post-mounted fixture aimed at the grill surface, or a dedicated brighter puck light over the prep counter, keeps you from flipping burgers by phone flashlight. If you're dialing in that whole zone, it slots right into a proper backyard grilling station setup — the lighting is the part most people forget until the first time they're squinting at raw chicken in the dark.
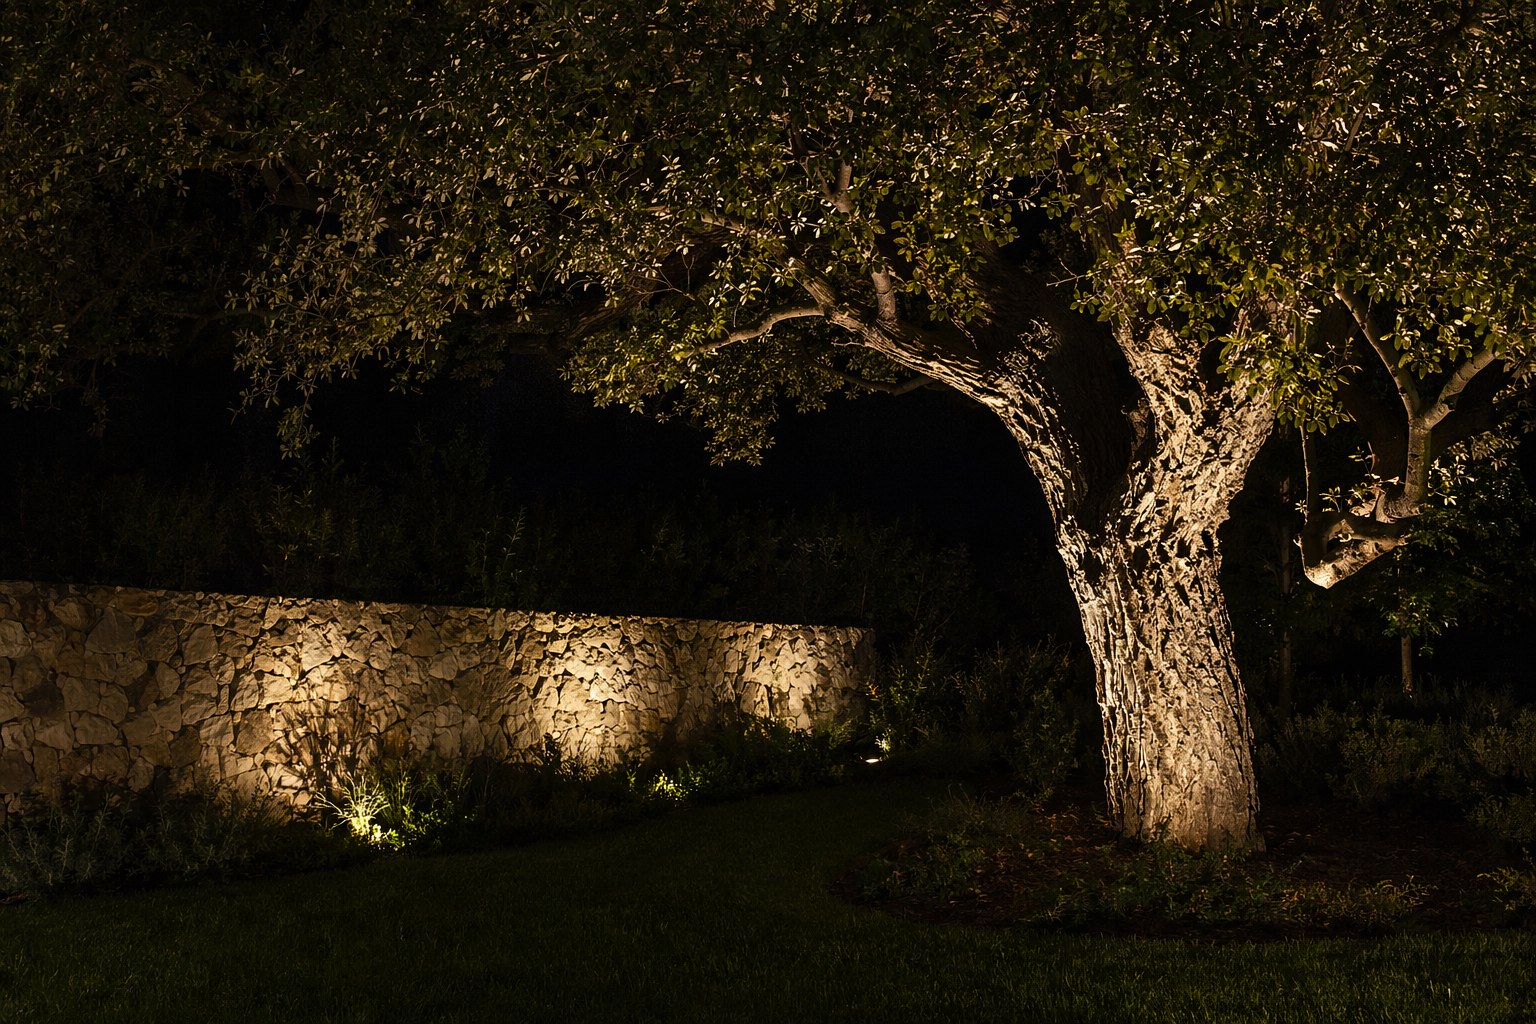
Layer Three: Accent Lighting With Uplighting
This is the layer that takes a yard from "lit" to "designed," and it's the one most homeowners have never tried. Uplighting means placing a fixture at the base of a feature — a tree trunk, a textured fence, a stone wall, a tall ornamental grass — and aiming it upward to graze the surface with light. It creates shadow, depth, and drama after dark, and it's what makes professional landscapes look expensive.
A low-voltage RGB uplighting kit lets you wash a tree canopy in warm white most nights, then shift to color for a party. Start with two or three trees or features — you don't need to light everything. Restraint reads as elegance here; over-lighting reads as a used car lot.
Uplighting Kit LED RGB Color Changing
Low-voltage 12V spotlights that graze trees, walls, and architecture with warm white or color. Adjustable heads let you aim the beam; a few well-placed fixtures transform a yard.
Check Price on Amazon →Aiming tips that make a real difference:
- For trees, place the fixture 1 to 2 feet from the trunk and tilt it up into the canopy. The branches catch the light and the whole crown glows.
- For walls and fences, set the light close to the base and aim straight up the surface to rake across the texture. Brick, stone, and board fences all come alive this way.
- Hide the source. The goal is to see the lit object, not the fixture. Tuck units behind plants or mulch so the eye sees glowing trees, not glowing lamps.
Tie It Together With a Low-Voltage System
Here's the secret that makes the whole accent-and-path layer easy and safe: low voltage. A transformer plugs into your GFCI outlet, drops 120 volts down to a safe 12 volts, and feeds all your path and uplighting fixtures through a single buried cable. At 12 volts, you can cut, splice, and reroute the wire with your bare hands — there's no shock risk and no permit needed.
Landscape Lighting Low Voltage Transformer Kit
A 120W-plus transformer with a built-in timer and photocell that powers an entire run of 12V path and accent lights off one outlet. The safe, expandable backbone of a DIY landscape lighting system.
Check Price on Amazon →A few install notes:
- Size the transformer to your total wattage, then leave headroom. Add up the watts of every fixture and pick a transformer rated about 25 percent higher so you can expand later.
- Bury the cable shallow. A few inches under mulch or sod is plenty. A flat-edge spade makes a slit; tuck the wire in and step it closed.
- Use a transformer with a built-in photocell and timer so the whole system comes on at dusk and runs for a set number of hours automatically.
The total spend on a solid layered setup — string lights, a path-light kit, a few uplights, and a transformer — runs roughly $200 to $600 depending on yard size. A landscape lighting company quoting the same job typically lands between $2,000 and $4,000 installed. The DIY version is a weekend of work, and you keep the difference. While you're investing in the space, it's worth pairing the lighting with comfortable seating — keep an eye on the best outdoor patio furniture deals so the lit zones actually invite people to linger.
Frequently Asked Questions
What color temperature is best for backyard ambiance?
Warm, in the 2200K to 2700K range. That's the difference between a cozy cafe glow and a sterile office. Use warm bulbs for all your string lights and general ambiance. The only place I'd consider going slightly cooler (3000K) is bright task lighting over a grill or prep area, where you want a touch more clarity.
Can I install landscape lighting myself, or do I need an electrician?
The low-voltage 12V system — path lights, uplighting, the transformer — is fully DIY and safe to handle, because 12 volts can't shock you. The one job where I'd call a pro is adding or replacing the 120-volt GFCI outlet that the transformer and string lights plug into, unless you're already comfortable with basic outlet wiring. Everything downstream of that outlet is fair game for a confident homeowner.
How many string lights do I need for my patio?
Measure the perimeter or the crisscross runs of your gathering zone and add about 20 percent for sag and slack. A typical 12 by 15 foot patio is covered by one 48 to 50 foot strand zigzagged overhead. For larger areas, connect multiple strands end to end — LED strands draw so little power that you can usually run several off a single outlet without issue.
Will solar path lights actually stay lit all night?
Quality ones get close. Look for units with a stated runtime of 8-plus hours and a battery you can replace later. Place them where they get several hours of direct sun daily — shaded spots are where solar disappoints. For paths near the house where reliability matters most, or in heavily shaded yards, a wired low-voltage path light off the transformer is the more dependable choice.
Final Thoughts
Backyard lighting is one of those projects where a little knowledge goes a long way. Layer your light — warm string lights overhead for mood, task lighting on paths and at the grill for safety, and a few well-aimed uplights for drama. Run it all off a GFCI outlet with a low-voltage transformer doing the heavy lifting, and you've built a space that pulls people outside long after sunset.
Start with one zone this weekend. Hang a strand of bistro lights over your dining table, set them on a timer, and pour a drink at dusk. Once you see what that warm glow does to the space, the rest of the plan tends to build itself.
Get weekly home tips that actually work
Join thousands of homeowners getting practical cleaning hacks, DIY fixes, and money-saving tips every week. Free, and you can unsubscribe anytime.

Written by
Marcus ChenDIY & Home Repair Editor
Marcus Chen spent fifteen years as a licensed general contractor in the Pacific Northwest before joining Practical Home Guides full time. He specializes in plumbing, electrical, and weekend warrior projects that save homeowners thousands. Marcus has personally tested every tool he recommends in his own century-old fixer-upper.
Recommended Products
Looking for specific product recommendations? Check out our tested picks.

Best Cordless String Trimmers (2026 Tested)
Battery-powered string trimmers have caught up to gas. We tested the top models on bermuda, fescue, and overgrown areas to find the picks worth your money.

Best Basement Dehumidifiers (2026 Buyer's Guide)
Damp basements destroy stored items, grow mold, and stink. We tested dehumidifiers for capacity, durability, and energy use to find the picks worth the money.

Best Wet/Dry Shop Vacs (2026 Tested)
Whether you need to clean a flooded basement, dust the garage, or pick up workshop debris, here are the wet/dry shop vacs worth the money.

Best Electric Leaf Blowers (2026 Buyer's Guide)
Cordless and corded electric leaf blowers tested for power, runtime, and noise. Our picks for small yards, large yards, and pro-grade home use.

Best Cordless Lawn Mowers (2026 Spring Buyer's Guide)
Battery-powered mowers have caught up to gas. We tested the top cordless mowers on grass length, slopes, and runtime to find the picks worth your money.

5 Best Cordless Drills for Homeowners (2026)
Find the right cordless drill for home projects without overspending. We compared the top drills for DIYers — here are the 5 best for everyday home use.

Best Home Tool Kits for Beginners (2026)
The best home tool kits for new homeowners and renters. We compare 6 tool sets from basic to comprehensive, so you can handle common repairs without calling a handyman.
Related Articles

Cordless vs. Corded vs. Pneumatic: The Homeowner's Tool System Buying Guide
Cordless, corded, or pneumatic? A homeowner's guide to choosing a power tool ecosystem (DeWalt, Milwaukee, Makita, Ryobi) with a starter-to-advanced path.
End-of-May Home Audit: Fix 5 Summer Safety Issues Before June Heat
A contractor's final spring safety audit. Five critical ventilation, electrical, plumbing, and cooling checks to fix before extreme June heat hits your home.
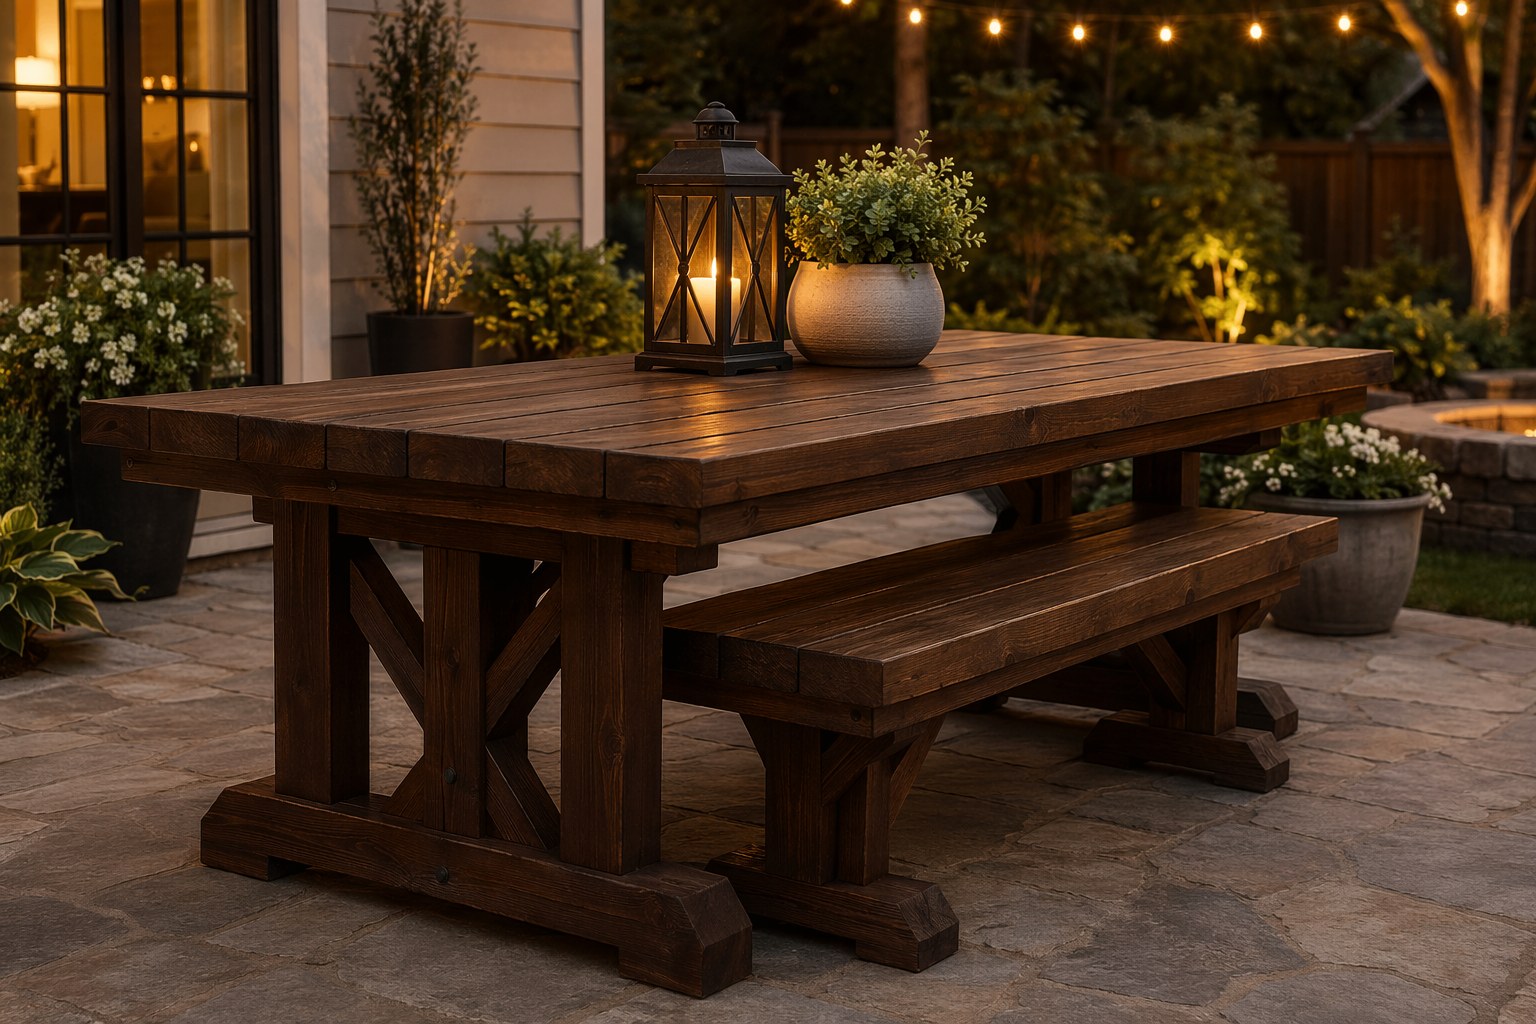
Budget Outdoor Dining: Building a Patio Table & Bench Setup
A carpenter's plans for a sturdy 2x4 outdoor dining table and bench set that seats 8, costs about 300 dollars in materials, and lasts 20 years.
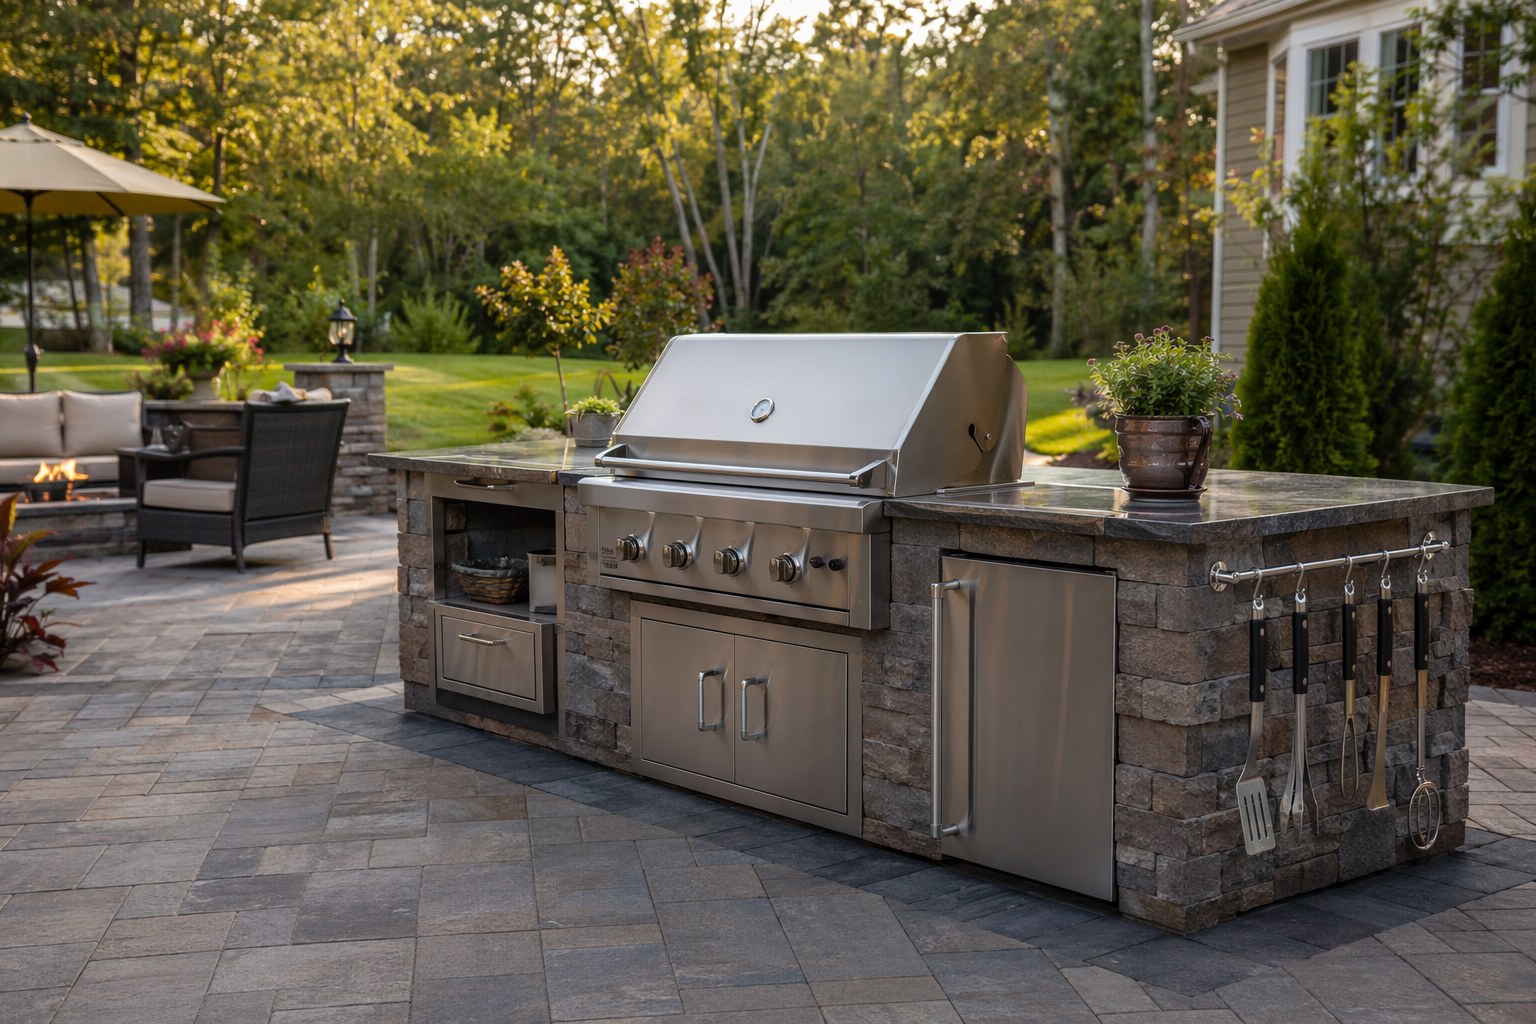
Grilling Season Setup: Build the Perfect Backyard Cook Station
A contractor's guide to a backyard grill station setup for outdoor cooking: gas hookup, clearances, ventilation, and a prep counter so you cook cool and safe all summer.