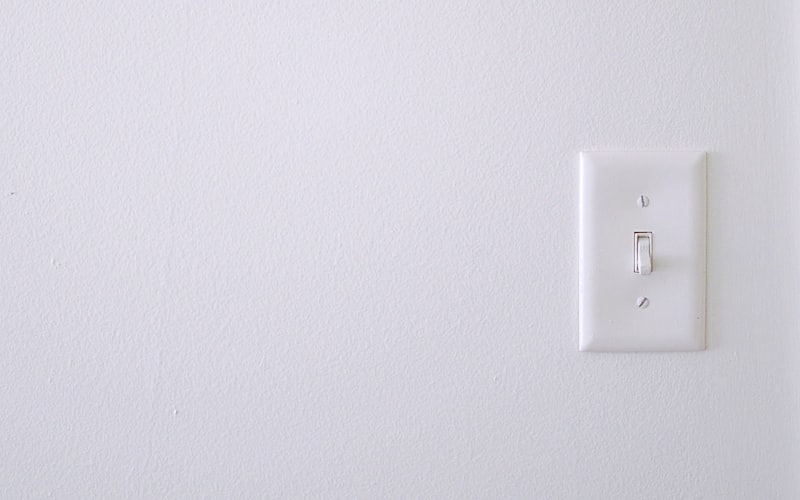
How to Replace a Light Switch (Even If You've Never Done Electrical Work)
This article may contain affiliate links. If you make a purchase through these links, we may earn a small commission at no extra cost to you. Learn more
Quick Answer
How to Replace a Light Switch (Even If You've Never Done Electrical Work)
Turn off the breaker that controls the switch, confirm the power is off with a voltage tester, remove the old switch by unscrewing the cover plate and disconnecting the wires, then connect the wires to the new switch in the same configuration. The entire job takes about 15 to 20 minutes with a screwdriver and a non-contact voltage tester -- no electrician needed.
How to Replace a Light Switch (Even If You've Never Done Electrical Work)
Replacing a light switch is one of those home repairs that sounds far more intimidating than it actually is. The word "electrical" triggers a very reasonable fear response -- nobody wants to get shocked, start a fire, or accidentally knock out power to half the house. But the reality is that swapping a light switch is one of the simplest, safest electrical tasks you can do at home, as long as you follow the correct steps and respect the process.
You do not need an electrician for this. You do not need years of experience. You need a screwdriver, a non-contact voltage tester, about 20 minutes, and a willingness to flip a breaker before you start. That is genuinely the entire barrier to entry. The switch itself costs between $2 and $15, which means you are saving $100 to $200 in electrician fees every time you do this yourself.
Whether your current switch is cracked, discolored, buzzing, or you simply want to upgrade from a basic toggle to a modern rocker or dimmer, this guide walks you through every step. By the end, you will have a brand-new switch on the wall and the confidence to tackle the next one even faster.
Why Would You Need to Replace a Light Switch?
Light switches are mechanical devices, and like all mechanical devices, they wear out over time. Here are the most common reasons you might need to swap one out.
The switch feels loose or wobbly. After years of daily use, the internal toggle mechanism wears down. The switch may flip without a satisfying click, or it may not stay in position reliably. This is the most common sign that a switch is at the end of its life.
The switch makes a buzzing or crackling sound. Any audible noise from a light switch is a sign that the internal contacts are arcing -- meaning electricity is jumping across a small gap instead of flowing smoothly. This is not just annoying; it is a potential fire hazard and should be addressed promptly.
The switch or cover plate is warm to the touch. A standard toggle switch that feels warm when you touch it indicates a wiring problem or a failing switch. Dimmer switches can run slightly warm during normal operation, but a standard on/off toggle should always be cool. If yours is warm, replace it.
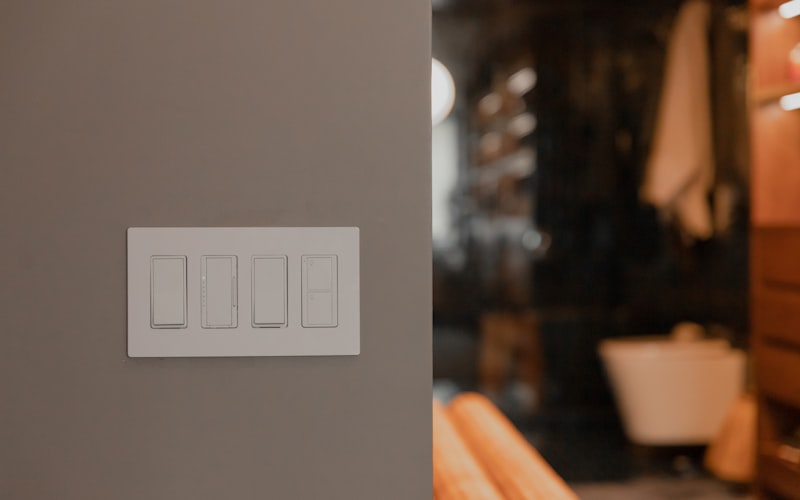
You want a style or function upgrade. Maybe you want to swap an old almond-colored toggle for a clean white rocker switch. Maybe you want to install a dimmer switch so you can control the brightness of your dining room lights. Or maybe you are upgrading to a smart switch that works with voice assistants. All of these are straightforward swaps that follow the same basic process.
You are updating the room and want a fresh look. Stained, painted-over, or cracked switch plates make a room look dated. Replacing the switch and cover plate is one of the cheapest cosmetic upgrades you can do -- right up there with swapping out LED light bulbs for better lighting and lower energy costs.
What Tools and Materials Do You Need?
The tool list for this project is refreshingly short. If you already own a basic home tool kit, you have almost everything you need.
Essential tools:
- A flathead screwdriver
- A Phillips screwdriver (or a multi-bit screwdriver set)
- A non-contact voltage tester -- this is non-negotiable for safety
Materials:
- A new light switch (single-pole toggle, rocker, or dimmer -- make sure it matches your setup)
- A new cover plate if you want to update the look
- Electrical tape (optional but good to have)
- Wire nuts (typically included with the new switch, but extras are handy)
Klein Tools NCVT-1P Non-Contact Voltage Tester
Detects voltage from 50 to 1000V AC without touching wires. Bright LED and audible alert tell you instantly if power is present. Essential safety tool for any DIY electrical work -- no home should be without one.
Check Price on Amazon →The voltage tester is the single most important item on this list. It costs around $15 to $20, and it allows you to confirm with absolute certainty that the power is off before you touch any wires. Never skip this step, and never rely on simply flipping the switch to "off" as proof that the circuit is dead.
How Do You Turn Off the Power Safely?
Safety is not optional when working with electricity. The good news is that making a light switch circuit safe to work on takes about two minutes and is completely foolproof if you follow these steps.
Step 1: Go to your home's electrical panel (breaker box). This is usually in the garage, basement, utility closet, or on an exterior wall. Open the panel door.
Step 2: Identify the breaker that controls the circuit for the light switch you are replacing. If your breakers are labeled, look for the one that corresponds to the room. If they are not labeled, flip the switch to the "on" position and have someone watch the light while you flip breakers one at a time until the light goes off. Once you find it, leave that breaker in the "off" position.
Step 3: Go back to the switch and flip it on and off. The light should not respond at all. This is your first confirmation that the power is off.
Step 4: Use your non-contact voltage tester to verify. Hold the tip of the tester near the switch. If the tester lights up or beeps, the power is still on -- go back to the panel and try a different breaker. If the tester stays silent and dark, you are safe to proceed.
Step 5: Put a piece of tape over the breaker you turned off, or leave a note on the panel. This prevents anyone in the household from accidentally flipping the breaker back on while you are working.
This process takes less time than reading about it. But it is the most critical part of the entire job, and skipping it is the only way this project becomes dangerous. Take it seriously every single time. This same approach to electrical safety also applies when you are looking to save money on your electric bill by doing upgrades yourself.
How Do You Remove the Old Light Switch?
With the power confirmed off, removing the old switch is straightforward.
Step 1: Remove the cover plate. Use your flathead screwdriver to remove the one or two screws holding the cover plate to the wall. Set the plate and screws aside. If the plate is painted or caulked to the wall, score around the edges with a utility knife first to avoid pulling off paint or drywall paper.
Step 2: Remove the switch mounting screws. You will see two screws -- one at the top and one at the bottom of the switch -- securing it to the electrical box in the wall. Remove both screws.
Step 3: Gently pull the switch out of the box. Grip the top and bottom of the switch (not the wires) and carefully pull it straight out. The wires will come with it, and there is enough slack to give you several inches of working room.
Step 4: Test the wires one more time with your voltage tester. Even though you already confirmed the power is off, test every wire you can see. Touch the tester to each wire individually. This redundant safety check is a habit every professional electrician practices, and it takes three seconds.
Step 5: Take a photo. Before you disconnect anything, pull out your phone and take a clear, well-lit photo of how the wires are connected to the old switch. Note which wire is on which screw terminal and which side of the switch they are on. This photo is your insurance policy -- if you get confused during installation, you can refer back to it.
How Do You Identify the Wires?
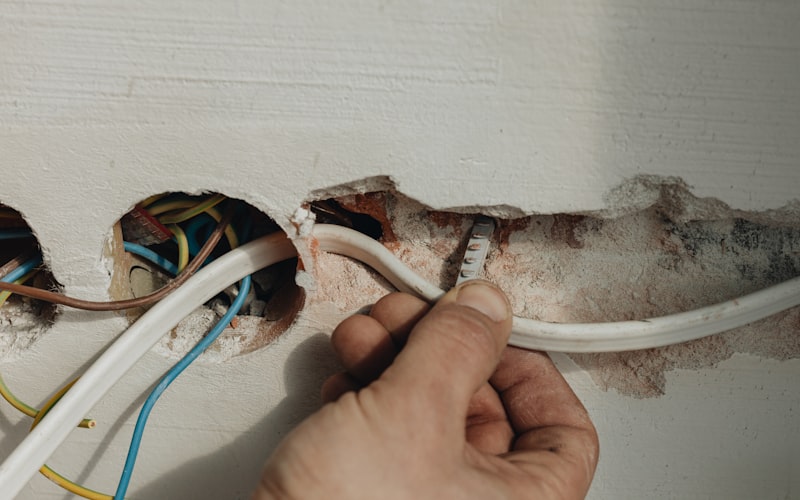
Understanding what each wire does removes the mystery from the process. A standard single-pole light switch (the most common type -- it controls a light from one location) has a very simple wiring setup.
Black wires (hot). These are the "live" wires that carry current. A single-pole switch will have two black wires (or sometimes one black and one red) connected to the screw terminals on the side of the switch. One brings power from the breaker panel, and the other sends it to the light fixture. These connect to the brass or dark-colored screw terminals on the switch.
Green or bare copper wire (ground). This is the safety ground wire. It connects to the green screw on the switch. The ground wire provides a safe path for electricity to flow if something goes wrong, preventing shocks.
White wires (neutral). In most single-pole switch boxes, the white neutral wires are connected to each other with a wire nut and are not attached to the switch at all. You typically do not need to touch them. However, some newer smart switches require a neutral wire connection -- if you are installing a smart switch, check the manufacturer's instructions.
If your wires are all the same color (common in older homes), the photo you took earlier becomes even more important. Label them with tape before disconnecting so you know which wire goes where.
How Do You Install the New Light Switch?
This is the payoff. With your wires identified and your old switch removed, installing the new one is essentially the process in reverse.
Step 1: Disconnect the wires from the old switch. Loosen each screw terminal by turning it counterclockwise until the wire slips free. If the wires are connected via push-in connectors (small holes in the back of the switch), insert a small flathead screwdriver into the release slot next to the hole while pulling the wire out. Set the old switch aside.
Step 2: Inspect the wire ends. Look at the exposed copper at the end of each wire. If the wire ends are nicked, corroded, or the copper hooks are mangled, use your wire strippers to snip off the damaged section and strip about 3/4 inch of fresh insulation. Clean, bright copper makes the best connections.
Step 3: Connect the ground wire first. Find the green screw on your new switch. Bend the bare copper ground wire into a clockwise hook (so it wraps in the direction the screw tightens), loop it around the green screw, and tighten the screw firmly. The wire should be snug under the screw head with no loose copper exposed.
Step 4: Connect the hot wires. Take your two black (or black and red) wires and connect them to the brass or dark-colored screw terminals on the new switch -- one wire per terminal. On a standard single-pole switch, it does not matter which black wire goes on which brass terminal. Bend each wire into a clockwise hook, loop it around the screw, and tighten securely. Make sure no bare copper is exposed beyond the screw head.
Step 5: Carefully fold the wires back into the electrical box. Accordion-fold the wires neatly so they fit behind the switch without pinching or crimping. Push the switch back into the box until it sits flush with the wall surface.
Step 6: Secure the switch with the mounting screws. Drive the top and bottom screws into the electrical box. Most switches have elongated screw slots that let you adjust the switch up or down slightly so it sits perfectly level. Use a small level or eyeball it against the cover plate.
Step 7: Attach the new cover plate. Place the cover plate over the switch and secure it with the screws. Tighten gently -- overtightening can crack plastic plates.
Step 8: Restore power and test. Go back to the breaker panel, remove your tape, and flip the breaker back on. Return to the switch and flip it. Your light should turn on and off cleanly with a satisfying click. Test it several times. If the light works reliably, you are done.
That is the entire process. From start to finish, it takes most first-timers about 20 minutes. Your second switch replacement will take half that.
What If You Are Installing a Dimmer Switch?
Dimmer switches follow the same basic process with a couple of minor differences. Instead of screw terminals, most modern dimmers have pre-attached wire leads (pigtails) that you connect to your house wiring using wire nuts.
Step 1: Follow the same power-off and removal process described above.
Step 2: Connect the green wire lead from the dimmer to the ground wire in the box using a wire nut. Twist the bare ends together clockwise, then twist the wire nut on tightly.
Step 3: Connect each black wire lead from the dimmer to one of the black wires in the box. For a single-pole dimmer, it does not matter which black dimmer lead goes to which black house wire. Strip about 3/4 inch of insulation from each house wire if needed, hold the ends together, twist clockwise, and secure with a wire nut. Give each connection a firm tug to make sure it is solid.
Step 4: Fold the wires in, mount the switch, attach the cover plate, and restore power.
One important note: dimmer switches are slightly bulkier than standard toggles, so fitting the wires back into the box can be tighter. Take your time folding the wires neatly. If you are upgrading to dimmable lighting, make sure your bulbs are rated for dimmer use -- not all LED bulbs are dimmable, and using non-dimmable bulbs with a dimmer causes flickering and buzzing.
What About Three-Way Switches?
A three-way switch controls a single light from two different locations -- like the top and bottom of a staircase, or both ends of a hallway. Replacing a three-way switch is only slightly more involved than a single-pole swap, but the wiring must be connected correctly for the circuit to work.
A three-way switch has three screw terminals plus a ground: one "common" terminal (usually a darker color than the other two, often black or dark brass) and two "traveler" terminals (usually brass or silver). The common terminal is the most important one to identify.
Step 1: Before disconnecting the old switch, identify the common terminal. It is usually labeled, colored differently, or marked with "COM" on the switch body. Note which wire is connected to it -- this is critical.
Step 2: Tag the common wire with a piece of tape so you can identify it later.
Step 3: Disconnect all wires and connect them to the new switch in the same positions. The common wire goes to the common terminal, and the two traveler wires go to the two traveler terminals.
Step 4: Connect the ground wire to the green screw, mount the switch, and restore power.
If you mix up the traveler wires, the switch will still work -- just in reverse (up for off, down for on). Simply swap the two traveler wires and the problem is solved. If you have a reliable cordless drill, it can speed up removing and replacing the cover plate screws, though a simple screwdriver works perfectly fine.
What Are Common Mistakes to Avoid?
Even though this is a beginner-friendly project, a few common mistakes can trip you up.
Skipping the voltage test. This is the number one mistake and the only genuinely dangerous one. Never assume the power is off just because you flipped a breaker. Always verify with a voltage tester. Mislabeled breaker panels are extremely common, especially in older homes.
Overtightening screw terminals. You want the screw snug against the wire, not cranked down with all your strength. Overtightening can break the wire, crack the switch housing, or strip the screw. Firm and snug is the target.
Leaving exposed copper outside the screw terminal. If bare copper wire is visible beyond the screw head, it is a potential short circuit or shock hazard. Either trim the wire shorter or reposition the hook so all bare copper is under the screw.
Forcing wires into a crowded box. Cramming wires in can loosen connections, damage insulation, or create hot spots. Take the time to fold wires neatly. If the box is too small for the new switch (common with smart switches and dimmers), you may need to install a larger electrical box -- a project that is still DIY-friendly but takes a bit more work.
Using the wrong switch type. Make sure you buy a single-pole switch if the light is controlled from one location, or a three-way switch if it is controlled from two locations. The packaging will clearly state which type it is. Using the wrong type means the circuit will not work correctly.
These mistakes are easy to avoid once you know about them, and they are the same principles that apply to any DIY home repair project -- take your time, use the right tools, and double-check your work.
How Much Money Does Replacing a Switch Yourself Save?
The savings are significant when you consider how simple the job is.
A basic single-pole light switch costs $1 to $3. A rocker-style switch runs $3 to $7. A dimmer switch costs $10 to $25. A smart switch runs $20 to $50.
Hiring an electrician for this same job typically costs $100 to $200, including the service call fee. In many areas, the minimum charge just to show up is $75 to $100 before any work is done.
If you have five switches in your home that need replacing -- a common scenario in an older house -- doing them yourself saves $400 to $900 compared to hiring out. That is enough to fund a nice set of tools, a weekend project, or a chunk of your next home improvement upgrade.
The cost savings compound when you build a habit of handling small fixes yourself. Between fixing a loose door handle, patching a hole in drywall, and replacing light switches, you can easily save over $1,000 a year in handyman fees. And every repair you do yourself builds the skills and confidence for the next one.
Frequently Asked Questions
Do you need to turn off the whole house to replace a light switch?
No. You only need to turn off the individual circuit breaker that controls the switch you are working on. Your breaker panel has separate breakers for different areas and circuits in your home. Identify the correct breaker (by label or by testing), switch it off, and verify with a voltage tester. The rest of your home's power stays on. If your breakers are not labeled, this is a great time to map them out and label each one -- it takes about 20 minutes with a helper and saves confusion on every future project.
Can you replace a light switch without rewiring?
Absolutely. A standard switch replacement uses the existing wires exactly as they are. You are simply disconnecting the wires from the old switch and connecting them to the new switch in the same positions. No new wiring, no cutting into walls, no permits. The only exception is if you are installing a smart switch that requires a neutral wire and your switch box does not have one -- in that case, you would need to run a neutral wire, which is a more advanced project best left to an electrician.
Is it safe to replace a light switch yourself?
Yes, as long as you turn off the power at the breaker and verify it is off with a non-contact voltage tester before touching any wires. This is the same process electricians use. The voltage tester removes all guesswork. With the power confirmed off, the wires are completely safe to handle. Millions of homeowners replace their own light switches every year without incident. The key is never skipping the power-off verification step.
What is the difference between a single-pole and a three-way switch?
A single-pole switch controls a light from one location -- one switch, one light. This is the most common type in homes. A three-way switch controls a light from two different locations -- for example, switches at both the top and bottom of a staircase that control the same hallway light. The wiring is slightly different (a three-way switch has three screw terminals plus ground, while a single-pole has two plus ground), so you need to buy the correct type. Check the existing switch or count the number of colored screw terminals to determine which type you have.
Final Thoughts
Replacing a light switch is one of the best entry points into DIY electrical work. It is fast, inexpensive, low-risk when done correctly, and delivers an immediate, tangible result every time you walk into the room and flip the switch. That clean click of a new rocker switch -- instead of the mushy wobble of a worn-out toggle -- is a small but real upgrade to your daily experience at home.
The skills you build here transfer directly to other projects. Once you are comfortable turning off a breaker, testing for voltage, and connecting wires to terminals, you have the foundation for installing a ceiling fan, swapping an outlet, or adding a USB charging receptacle. Each project is just a variation on the same basic process.
If you are building your DIY confidence, keep the momentum going. A loose door handle takes ten minutes with a screwdriver. A drywall patch is a weekend afternoon project that makes a wall look brand new. And investing in a solid beginner tool kit means you are ready for whatever your house throws at you next. The more you do, the more you realize that most home repairs are simpler than they look -- and that the money you save by doing repairs yourself adds up remarkably fast.
Get weekly home tips that actually work
Join thousands of homeowners getting practical cleaning hacks, DIY fixes, and money-saving tips every week. Free, and you can unsubscribe anytime.

Written by
Beth SullivanFounder & Editor-in-Chief
Beth Sullivan is the founder of Practical Home Guides. With over a decade of hands-on experience tackling every home challenge imaginable, she started this site to share the practical, no-nonsense solutions she wishes she had found years ago. When she's not testing cleaning hacks or organizing pantries, you'll find her in the garden or working on her next DIY project.
Recommended Products
Looking for specific product recommendations? Check out our tested picks.

Best Cordless String Trimmers (2026 Tested)
Battery-powered string trimmers have caught up to gas. We tested the top models on bermuda, fescue, and overgrown areas to find the picks worth your money.

Best Basement Dehumidifiers (2026 Buyer's Guide)
Damp basements destroy stored items, grow mold, and stink. We tested dehumidifiers for capacity, durability, and energy use to find the picks worth the money.

Best Wet/Dry Shop Vacs (2026 Tested)
Whether you need to clean a flooded basement, dust the garage, or pick up workshop debris, here are the wet/dry shop vacs worth the money.

Best Electric Leaf Blowers (2026 Buyer's Guide)
Cordless and corded electric leaf blowers tested for power, runtime, and noise. Our picks for small yards, large yards, and pro-grade home use.

Best Cordless Lawn Mowers (2026 Spring Buyer's Guide)
Battery-powered mowers have caught up to gas. We tested the top cordless mowers on grass length, slopes, and runtime to find the picks worth your money.

5 Best Cordless Drills for Homeowners (2026)
Find the right cordless drill for home projects without overspending. We compared the top drills for DIYers — here are the 5 best for everyday home use.

Best Home Tool Kits for Beginners (2026)
The best home tool kits for new homeowners and renters. We compare 6 tool sets from basic to comprehensive, so you can handle common repairs without calling a handyman.
Related Articles
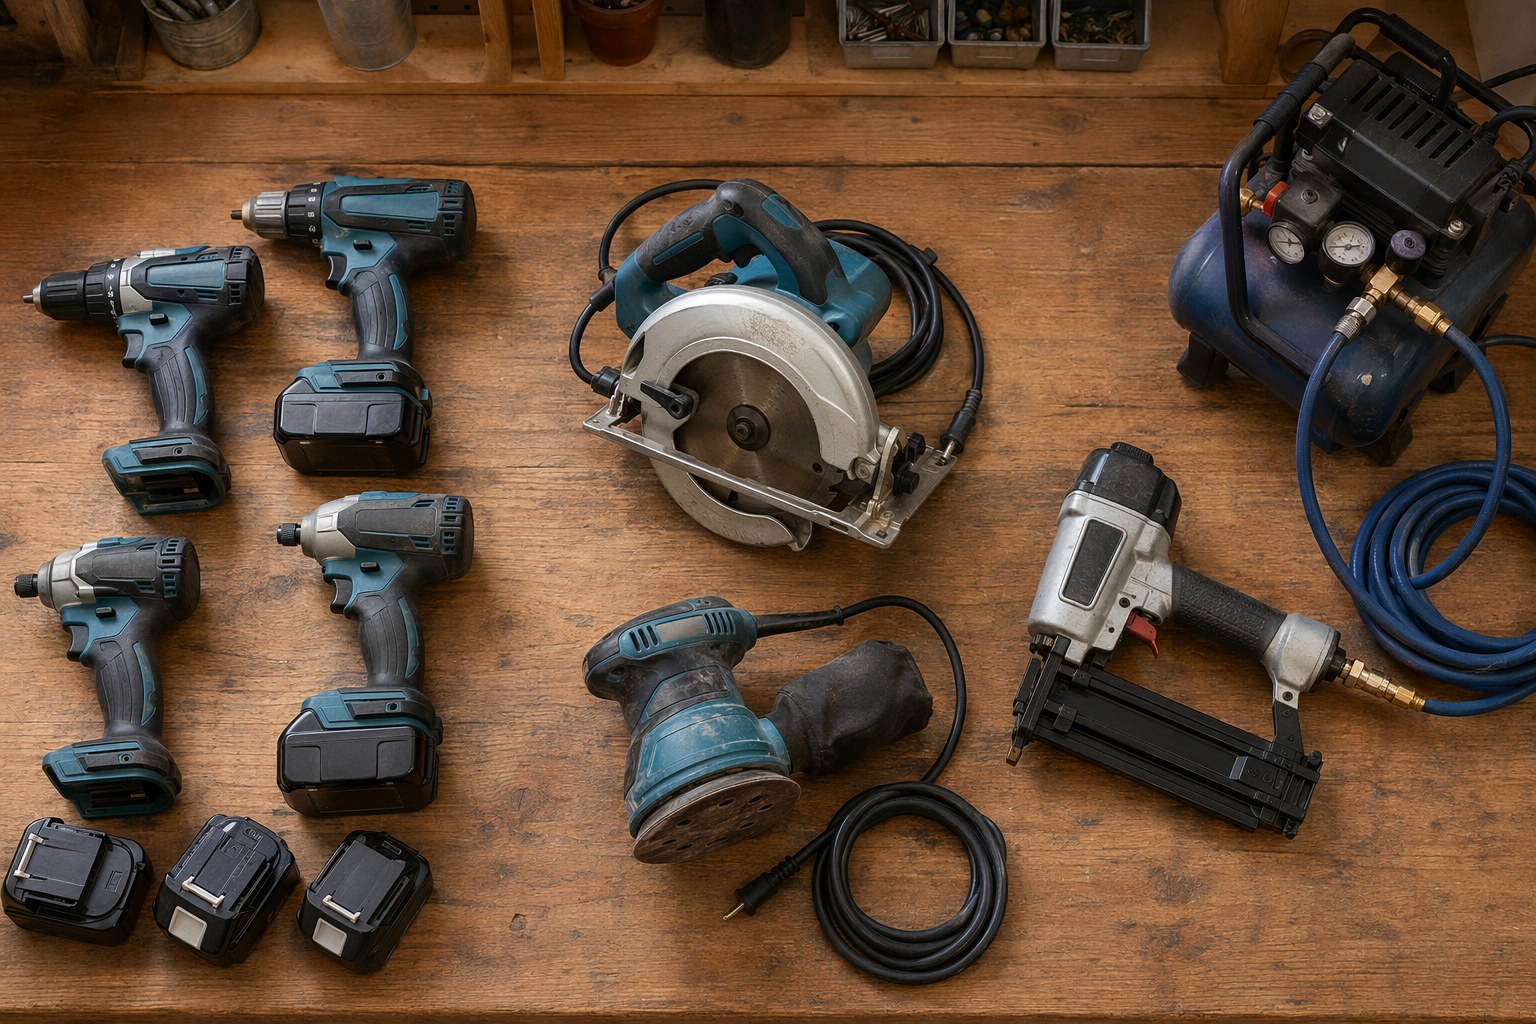
Cordless vs. Corded vs. Pneumatic: The Homeowner's Tool System Buying Guide
Cordless, corded, or pneumatic? A homeowner's guide to choosing a power tool ecosystem (DeWalt, Milwaukee, Makita, Ryobi) with a starter-to-advanced path.
End-of-May Home Audit: Fix 5 Summer Safety Issues Before June Heat
A contractor's final spring safety audit. Five critical ventilation, electrical, plumbing, and cooling checks to fix before extreme June heat hits your home.

Backyard Lighting Design: Create Ambiance for Summer Evenings
An electrician's guide to safe backyard lighting design. Layer string lights, path lights, and uplighting in zones for ambiance plus task lighting that lasts.

Budget Outdoor Dining: Building a Patio Table & Bench Setup
A carpenter's plans for a sturdy 2x4 outdoor dining table and bench set that seats 8, costs about 300 dollars in materials, and lasts 20 years.