Summer Wardrobe Storage: Swap Winter Clothes Without the Wrinkles
This article may contain affiliate links. If you make a purchase through these links, we may earn a small commission at no extra cost to you. Learn more
Quick Answer
Summer Wardrobe Storage: Swap Winter Clothes Without the Wrinkles
Wash everything before storing, fold knits and hang structured pieces, then pack into vacuum bags or breathable bins with cedar and a desiccant packet. The wrinkle and moth damage almost always comes from storing dirty, damp, or carelessly packed clothes, not from the storage method itself.

I have unpacked the winter bins in October and found two very different results over the years. Some years the sweaters come out soft, fresh, and ready to wear. Other years I have pulled out a cashmere cardigan with a deep crease ironed in by eight months of compression, a wool coat that smelled like a basement, and a moth hole the size of a dime in my favorite merino base layer. The difference was never the closet. It was how I packed things in May.
The seasonal swap itself is the easy part, and if you just want the fast version of clearing winter out and bringing summer forward, our step-by-step wardrobe swap guide covers the whole 90-minute routine. This article is about the other half of the job, the half most people rush: storing winter clothes so they survive the summer without wrinkles, musty smells, or pest damage. Get this right once and you save yourself a small fortune in dry cleaning, re-ironing, and replacing ruined pieces.
Why Clothes Come Out of Storage Wrinkled or Ruined
The damage almost never happens in August when the bin is sitting still. It happens in the first ten minutes when you pack it. There are really only four culprits, and once you know them you can defeat all of them.
The first is dirt you cannot see. Body oils, deodorant, perfume, and food residue are invisible on a "clean enough" sweater, but over six months they oxidize, set into permanent yellow stains, and act like a dinner bell for moths. The second is moisture. Packing a slightly damp item, or storing breathable clothes in a humid basement, grows mildew and that distinctive musty smell. The third is bad folding and overpacking, which presses creases in so hard that no amount of steaming fully removes them. The fourth is pests, mainly clothes moths and carpet beetles, which lay eggs in natural fibers and chew holes while everything sits in the dark.
Notice that the storage container is not on that list. You can store clothes perfectly in a cardboard box or ruin them in an expensive bin. Technique beats gear every time.
Step 1: Wash or Clean Everything First (No Exceptions)
This is the rule I am most stubborn about, because it is the one most people skip and the one that causes the most heartbreak. Every single item goes into storage clean, even the sweater you wore once for two hours.
Launder washables according to the care label and make sure they are bone dry before folding. For dry-clean-only pieces, wool coats, suit jackets, structured blazers, take them to the cleaner before you store them, not next fall. They come back fresh, pressed, and protected, and they are ready to wear the day you pull them out. One important warning: have the cleaner remove the thin plastic film they bag clothes in. That plastic traps moisture and off-gasses chemicals that yellow fabric over months. It is meant for the car ride home, not storage.
If a knit is only lightly worn and you would rather not wash it again, at minimum air it out for a full day and spot-treat any collar or underarm areas. But when in doubt, wash. The cost of a wash cycle is nothing compared to a set-in stain you discover in October.
Step 2: The Fold vs. Hang Decision
This single choice prevents most wrinkle problems, and the rule is simple: knits get folded, structured pieces get hung.
Fold these: sweaters, cardigans, sweatshirts, knit dresses, and anything stretchy or heavy. Hanging a knit for months lets gravity pull it into a stretched, shoulder-dimpled mess. Fold them flat or use the file-fold method where each piece stands on its edge so you can see everything at once. Heavy items like sweaters do best folded with as few creases as possible, so fold in thirds rather than tight quarters.
Hang these: wool coats, blazers, suit jackets, and anything tailored or lined. These pieces are built around structure, and folding them puts hard creases through the lapels and shoulders. Use wide, contoured hangers, never thin wire, and slip each garment into a breathable garment bag so dust and moths stay out while air still moves. Clear fabric bags are ideal because you can see what is inside without unzipping.
The mistake I see constantly is hanging everything because it feels tidier, or folding everything because it is faster. Match the method to the garment and you eliminate the deep creases that steaming cannot fix.
Fabric Garment Bags Hanging Clear 2-Pack
Breathable clear garment bags that protect hung coats and blazers from dust and moths while still letting fabric air out. The see-through panel means you can identify each piece without unzipping, and full-length zippers make loading easy.
Check Price on Amazon →Step 3: Choose the Right Container for Each Fabric
Once everything is clean, folded, or bagged, decide how to contain it. There is no single best container, and the right answer depends on the fabric.
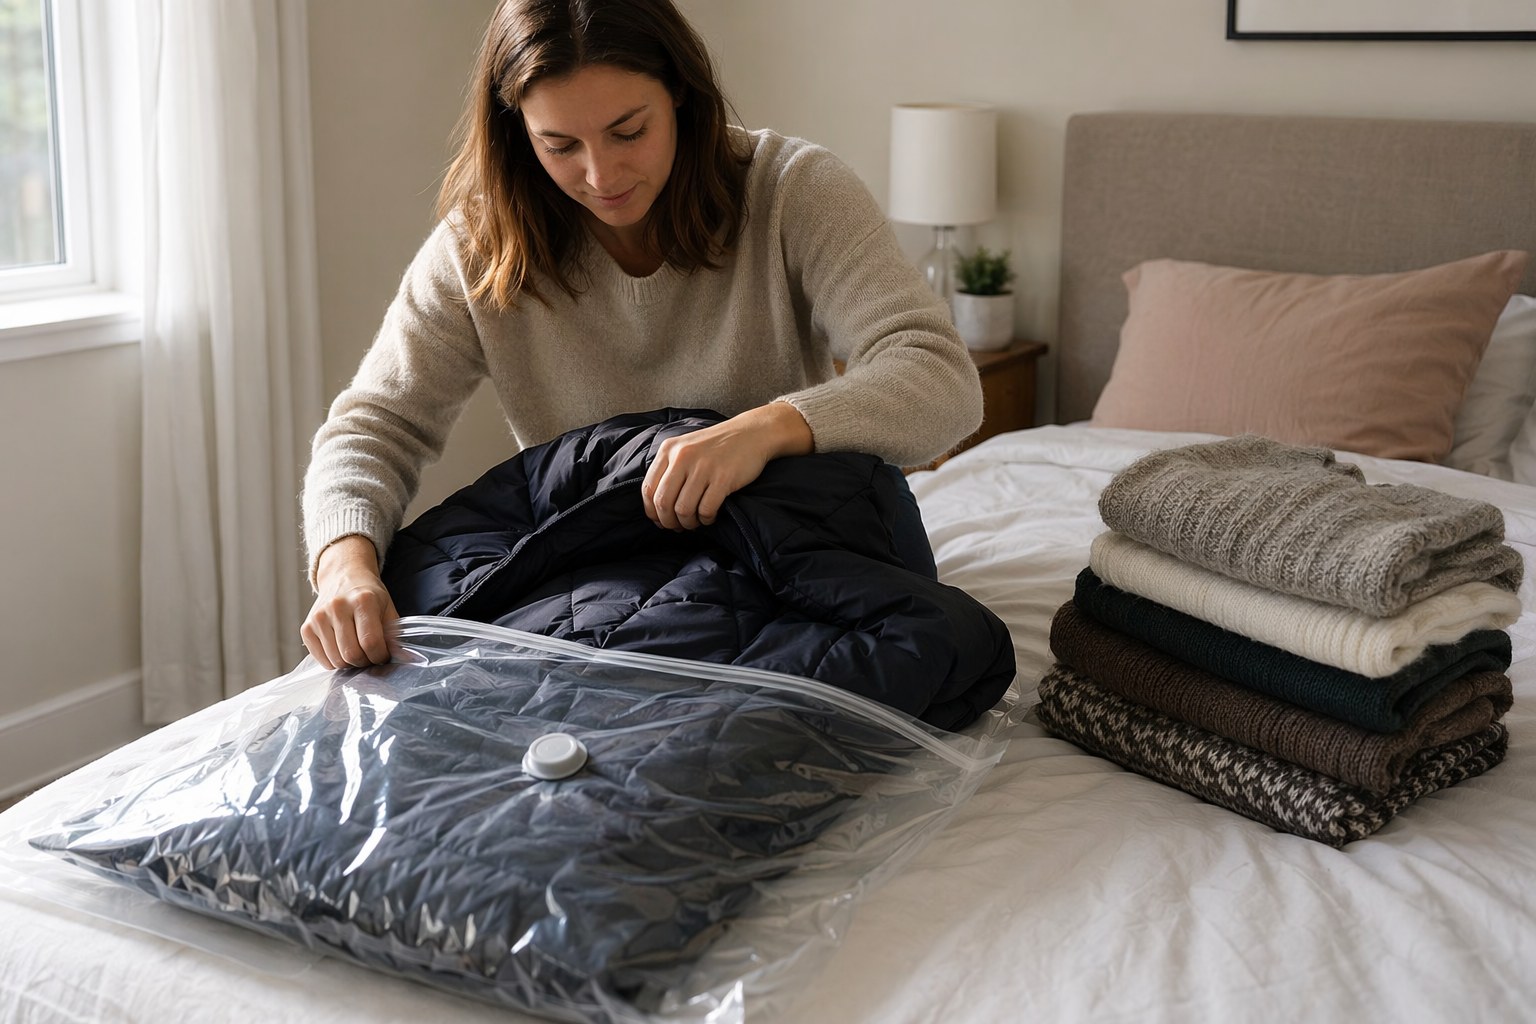
Vacuum storage bags are unbeatable for space. They shrink a pile of parkas and fleece down to about a quarter of its original volume, which is a lifesaver if you store under the bed or on a single shelf. They also seal out moisture and pests completely. But, and this matters, prolonged compression crushes the loft out of delicate fibers. I use vacuum bags for synthetic puffers, fleece, cotton sweatshirts, and bulky blankets, and I keep them away from anything I care about long-term.
Breathable bins and fabric totes are gentler. Natural fibers like wool, cashmere, and silk want a little air circulation, and a fabric tote or a hard bin with the lid resting on rather than fully crushed lets them breathe. The trade-off is that they take more space. My personal system is a mix: vacuum bags for the bulky non-delicates, breathable bins for the good stuff.
Whatever you use, never overstuff. Leave clothes enough room that they are not crammed, because pressure is what presses creases in permanently.
Vacuum Storage Bags 6-Pack XL Size
Extra-large vacuum compression bags that shrink bulky winter coats, fleece, and blankets to about a quarter of their size. Double-zip seals and a one-way valve lock out moisture, dust, and moths, making them ideal for under-bed and high-shelf storage.
Check Price on Amazon →Step 4: Defeat Moths Before They Start
Clothes moths are silent and patient. You will not see the adults; you will see the holes their larvae leave in wool, cashmere, and other animal fibers six months later. The good news is that clean clothes in a sealed container are already most of the battle, because moths are drawn to the food residue and oils on dirty fabric.
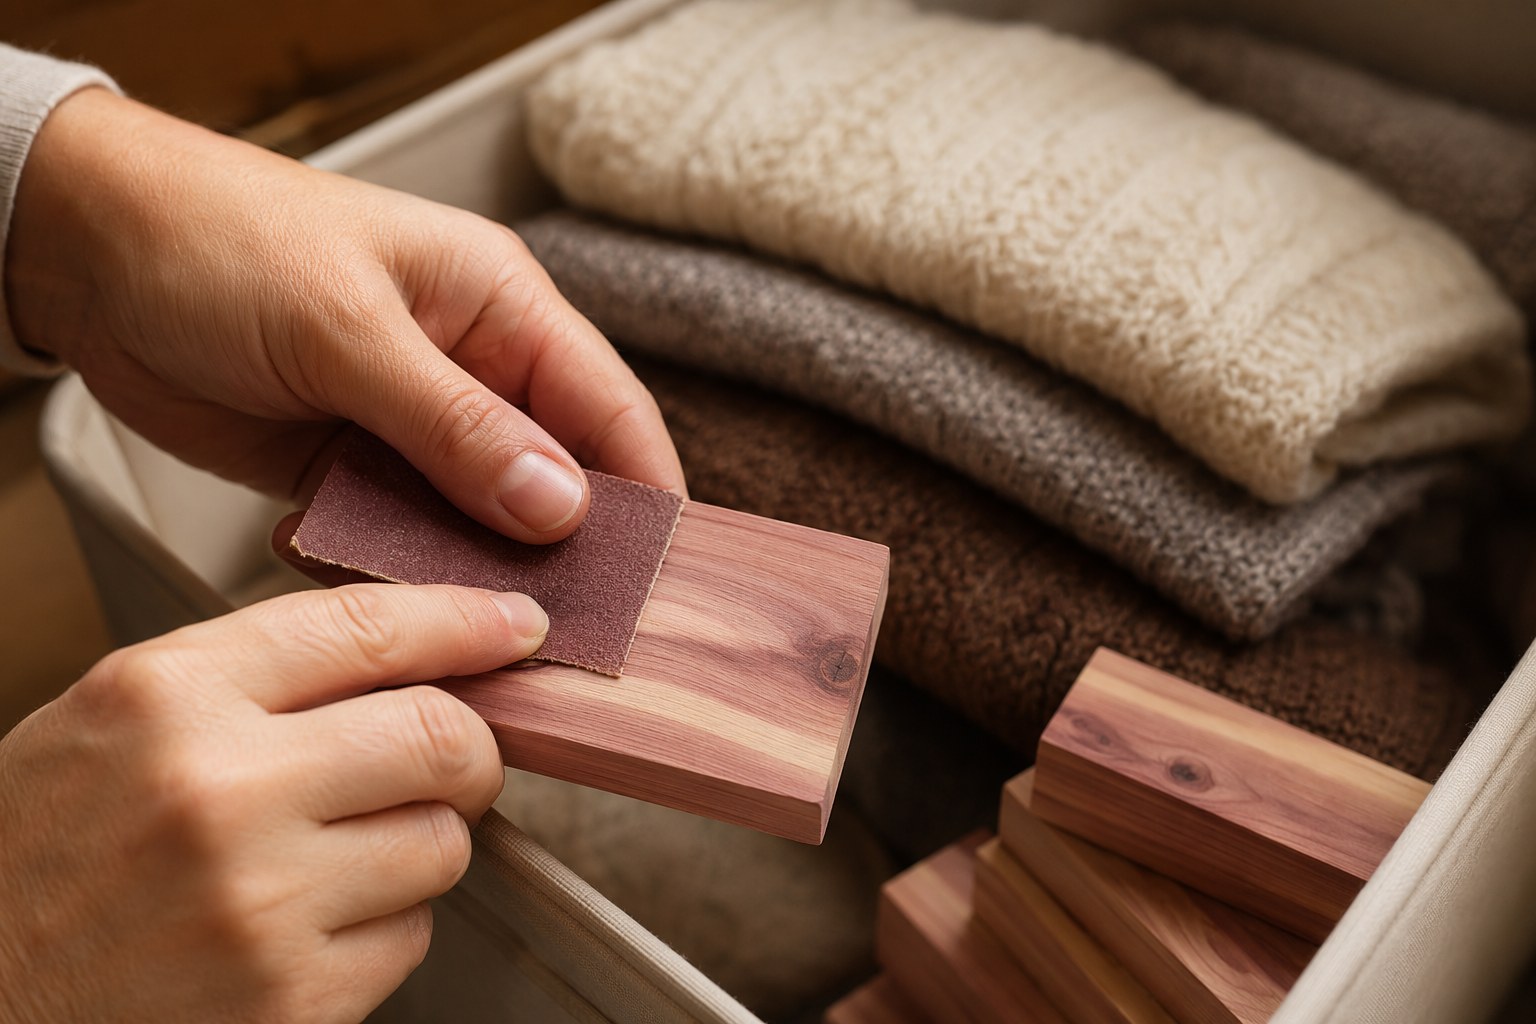
For an added layer, use real cedar. A handful of natural cedar blocks tucked into each bin repels moths through the aromatic oil in the wood, not a chemical pesticide, so it is safe around clothes and noses alike. The catch most people miss: cedar loses its scent in six to twelve months as the surface oils evaporate. Once a year, give each block a quick pass with fine sandpaper to expose fresh wood and the smell comes roaring back. Skip the old-fashioned mothballs. They genuinely work, but they are toxic, and that chemical reek soaks into fabric and lingers for weeks. Cedar and a tightly sealed container do the job without poisoning your closet.
Step 5: Control Humidity Wherever You Store
Moisture is the quiet destroyer. It grows mildew, sets that musty smell, and in a sealed bin it has nowhere to escape. The fix is two-part: store in the right place, and add a moisture absorber.
Choose a storage spot that is cool, dark, and dry. Attics swing brutally hot in summer and can warp synthetic fibers and degrade elastic. Damp basements invite mildew. If a basement is your only option, run a dehumidifier and keep bins up off the concrete floor on a shelf or pallet, since concrete wicks moisture upward. For most homes, a top closet shelf, an interior cabinet, or under the bed in a temperature-stable bedroom is the safest bet.
Inside each sealed bin or vacuum bag, drop in a couple of silica gel desiccant packets. These pull residual humidity out of the trapped air so condensation never forms against your clothes. The large reusable packets are worth it; when they saturate, you bake them in a low oven for an hour to recharge and use them again next season. It is a tiny step that makes the difference between fresh sweaters and that basement smell.
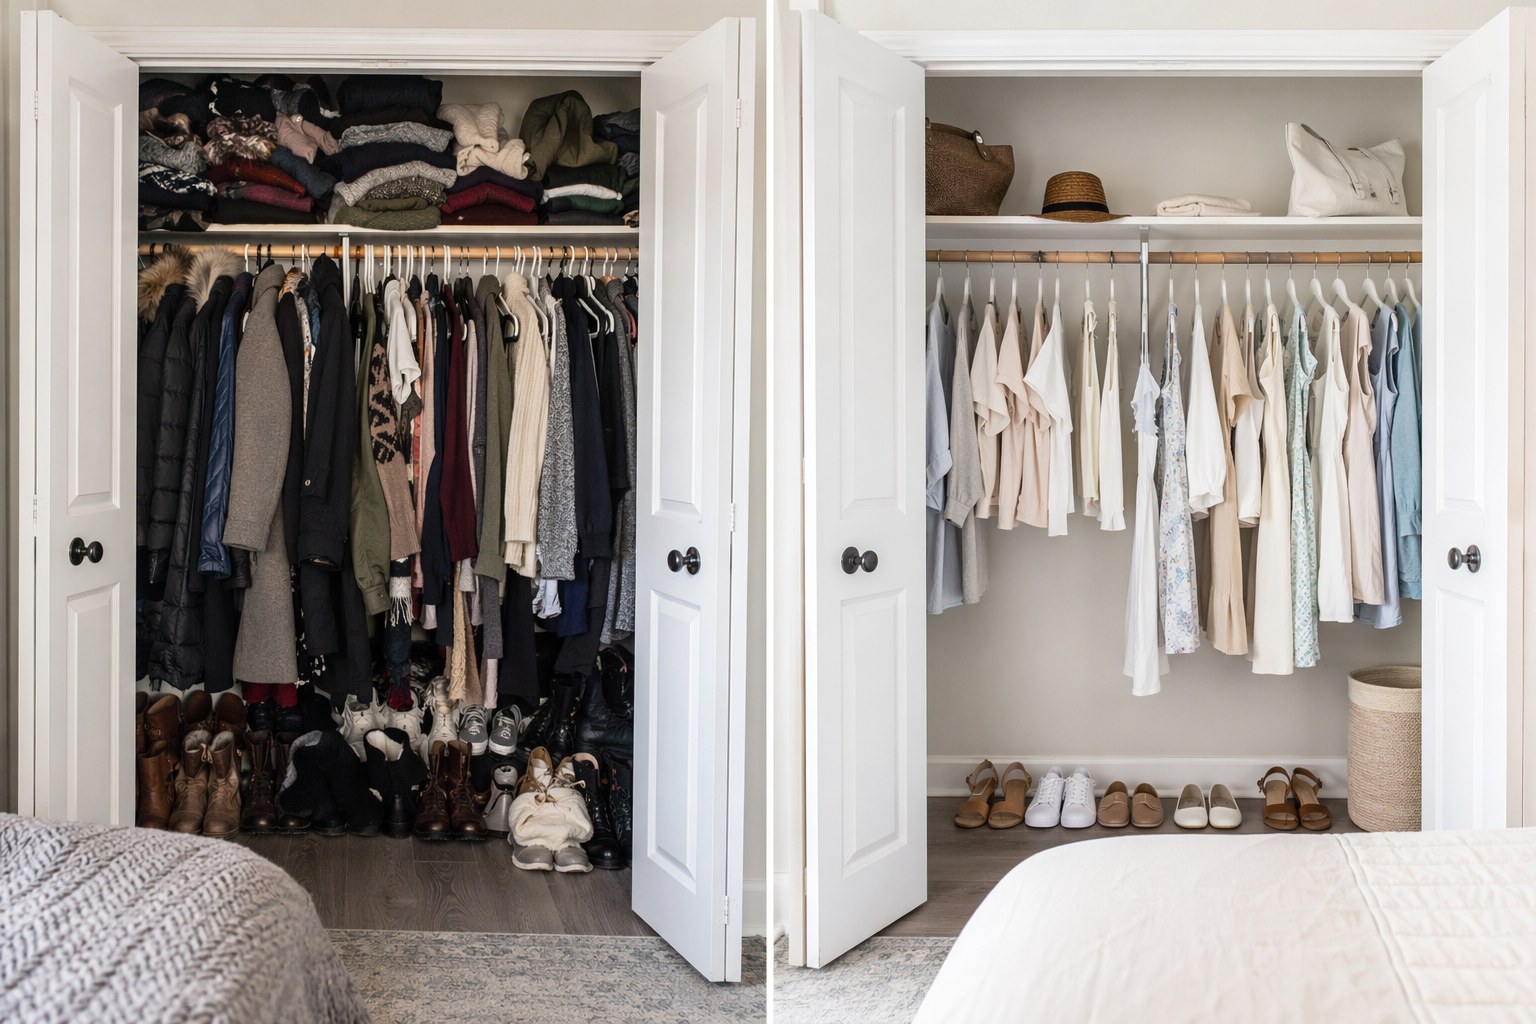
Step 6: Label, and Reorganize the Active Closet
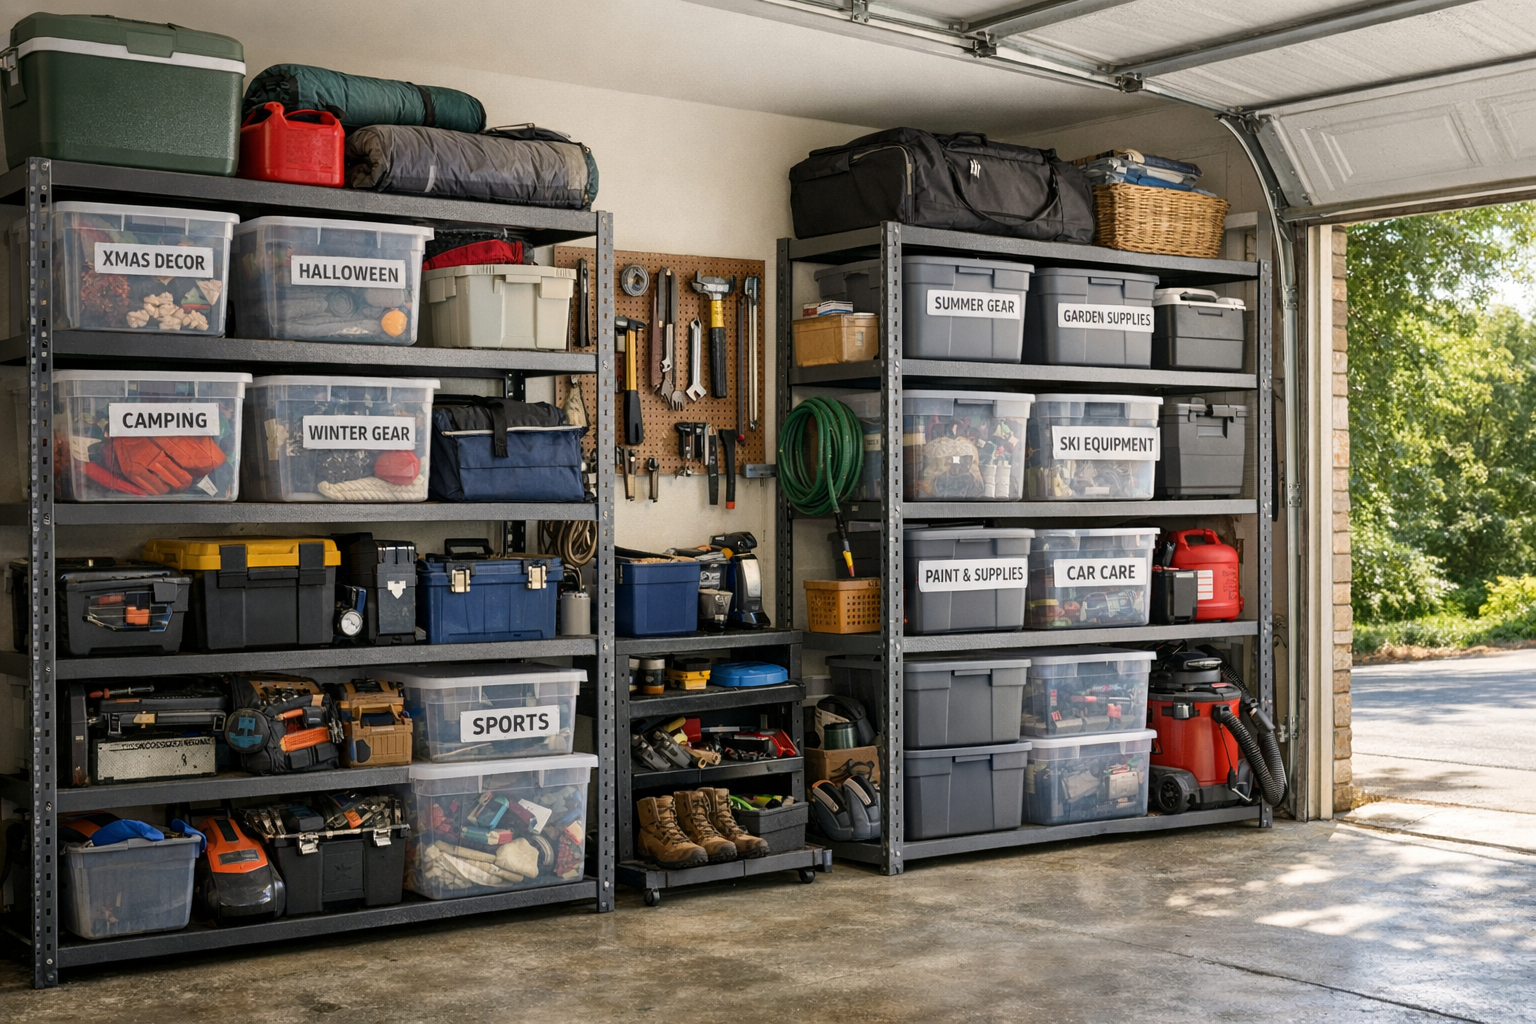
With winter packed away, label every container clearly on at least two sides: category and season, like "Winter Knits 2025-26" or "Wool Coats and Blazers." A label maker is nice but a Sharpie on painters tape is plenty. You will thank yourself when you are staring at a stack of identical bins next fall.
Now reclaim the space. The closet should feel half-empty, which is the whole point. Bring summer pieces to the front, group by type, and add a few closet rod dividers to keep sections from sliding into each other. If your closet runs small to begin with, the vertical and zone tricks in our small closet organization guide will help that summer wardrobe breathe. And since the bedroom is where this whole project lives, it is a natural moment to apply the calm-space principles from our guide on organizing your bedroom for better sleep while everything is already pulled apart.
The same clean-store-label discipline carries straight over to other seasonal jobs. It is exactly the system I use for the linen closet and for holiday decorations, and once it is muscle memory, every seasonal rotation gets faster.
Common Mistakes That Ruin Stored Clothes
- Storing dirty. Invisible oils set into permanent stains and attract moths. Always clean first.
- Leaving the dry-cleaner plastic on. It traps moisture and yellows fabric. Strip it off before storing.
- Hanging knits. Gravity stretches them into a misshapen mess. Fold knits, hang structure.
- Vacuum-sealing delicates. Compression crushes the loft from cashmere, wool, and down. Use breathable bins for those.
- Storing in a damp basement with no moisture control. Mildew and musty smell. Add a desiccant and dehumidifier or store elsewhere.
- Mothballs. Toxic and the smell never leaves. Use cedar instead.
Frequently Asked Questions
How do I get wrinkles out of clothes that have been in storage all season?
Most release with steam. Hang the item in a steamy bathroom for twenty minutes, or run a handheld garment steamer over it, which relaxes fibers without the hard pressing of an iron. For stubborn creases in knits, lay the piece flat and steam from a few inches away. The real fix, though, is prevention: fold knits loosely, hang structured pieces, and never overpack, so the creases never set in the first place.
Are vacuum bags safe for wool and cashmere?
For short-term storage they are fine, but I avoid them for a full season with delicate natural fibers. Months of compression crush the loft and natural spring out of wool, cashmere, and down, and they can come out flat and tired. Use vacuum bags for synthetics, fleece, and cotton, and store your good knits in breathable bins or fabric totes where the fibers can keep a little air.
How do I keep stored clothes from smelling musty?
Three things. Store only completely dry clothes, choose a cool dry spot rather than a damp basement, and drop reusable silica gel desiccant packets into each sealed container to absorb trapped humidity. A cedar block adds a clean natural scent on top. If something already smells musty, wash it, dry it fully, and air the container out before repacking.
Should I store clothes in cardboard boxes?
Only as a last resort. Cardboard is acidic, which can yellow fabric over time, and rodents and insects chew through it easily. If cardboard is all you have, line it with acid-free tissue, seal it well, and add cedar and a desiccant. Hard plastic bins or breathable fabric totes are a much safer long-term choice.
Final Thoughts
The wardrobe swap is one of the most satisfying afternoons in the home calendar, but the payoff is decided by how you pack, not how you clear out. Clean everything, fold the knits and hang the structure, match the container to the fabric, and add cedar plus a desiccant against moths and moisture. Do that, and next October the bins open to fresh, wrinkle-free, hole-free clothes that are ready to wear the same day. That moment, pulling out a sweater that looks exactly as good as the day you put it away, is worth every extra minute you spend this week.
Get weekly home tips that actually work
Join thousands of homeowners getting practical cleaning hacks, DIY fixes, and money-saving tips every week. Free, and you can unsubscribe anytime.

Written by
Beth SullivanFounder & Editor-in-Chief
Beth Sullivan is the founder of Practical Home Guides. With over a decade of hands-on experience tackling every home challenge imaginable, she started this site to share the practical, no-nonsense solutions she wishes she had found years ago. When she's not testing cleaning hacks or organizing pantries, you'll find her in the garden or working on her next DIY project.
Recommended Products
Looking for specific product recommendations? Check out our tested picks.
Best Garage Shelving Systems (2026 Tested)
Wire shelving, freestanding steel, wall-mounted, and overhead — we tested the garage shelving systems that hold real weight without sagging.

5 Best Closet Organizer Systems Under $100 (2026)
Transform your cluttered closet without spending a fortune. We compared the top closet organizer systems under $100 — here are the 5 best for different closet sizes and needs.
Best Storage Bins and Organizers for Every Room (2026)
The best storage bins, baskets, and organizers for closets, pantries, bathrooms, and garages. Practical picks at every price point to get your home organized.
Related Articles

The Complete Home Organization System: A Room-by-Room Master Plan
A room-by-room home organization master plan with a proven system, product picks, and a realistic schedule to organize your entire house without burning out.
Hurricane Season Prep: June 1 Home Readiness Checklist for Coastal Areas
A June 1 hurricane readiness checklist for coastal homes: build your emergency kit, harden the property, and stockpile supplies before the season peaks in fall.

Graduation Gift: Tech Essentials for College Success
The 2026 graduation tech gift list that balances budget and function: laptop, noise-canceling earbuds, power bank, and the upgrades worth your money.

Summer Bedroom Comfort: Cooling Bedding & Sleep Setup Guide
A sleep coach's guide to staying cool in hot weather: breathable bedding, pillow placement, and temperature hacks for better rest from May through August.