Spring Deck & Patio Refresh: Deep Clean + Resealing Guide
This article may contain affiliate links. If you make a purchase through these links, we may earn a small commission at no extra cost to you. Learn more
Quick Answer
Spring Deck & Patio Refresh: Deep Clean + Resealing Guide
Deep clean and reseal your deck every spring in this order: sweep and repair, apply deck cleaner, pressure wash at 1500 PSI with a wide tip, let it dry 48 hours, then seal. The whole job is a weekend, and doing it yearly can add 10 years to your deck's life.
I've been building and restoring wood decks for the better part of two decades, and I'll tell you the single biggest reason decks rot out and get torn down 12 years early: nobody touches them. They get pressure washed once, maybe, the year before the house goes on the market. The rest of the time they sit there soaking up rain, UV, and ground moisture until the boards cup, split, and turn to oatmeal.
A deck is just wood left outside. It needs the same thing your house siding and your car's paint need — a barrier between the material and the weather. The good news is that maintaining one is genuinely a weekend project, it costs less than dinner out for four, and if you do it every spring it will add a solid decade to the life of the structure. I've walked onto 25-year-old decks that look 8 because the owner sealed them religiously, and I've condemned 11-year-old decks because the owner never did.
This is the exact process I use on jobs. Clean, repair, seal, in that order, with the timing that actually matters.
When to Do This (and Why Spring Wins)
You want air temps between 50 and 90 degrees, no rain in the 24 hours before you clean or the 48 hours after you seal, and out of direct blazing sun if you can swing it. Spring is ideal in most of the country because the wood has dried out from winter, pollen and mildew are at their worst (so the cleaning is satisfying), and you reseal before the brutal summer UV that does most of the fading.
Do not seal in fall right before freeze. And do not, under any circumstances, seal wet wood. Trapping moisture under a sealer is how you get a peeling, blotchy mess that you'll be sanding off next year. Patience on the drying step is everything.
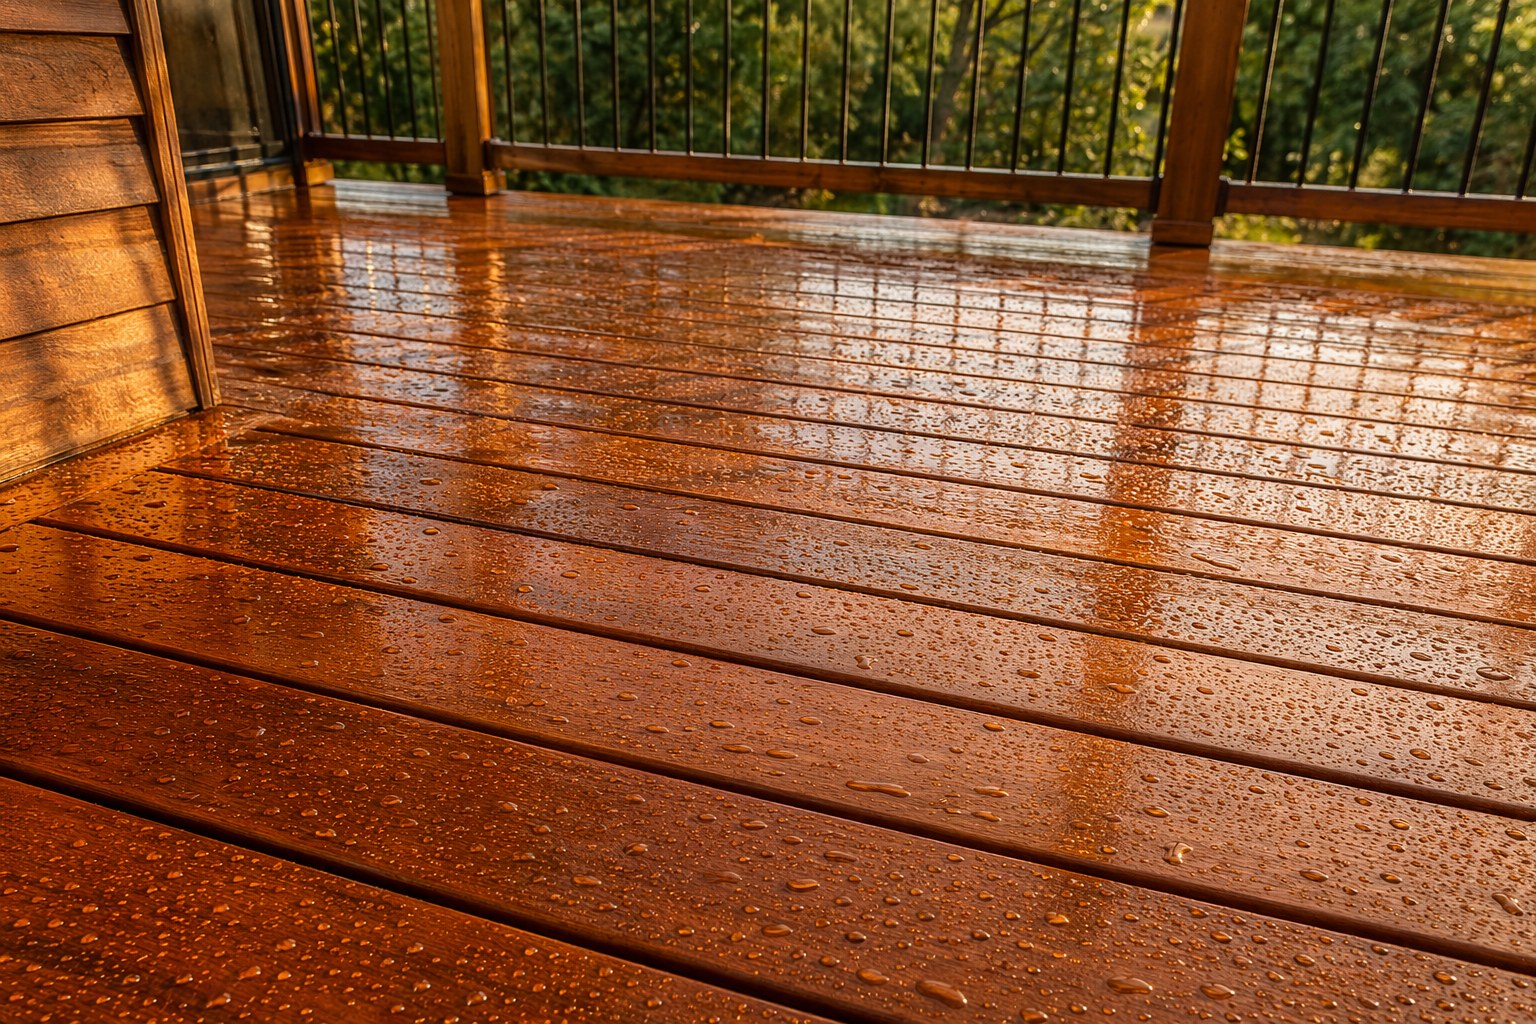
One quick test before you commit to the whole project: splash a cup of water on the deck. If it beads up and sits there, your existing seal is still working and you may only need a clean this year. If it soaks straight in and darkens the wood, the seal is gone and it's time for the full treatment.
Step 1: Clear, Inspect, and Repair First
Pull everything off the deck — furniture, the grill, planters, the rug. This is also the perfect moment to give that stuff a once-over, since you'll have a clean slate to put it back on. I usually deep clean the patio furniture and refresh the outdoor rugs the same weekend so everything goes back down looking like new at once.
Now get on your hands and knees and inspect. You're looking for:
- Popped or rusted nails and screws. Replace nails with deck screws — nails work their way out as wood expands and contracts. A rusty fastener is a sign of trapped moisture.
- Soft, spongy boards. Press a screwdriver into suspect spots. If it sinks in easily, that board is rotting and needs replacing before you seal over it.
- Splinters, cracks, and raised grain. Sand the worst spots with 60 to 80 grit so the cleaner and sealer go on evenly.
- Wobbly railings. Tighten every connection. A loose railing is a liability, not a cosmetic issue.
Replace any board you're unsure about now. Sealing a rotten board just hides the problem until someone's foot goes through it. Drive in any protruding screws so the surface is flush before you wash.
Step 2: Gear Up and Apply Deck Cleaner
Here's where people skip a step and regret it. The pressure washer is not your cleaner — it's your rinse. The actual mildew, gray oxidized wood fibers, and ground-in grime come off with a chemical deck cleaner first. Blasting dirty wood with high pressure alone just drives the grime in and shreds the surface.
Before you touch anything, put on protection. Deck cleaners are alkaline or contain sodium percarbonate, and the spray bounces back at you. I wear safety goggles and chemical-resistant gloves on every single job — eye injuries from cleaner splashback are the most common deck-maintenance ER visit, and they're 100 percent preventable.
Deck Cleaner Concentrated Pre-Wash
A concentrated oxygen-based deck cleaner that lifts mildew, algae, and gray oxidation before you rinse. One bottle covers a typical deck and won't kill nearby plants like bleach does.
Check Price on Amazon →Mix the concentrate per the label, wet down any plants and grass around the deck first (so the runoff doesn't burn them), and apply the cleaner with a pump sprayer or a roller. Work in sections of about 100 square feet so it doesn't dry out. Let it dwell for 10 to 15 minutes — you'll literally watch the mildew lift — and give heavily stained spots a scrub with a stiff synthetic-bristle brush. Do not let the cleaner dry on the wood; mist it if it's evaporating fast.
Safety Goggles and Gloves Protection
Sealed wraparound goggles and chemical-resistant nitrile gloves. The cheapest insurance on this entire project — wear them for both the cleaning and the sealing steps.
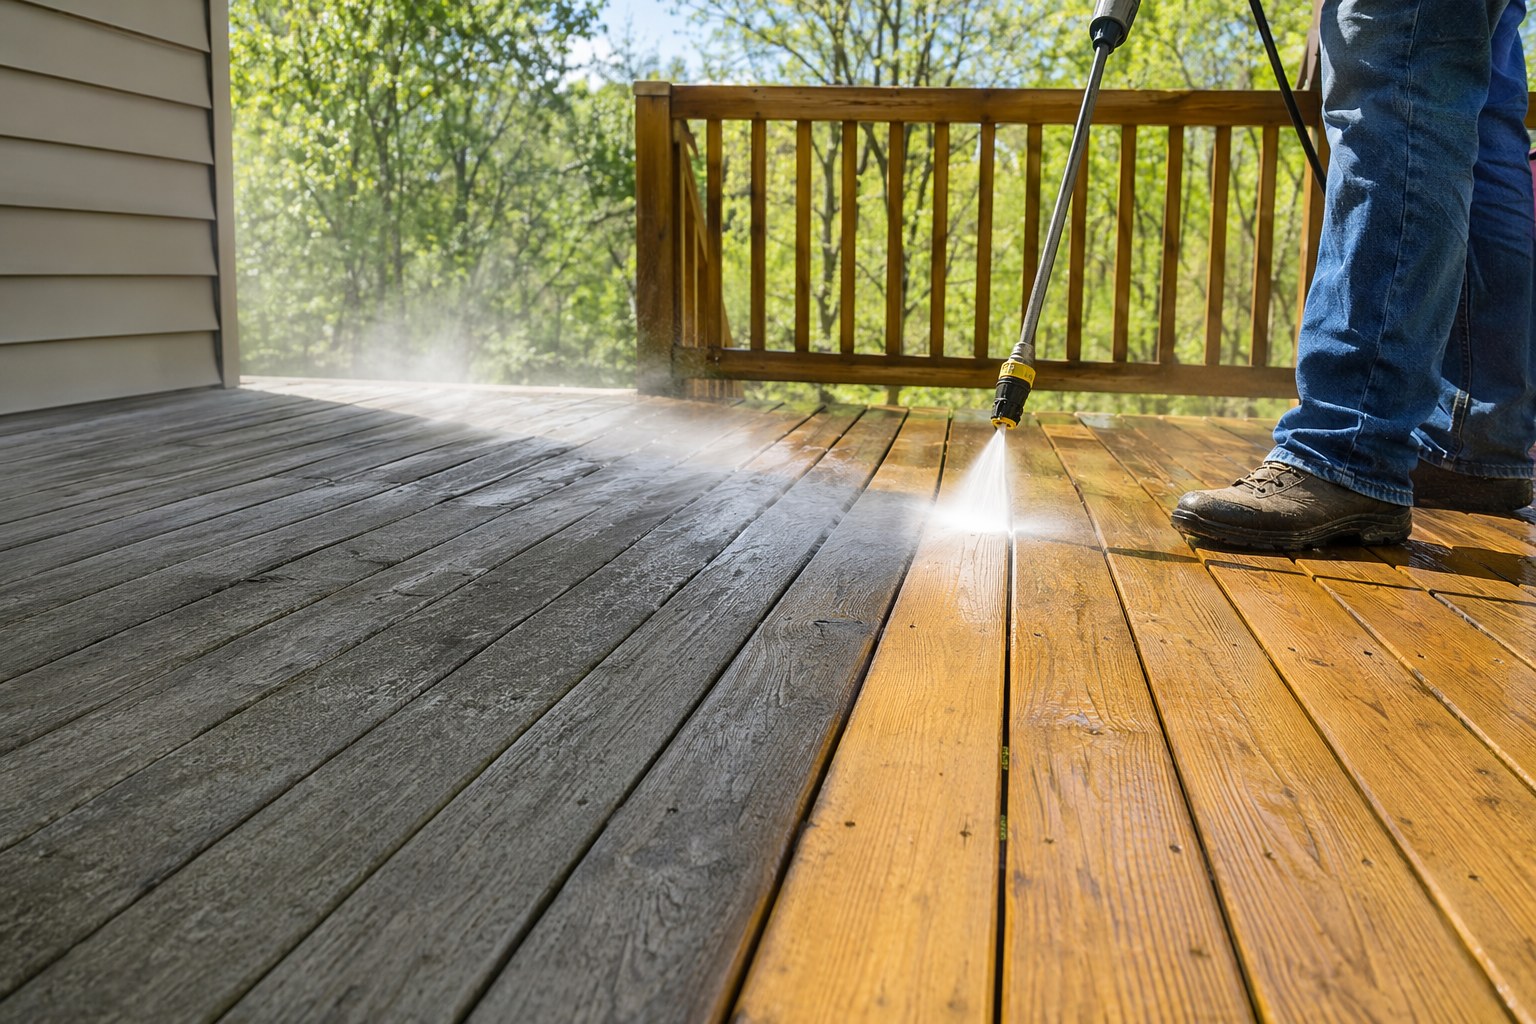
Check Price on Amazon →Step 3: Pressure Wash the Right Way
Now the satisfying part. But this is also where I see the most expensive mistakes — I've replaced entire decks that someone "cleaned" by carving wavy gouge marks into every board with a too-narrow tip held too close. Pressure washing wood is a finesse job, not a power contest.
The two things that matter are PSI and tip angle. For a deck, you want a wide fan tip and you want to keep the wand moving.
Pressure Washer 3000 PSI Gas Powered
A gas unit gives you the reach and consistent pressure to clean a full deck in one session without an extension cord. Run it at the low end of its range for wood — you do not need all 3000 PSI.
Check Price on Amazon →My rules for not destroying your deck:
- Use a 25-degree (green) or 40-degree (white) tip. Never the 0-degree red tip on wood. A swappable adjustable nozzle set makes this easy.
- Stay around 1200 to 1500 PSI for softwood (pressure-treated pine, cedar, redwood). Hardwoods can take a bit more. Even with a 3000 PSI machine, you control effective pressure with distance and tip choice.
- Keep the tip 8 to 12 inches off the wood and move with the grain in long, overlapping passes, like you're using a wide paintbrush. Never stop in one spot.
- Feather your strokes so you don't leave a hard start/stop line on each board.
Power Washer Nozzle Set Adjustable
A quick-connect set with multiple fan angles plus a soap tip. The 25 and 40 degree tips are the only two you should use on a deck — keep the 0 degree tip in the box.
Check Price on Amazon →Work board by board or section by section, top of the deck toward the stairs, so you're always rinsing toward where the water drains. If you've never run a pressure washer before, my pressure washer buyer's guide crowd tends to ask which machine to start with — for a deck, a mid-range unit run conservatively beats a monster machine swung carelessly every time. Do the railings and stairs too; they take the most foot and weather abuse.
Step 4: Let It Dry — Really Dry
This is the step that separates a job that lasts five years from one that peels in five months. Wood that looks dry on the surface can be soaked underneath. After pressure washing, you need to wait a minimum of 48 hours of dry weather before you seal — 72 in humid climates or if the wood was really saturated.
The moisture-meter test is the pro move: you want the wood reading under 15 percent. No meter? Use the water-bead test again. If a few drops soak in within seconds, the wood is dry enough and thirsty enough to accept sealer. If it beads, wait longer. Sealing damp wood traps the moisture, and that's what causes the cloudy, peeling failures everyone blames on "bad sealer."
Use this drying window to knock out the other spring outdoor jobs you've been putting off — it's a great time to remove the rust from your grill grates before the wood is ready for you again.
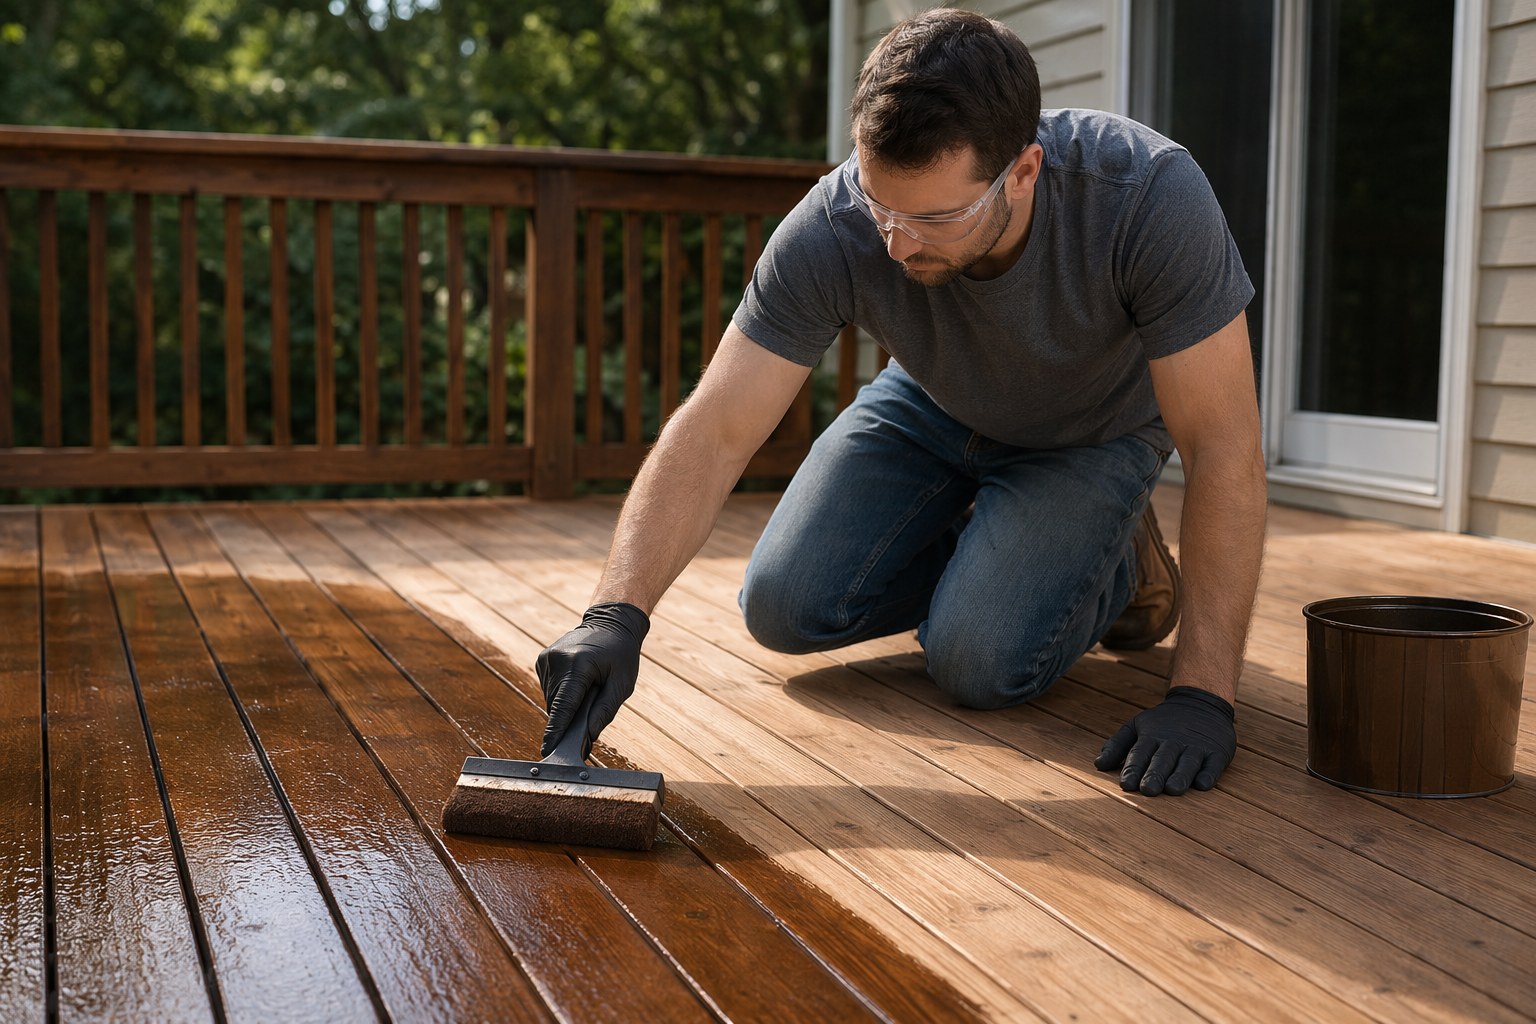
Step 5: Seal or Stain
Once the wood is dry, sealing is the fast and rewarding part. First, pick your finish:
- Clear sealer soaks in, repels water, and shows off the wood grain — but offers the least UV protection, so you'll reapply most often.
- Semi-transparent stain is what I use on most jobs. It adds enough pigment to block UV (pigment is what stops graying and fading) while still letting the grain show. Best balance of looks and longevity.
- Solid stain is basically deck paint. Maximum protection and color, but it hides the grain and eventually peels rather than fading, which makes future maintenance harder.
Deck Stain Sealer Exterior Wood Treatment
An oil-based semi-transparent stain-and-sealer in one. Penetrates the wood, blocks UV graying, and beads water for two to three years. One gallon covers roughly 200 to 300 square feet on bare wood.
Check Price on Amazon →Apply with the grain using a stain pad or a wide brush — I avoid rollers on decks because they leave the finish sitting on top instead of working it into the grain. Do two or three boards end to end at a time so you keep a wet edge and avoid lap marks. Don't over-apply; if the wood won't absorb any more, wipe the excess with a rag so it doesn't get tacky. Get the railings, the stair treads, and especially the end grain of every board, because the cut ends drink up water the fastest and rot first.
Two thin coats beat one thick coat every time. Let the first coat soak in per the label (usually a couple of hours) before the second.

Curing and Putting It Back Together
Keep foot traffic off the deck for at least 24 hours, and wait 48 to 72 hours before you drag furniture back on. Setting heavy planters on a finish that hasn't cured leaves permanent marks. While you wait, this is the perfect moment to take care of the rest of your warm-weather prep — getting ahead on things like preventing summer AC breakdowns means you're not scrambling when the first 95-degree day hits.
How Often, and What It Buys You
Here's the honest schedule. Do the water-bead test every spring. A horizontal deck in full sun typically needs resealing every two to three years; a covered or shaded deck can stretch to four. But you should clean it every single year regardless, because mildew and ground-in grime degrade the wood and the finish even when the seal is technically still holding.
A typical 200 to 300 square foot deck costs me about $60 to $120 in cleaner and sealer per cycle, plus a weekend. Compare that to $8,000 to $15,000 to tear out and rebuild a rotted deck, and the math isn't close. Stay on the cleaning every spring and the sealing every couple of years, and you'll genuinely get an extra decade out of the structure. That's the whole secret — there's no trick, just the discipline to spend one weekend a year on it.
Frequently Asked Questions
Can I clean and seal on the same day? No. The wood has to dry a full 48 hours (72 in humidity) after washing before it will accept sealer properly. Sealing damp wood is the number one cause of peeling and cloudiness. Plan it as a two-weekend-day project with the drying time in between.
Bleach or a dedicated deck cleaner? Use a dedicated oxygen-based deck cleaner. Chlorine bleach kills your surrounding plants and grass, can corrode fasteners, and breaks down wood lignin over time, leaving the surface fuzzy. The percarbonate-based cleaners do the job without the collateral damage.
Do I need to strip old stain before resealing? If the old finish is just faded but still bonded, a good cleaning is enough and you can recoat. If it's peeling, flaking, or blotchy, you need to strip it with a deck stripper and possibly sand, because new sealer won't bond to a failing layer. Solid stains almost always need stripping; semi-transparent and clear usually just need a clean.
Is a gas pressure washer overkill for one deck? Not if you also clean siding, driveways, and patios, which most homeowners do. A 3000 PSI gas unit gives you reach and steady pressure, and you simply run it conservatively on wood using a 25 or 40 degree tip and good distance. The machine's max rating doesn't matter as long as you control it.
Get weekly home tips that actually work
Join thousands of homeowners getting practical cleaning hacks, DIY fixes, and money-saving tips every week. Free, and you can unsubscribe anytime.

Written by
Marcus ChenDIY & Home Repair Editor
Marcus Chen spent fifteen years as a licensed general contractor in the Pacific Northwest before joining Practical Home Guides full time. He specializes in plumbing, electrical, and weekend warrior projects that save homeowners thousands. Marcus has personally tested every tool he recommends in his own century-old fixer-upper.
Recommended Products
Looking for specific product recommendations? Check out our tested picks.

Best Cordless String Trimmers (2026 Tested)
Battery-powered string trimmers have caught up to gas. We tested the top models on bermuda, fescue, and overgrown areas to find the picks worth your money.

Best Basement Dehumidifiers (2026 Buyer's Guide)
Damp basements destroy stored items, grow mold, and stink. We tested dehumidifiers for capacity, durability, and energy use to find the picks worth the money.

Best Wet/Dry Shop Vacs (2026 Tested)
Whether you need to clean a flooded basement, dust the garage, or pick up workshop debris, here are the wet/dry shop vacs worth the money.

Best Electric Leaf Blowers (2026 Buyer's Guide)
Cordless and corded electric leaf blowers tested for power, runtime, and noise. Our picks for small yards, large yards, and pro-grade home use.

Best Cordless Lawn Mowers (2026 Spring Buyer's Guide)
Battery-powered mowers have caught up to gas. We tested the top cordless mowers on grass length, slopes, and runtime to find the picks worth your money.

5 Best Cordless Drills for Homeowners (2026)
Find the right cordless drill for home projects without overspending. We compared the top drills for DIYers — here are the 5 best for everyday home use.

Best Home Tool Kits for Beginners (2026)
The best home tool kits for new homeowners and renters. We compare 6 tool sets from basic to comprehensive, so you can handle common repairs without calling a handyman.
Related Articles
Cordless vs. Corded vs. Pneumatic: The Homeowner's Tool System Buying Guide
Cordless, corded, or pneumatic? A homeowner's guide to choosing a power tool ecosystem (DeWalt, Milwaukee, Makita, Ryobi) with a starter-to-advanced path.
End-of-May Home Audit: Fix 5 Summer Safety Issues Before June Heat
A contractor's final spring safety audit. Five critical ventilation, electrical, plumbing, and cooling checks to fix before extreme June heat hits your home.

Backyard Lighting Design: Create Ambiance for Summer Evenings
An electrician's guide to safe backyard lighting design. Layer string lights, path lights, and uplighting in zones for ambiance plus task lighting that lasts.
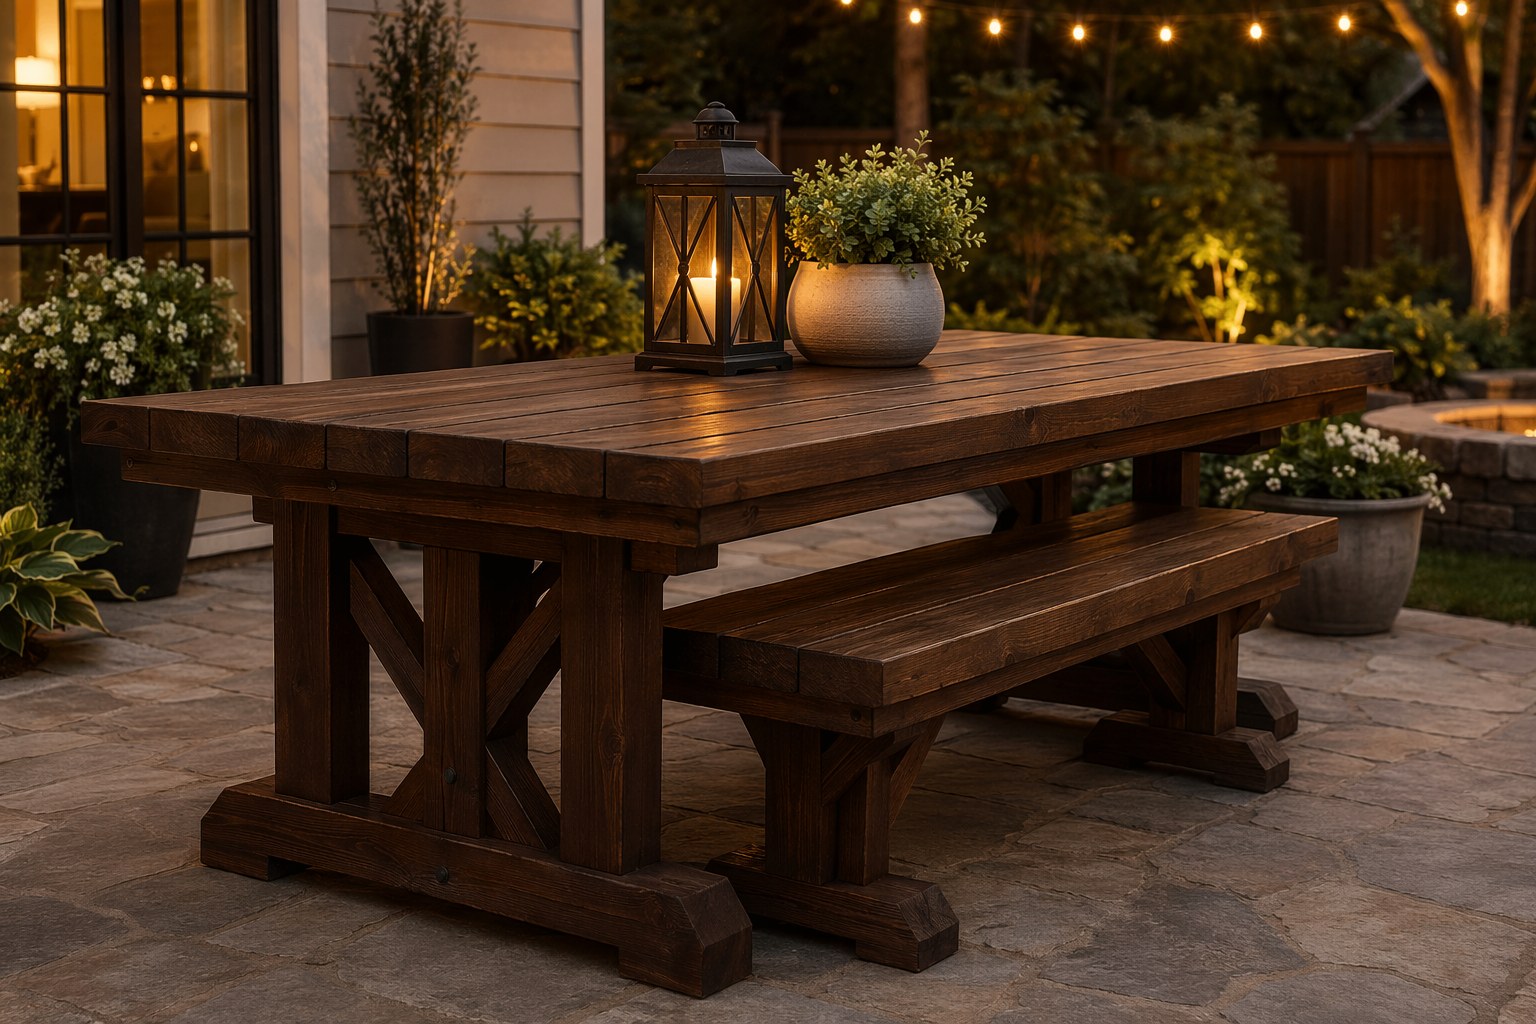
Budget Outdoor Dining: Building a Patio Table & Bench Setup
A carpenter's plans for a sturdy 2x4 outdoor dining table and bench set that seats 8, costs about 300 dollars in materials, and lasts 20 years.