How to Fix Peeling Paint (Interior Walls and Ceilings)
This article may contain affiliate links. If you make a purchase through these links, we may earn a small commission at no extra cost to you. Learn more
Quick Answer
How to Fix Peeling Paint (Interior Walls and Ceilings)
To fix peeling paint, start by scraping off all loose and flaking paint with a putty knife or paint scraper. Sand the edges smooth, clean the surface, apply a high-quality bonding primer, and repaint with two thin coats. Addressing the underlying cause -- whether moisture, poor prep, or incompatible paint layers -- is the key to preventing the problem from returning.
How to Fix Peeling Paint (Interior Walls and Ceilings)
Peeling paint is one of those problems that starts small and gets worse fast. A tiny flake near the bathroom ceiling becomes a palm-sized patch of curling paint within a few weeks. Before you know it, the damage has spread across half the wall and your room looks like it belongs in an abandoned building rather than a lived-in home.
The frustrating part is that peeling paint almost never happens because of bad luck. There is always an underlying cause -- moisture, poor surface preparation before the last paint job, or incompatible paint layers. If you just slap fresh paint over the peeling area without addressing that root cause, you will be doing this repair again in six months.
The good news is that fixing peeling paint is a straightforward DIY project that requires no specialized skills. With the right preparation, a quality primer, and a little patience, you can restore your walls and ceilings to a smooth, professional finish that lasts for years. This guide walks you through the entire process from diagnosis to final coat.
What Causes Paint to Peel on Interior Walls and Ceilings?
Before you pick up a scraper, you need to understand why the paint is peeling in the first place. Fixing the symptom without addressing the cause is a guaranteed path to repeat failure.
Moisture is the most common culprit. Bathrooms, kitchens, laundry rooms, and any space with high humidity are prime candidates for peeling paint. When moisture gets behind the paint film -- either from steam, condensation, or a leak -- it breaks the bond between the paint and the surface. If you have noticed mold growing alongside the peeling paint, check out our guide on how to remove mold from a bathroom ceiling before you start repainting.
Poor surface preparation during the previous paint job is the second most common cause. Paint applied over dust, grease, glossy surfaces, or chalky old paint never bonds properly and will eventually lose its grip.
Incompatible paint layers cause adhesion failure. Latex paint applied directly over old oil-based paint without a bonding primer will peel because the two formulations expand and contract at different rates. This is especially common in older homes where oil-based paint was standard.
Low-quality paint and bad application conditions round out the list. Bargain paint with lower resin content is more prone to cracking and peeling, and paint applied in a room that was too cold, too hot, or too humid may not cure properly.
What Tools and Materials Do You Need to Fix Peeling Paint?
Having everything ready before you start prevents frustrating trips to the hardware store mid-project. Here is your complete supply list.
Tools:
- Paint scraper or 5-in-1 painter's tool for removing loose paint
- Sanding block or sanding sponge (medium and fine grit)
- Putty knife (2-inch and 4-inch)
- Drop cloths or plastic sheeting
- Painter's tape
- Tack cloth or damp rags
- Paint tray and roller frame
- Roller covers (3/8-inch nap for smooth walls, 1/2-inch for textured)
- Angled sash brush (2 or 2.5 inch) for cutting in
- Step ladder (especially for ceiling work)
- Dust mask and safety glasses
Materials:
- Lightweight spackling compound or joint compound for filling gouges
- Bonding primer (oil-based or shellac-based for problem areas)
- Interior latex paint in your chosen color and finish
- Fine-grit sandpaper (150 and 220 grit)
If you are building your tool collection from scratch, a basic home tool kit for beginners covers the screwdrivers, putty knives, and other essentials you will use across many projects. The painting-specific items -- scraper, brushes, rollers, and primer -- typically cost $30 to $50 total at any hardware store.
Zinsser Bulls Eye 1-2-3 Plus Primer
A high-adhesion bonding primer that sticks to glossy, chalky, and previously painted surfaces without sanding. Blocks stains, seals porous repairs, and provides excellent adhesion for topcoats. Works over oil-based and latex paint -- the best all-purpose primer for peeling paint repairs.
Check Price on Amazon →How Do You Prepare the Surface Before Repainting?
Surface preparation is the single most important step in this entire process. Skip it or rush it, and the new paint will peel just as badly as the old paint did. Take your time here -- the prep work is where the real repair happens.
Step 1: Protect the room. Lay drop cloths over furniture and floors. If you are working on a ceiling, tape plastic sheeting over anything directly below the repair area.
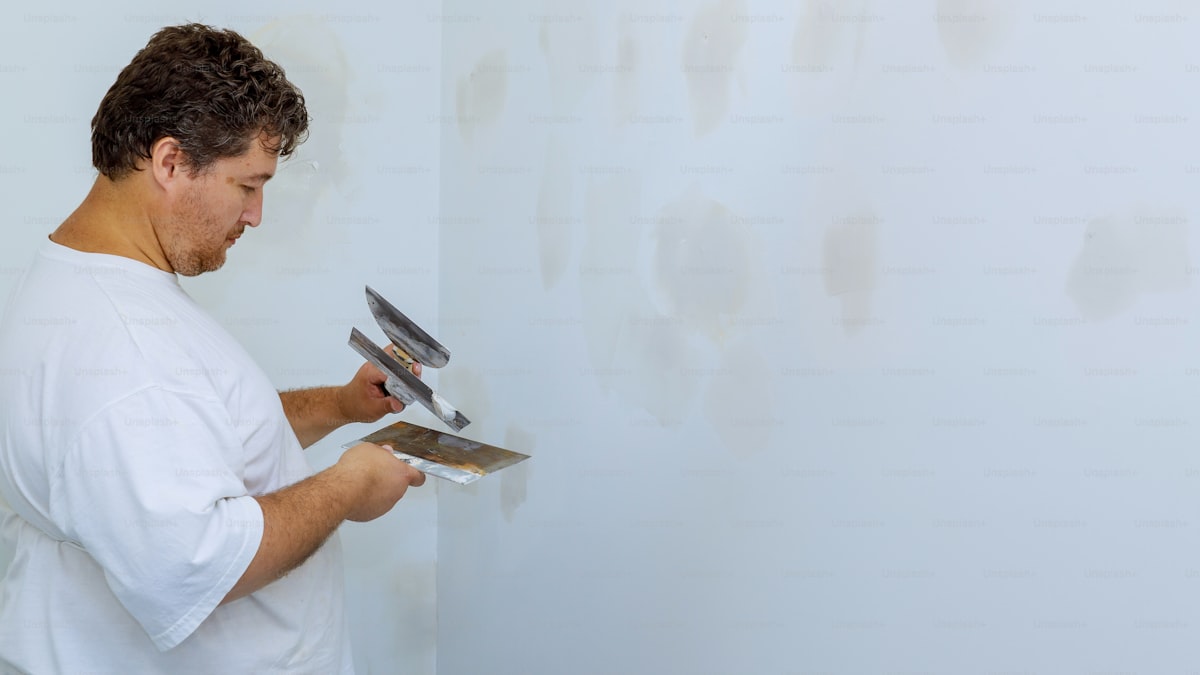
Step 2: Scrape off all loose paint. Using your paint scraper or 5-in-1 tool, scrape away every bit of loose, cracked, flaking, or bubbling paint. Press firmly and scrape until you reach paint that is solidly adhered to the surface. Work the scraper at a low angle to avoid gouging the drywall or plaster underneath.
Step 3: Feather the edges. Sand the transitions between scraped areas and intact paint with a medium-grit sanding sponge (120 to 150 grit). The goal is a gradual, feathered transition with no hard ridges. Run your hand across the edge -- if you can feel a step, keep sanding.
Step 4: Repair any damage underneath. Scraping often reveals dents, gouges, or crumbling drywall paper. Fill these with lightweight spackling compound, pressing it in with a putty knife and smoothing it flush. If you have larger damaged areas, our guide on how to patch a hole in drywall covers the complete technique.
Step 5: Let the spackle dry, then sand again. After the compound has dried (usually 1 to 2 hours), sand smooth with 150-grit sandpaper followed by 220-grit.
Step 6: Clean the entire surface. Wipe down the repair area with a damp cloth or tack cloth to remove all dust and sanding residue. For kitchens or bathrooms, wash with warm water and a TSP substitute to remove grease. Let the surface dry completely before priming.
How Do You Prime Over Peeling Paint Repairs?
Primer is the bridge between your repair work and the finished paint. It seals the surface, creates a uniform base, and ensures the topcoat adheres properly. Skipping primer on a peeling paint repair is like building a house without a foundation -- everything looks fine at first, but it will not last.
Step 1: Choose the right primer. For most peeling paint repairs, a high-adhesion bonding primer is the best choice. Products like Zinsser Bulls Eye 1-2-3 Plus, Kilz Adhesion, or GRIPPER bond to chalky, glossy, and previously painted surfaces. If you suspect moisture caused the peeling, use a shellac-based primer like Zinsser B-I-N -- it blocks stains and seals moisture damage better than latex-based primers.
Step 2: Cut in with a brush. Using an angled sash brush, apply primer around edges, corners, trim, and areas the roller cannot reach. Extend the primer 2 to 3 inches beyond the scraped area onto the intact paint for full coverage of the transition zone.
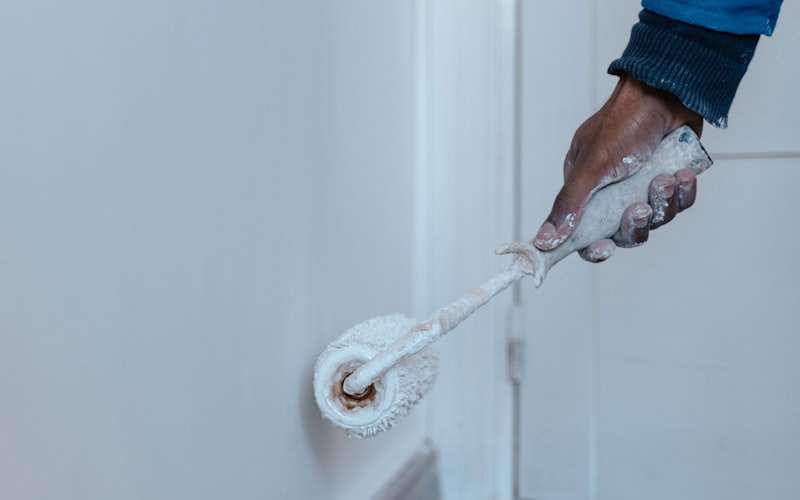
Step 3: Roll the primer over the repair area. Load your roller with primer, roll off excess on the tray grate, and apply in smooth, even strokes. Cover the entire scraped area plus a few inches of overlap. One coat is usually sufficient, but a second coat helps if the surface is porous or stained.
Step 4: Let the primer dry completely. Most latex primers are ready for topcoat in two to four hours. Shellac-based primers dry within 45 minutes. Do not rush this step -- applying paint over uncured primer leads to the same adhesion problems you are trying to fix.
If you are dealing with a situation where moisture originally caused the peeling, make sure you have addressed the moisture source before priming. Fix the leak, improve ventilation, or add an exhaust fan. Otherwise, moisture will work its way behind the new primer and paint, and you will be right back where you started. The same principle applies when you fix a drafty window -- sealing the source of the problem matters more than patching the symptom.
How Do You Repaint the Repaired Area for a Seamless Finish?
Painting is the rewarding final step. A few techniques make the difference between a visible repair and a wall that looks like it was never damaged.
Step 1: Choose the right paint and sheen. Match the existing paint color and sheen as closely as possible. If you have leftover paint from the original job, use it -- but test it first, as color can shift in the can over time. For bathrooms and kitchens, use a satin or semi-gloss finish. For ceilings, flat or matte hides imperfections best.
Step 2: Cut in around the repair area. Using your angled brush, paint the edges, corners, and tight spots first. Blend at least 6 to 8 inches beyond the primed area to avoid a visible line where new paint meets old.
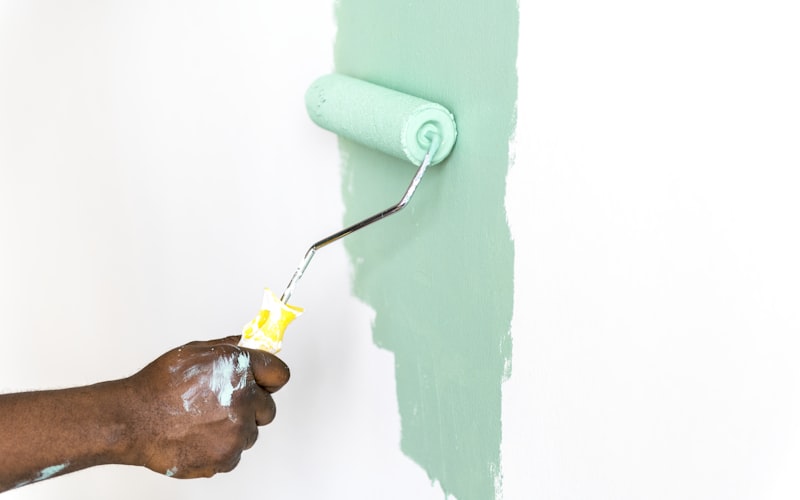
Step 3: Apply the first coat with a roller. Load your roller lightly and apply paint in a "W" pattern, then fill in with even, overlapping strokes. Maintain a wet edge by working quickly enough that each stroke blends into the last before the paint starts to dry.
Step 4: Let the first coat dry, then apply a second coat. Two thin coats always produce a better result than one thick coat. Allow the first coat to dry for 2 to 4 hours before applying the second.
Step 5: Remove tape while the final coat is still slightly tacky. Pull painter's tape at a 45-degree angle while the paint is still slightly tacky. Waiting until it is fully dry risks peeling the fresh paint away with the tape.
For a complete breakdown of professional painting technique -- from loading the roller to avoiding lap marks -- check out our full guide on how to paint a room like a pro. The techniques you learn there will make every future painting project faster and more polished.
What About Peeling Paint on Ceilings -- Is the Process Different?
Ceiling work follows the same scrape-sand-prime-paint process, but the logistics are more demanding. Here are the key differences.
The scraping is messier. Paint flakes fall directly onto you. Wear safety glasses, a dust mask, and a hat. Cover the entire floor with drop cloths.
Use extension poles. A pole sander and extension pole for your roller let you work from the ground for most of the ceiling, saving the ladder for cutting in along edges. This reduces fatigue and produces more consistent results.
Primer adhesion matters even more. Gravity pulls on every coat of paint, so use a high-adhesion primer in thin, even coats. For widespread peeling, prime the entire ceiling rather than just repaired spots to prevent visible sheen differences.
Use ceiling-specific paint. Ceiling paints are formulated to be thicker and drip-resistant. They dry to a flat finish that hides imperfections. Work in sections and maintain a wet edge to prevent lap marks that become glaringly visible on a flat, light-colored ceiling.
What Are the Most Common Mistakes When Fixing Peeling Paint?
Avoiding these pitfalls saves you time, money, and the frustration of doing the job twice.
Painting over loose paint. Fresh paint applied over peeling paint will peel too. Every flake, bubble, and loose edge must come off before you prime and paint.
Skipping the primer. Bare surfaces exposed by scraping have different porosity than painted areas. Without primer, the topcoat absorbs unevenly and may not bond properly. This is one of those situations where saving money on home repairs means doing the job right the first time.
Not identifying the root cause. If moisture caused the peeling and you do not fix the moisture problem, the new paint will fail the same way.
Using the wrong primer for the surface. Latex primer over old oil-based paint will recreate the adhesion problem. Test with denatured alcohol on a cotton ball -- if the paint softens, it is latex. If not, it is oil-based and needs an oil-based or shellac-based primer.
Applying paint too thick. Heavy coats sag, drip, and create a film more prone to cracking than two thin coats.
Ignoring the feathering step. Hard edges where scraped areas meet intact paint create visible ridges that show through the finish. Sand those transitions smooth.
How Do You Prevent Peeling Paint From Coming Back?
Once you have put in the work to fix peeling paint, a few preventive measures keep the problem from returning.
Control humidity in moisture-prone rooms. Run bathroom exhaust fans during showers and for at least 20 minutes afterward. Use a range hood when cooking. Persistent moisture issues in the bathroom often go hand in hand with other maintenance tasks -- like caulking your bathtub to prevent water from seeping behind the tub surround.
Use the right paint for the environment. Flat paint does not hold up in high-moisture areas. Use satin or semi-gloss finishes in bathrooms, kitchens, and laundry rooms.
Always prime bare surfaces. Any time you expose bare drywall, plaster, or wood, prime it before painting.
Invest in quality paint. Premium paints contain higher concentrations of resins and binders that create a tougher, more flexible film. The $15 to $20 difference per gallon is nothing compared to redoing a room because bargain paint failed.
Do not paint in extreme conditions. Most interior paints need temperatures between 50 and 85 degrees Fahrenheit and moderate humidity for proper curing.
Clean walls before repainting. A quick wipe-down with a damp cloth removes the dust and grime that weaken adhesion. In kitchens, degrease with a TSP substitute.
Frequently Asked Questions
Can you paint over peeling paint without scraping?
No. Painting directly over peeling paint is one of the most common mistakes, and the results are predictable -- the new paint peels right along with the old paint, sometimes even faster because the added weight accelerates the failure. You must scrape off all loose, flaking, and bubbling paint, sand the edges smooth, and prime the exposed surface before repainting. There are no shortcuts that produce lasting results.
How do you tell if old paint is oil-based or latex?
Rub a small, inconspicuous area with a cotton ball soaked in denatured alcohol or rubbing alcohol. If the paint softens, gets tacky, or transfers to the cotton ball, it is latex (water-based). If the paint is unaffected and the cotton ball stays clean, the paint is oil-based. This test matters because latex paint applied directly over oil-based paint without a bonding primer will not adhere properly and will eventually peel. Older homes built before the mid-1980s are more likely to have oil-based paint on interior surfaces.
Is peeling paint dangerous or a health hazard?
In homes built before 1978, peeling paint may contain lead, which is a serious health hazard -- especially for children and pregnant women. Do not sand or scrape paint in a pre-1978 home without first testing it for lead using a lead paint test kit. If lead is present, follow EPA-recommended lead-safe work practices or hire a certified lead abatement professional. In newer homes, peeling paint is not toxic but still creates dust and debris that can irritate respiratory passages, so wearing a dust mask and safety glasses is always a smart precaution.
How much does it cost to fix peeling paint yourself versus hiring a professional?
A DIY repair for a single wall typically costs $30 to $60 for materials -- primer, paint, spackle, sandpaper, and basic tools. If you already own brushes and rollers, the cost drops to $15 to $30. Hiring a professional painter typically costs $200 to $500 per wall or ceiling, and $500 to $1,200 or more for a full room with significant peeling. Doing it yourself saves a substantial amount, and the skills transfer directly to future projects.
Final Thoughts
Peeling paint looks bad, but it is not a difficult problem to solve. The repair process is logical and forgiving -- scrape, sand, patch, prime, paint. Every one of those steps is something you can learn in minutes and master with a single weekend project.
The most important lesson is that peeling paint is always a symptom of something else. Moisture, poor preparation, incompatible paint layers, or low-quality materials are the real problems. Fix the cause, and your repair will last a decade or more. Ignore the cause, and no amount of fresh paint will save you from doing the same job again next year.
If this is your first time tackling a paint repair, start with the smallest peeling area in your home to build confidence and practice the technique before taking on an entire ceiling or a large wall. The skills you develop here -- surface prep, priming, and painting -- are the same skills you will use for dozens of other home improvement projects, from patching drywall to painting an entire room like a pro.
Grab your scraper, lay down a drop cloth, and get started. A few hours of work this weekend gives you walls and ceilings that look fresh, clean, and professionally finished -- and the satisfaction of knowing you did it yourself.
Get weekly home tips that actually work
Join thousands of homeowners getting practical cleaning hacks, DIY fixes, and money-saving tips every week. Free, and you can unsubscribe anytime.

Written by
Beth SullivanFounder & Editor-in-Chief
Beth Sullivan is the founder of Practical Home Guides. With over a decade of hands-on experience tackling every home challenge imaginable, she started this site to share the practical, no-nonsense solutions she wishes she had found years ago. When she's not testing cleaning hacks or organizing pantries, you'll find her in the garden or working on her next DIY project.
Recommended Products
Looking for specific product recommendations? Check out our tested picks.

Best Cordless String Trimmers (2026 Tested)
Battery-powered string trimmers have caught up to gas. We tested the top models on bermuda, fescue, and overgrown areas to find the picks worth your money.

Best Basement Dehumidifiers (2026 Buyer's Guide)
Damp basements destroy stored items, grow mold, and stink. We tested dehumidifiers for capacity, durability, and energy use to find the picks worth the money.

Best Wet/Dry Shop Vacs (2026 Tested)
Whether you need to clean a flooded basement, dust the garage, or pick up workshop debris, here are the wet/dry shop vacs worth the money.

Best Electric Leaf Blowers (2026 Buyer's Guide)
Cordless and corded electric leaf blowers tested for power, runtime, and noise. Our picks for small yards, large yards, and pro-grade home use.

Best Cordless Lawn Mowers (2026 Spring Buyer's Guide)
Battery-powered mowers have caught up to gas. We tested the top cordless mowers on grass length, slopes, and runtime to find the picks worth your money.

5 Best Cordless Drills for Homeowners (2026)
Find the right cordless drill for home projects without overspending. We compared the top drills for DIYers — here are the 5 best for everyday home use.

Best Home Tool Kits for Beginners (2026)
The best home tool kits for new homeowners and renters. We compare 6 tool sets from basic to comprehensive, so you can handle common repairs without calling a handyman.
Related Articles
Cordless vs. Corded vs. Pneumatic: The Homeowner's Tool System Buying Guide
Cordless, corded, or pneumatic? A homeowner's guide to choosing a power tool ecosystem (DeWalt, Milwaukee, Makita, Ryobi) with a starter-to-advanced path.
End-of-May Home Audit: Fix 5 Summer Safety Issues Before June Heat
A contractor's final spring safety audit. Five critical ventilation, electrical, plumbing, and cooling checks to fix before extreme June heat hits your home.

Backyard Lighting Design: Create Ambiance for Summer Evenings
An electrician's guide to safe backyard lighting design. Layer string lights, path lights, and uplighting in zones for ambiance plus task lighting that lasts.
Budget Outdoor Dining: Building a Patio Table & Bench Setup
A carpenter's plans for a sturdy 2x4 outdoor dining table and bench set that seats 8, costs about 300 dollars in materials, and lasts 20 years.