Quick Summer Home Maintenance: Prevent AC Breakdowns Before June
This article may contain affiliate links. If you make a purchase through these links, we may earn a small commission at no extra cost to you. Learn more
Quick Answer
Quick Summer Home Maintenance: Prevent AC Breakdowns Before June
Spend one hour before June replacing your air filter, hosing down the outdoor condenser coil, clearing the condensate drain line with vinegar, and checking the thermostat and refrigerant lines. This simple DIY tune-up restores efficiency and prevents the kind of mid-July compressor failure that turns into a $1,500 to $5,000 repair.
I have replaced more compressors in July than in any other month of the year, and almost every one of them was avoidable. The pattern is always the same: the system limped through a hot spring, ran flat-out through the first 95-degree week, and then quit on a Friday afternoon when every HVAC company in town already has a three-day backlog. The homeowner ends up paying emergency-call rates for a repair that a one-hour tune-up in May would have prevented.
Here is the part most people miss. An air conditioner rarely dies suddenly. It struggles for weeks first, working harder and harder against a dirty coil, a clogged filter, or a half-blocked drain line, until a component finally gives out under the strain. Catch it early and you are doing fifteen-dollar maintenance. Catch it late and you are writing a check with four digits on it.
This is the exact pre-season checklist I run on my own home every spring, and it is well within reach for a homeowner who is comfortable with a garden hose, a screwdriver, and shutting off a breaker. I will also be clear about where the DIY line stops and a licensed technician needs to take over, because there are a couple of things you genuinely should not touch.

Why Late Spring Is the Critical Window
Your AC has two jobs in summer: pull heat out of your house and dump it outside. Every layer of dust on the filter, every clog of grass clippings on the outdoor coil, and every gallon of standing water in a backed-up drain pan makes both of those jobs harder. The compressor (the expensive heart of the system) compensates by running longer and hotter, and heat is what kills compressors and capacitors.
Doing this work in May matters because the system is not yet under peak load. Outdoor temperatures are mild, you can shut the unit down for an hour without anyone overheating, and if you do uncover a problem that needs a pro, technicians actually have open slots. Wait until the first heat wave and you are competing with everyone else who waited too long. A clean system also runs more efficiently from day one, which directly trims your bill the same way the swaps in our guide to cutting your spring electric bill do.
The whole checklist below takes about an hour. Block off a Saturday morning before the end of May and you will be ahead of the curve.
Step 1: Replace the Air Filter (and Pick the Right MERV)
This is the single highest-payoff thing you will do all season, and it takes five minutes. A clogged filter starves your blower of airflow, which causes two failures: the evaporator coil indoors can freeze into a block of ice, and the system runs far longer to hit the set temperature. The Department of Energy estimates a dirty filter increases energy use by 5 to 15 percent.
Pull the old filter and hold it up to a light. If you cannot see light through it, it is overdue. Note the size printed on the cardboard frame (something like 16x25x1) and the airflow arrow, which always points toward the furnace or air handler.
On MERV rating, this is where people overcorrect. MERV measures filtration density. Higher numbers trap finer particles but also restrict airflow more, and many residential blowers are not built to pull air through a super-dense filter. For most homes, MERV 8 to MERV 13 is the sweet spot. Go to MERV 13 if you have allergies or pets; stay at MERV 8 to 11 if your system is older or your ducts are undersized.
Filtrete 16x25x1 MERV 13 Furnace Filter 4-Pack
A balanced high-efficiency pleated filter that captures pollen and pet dander without overly choking airflow on most residential systems.
Check Price on Amazon →Buy a multi-pack and change the filter every 30 to 60 days through peak summer. Set a phone reminder. A four-pack of good filters costs less than a single emergency service call deductible.
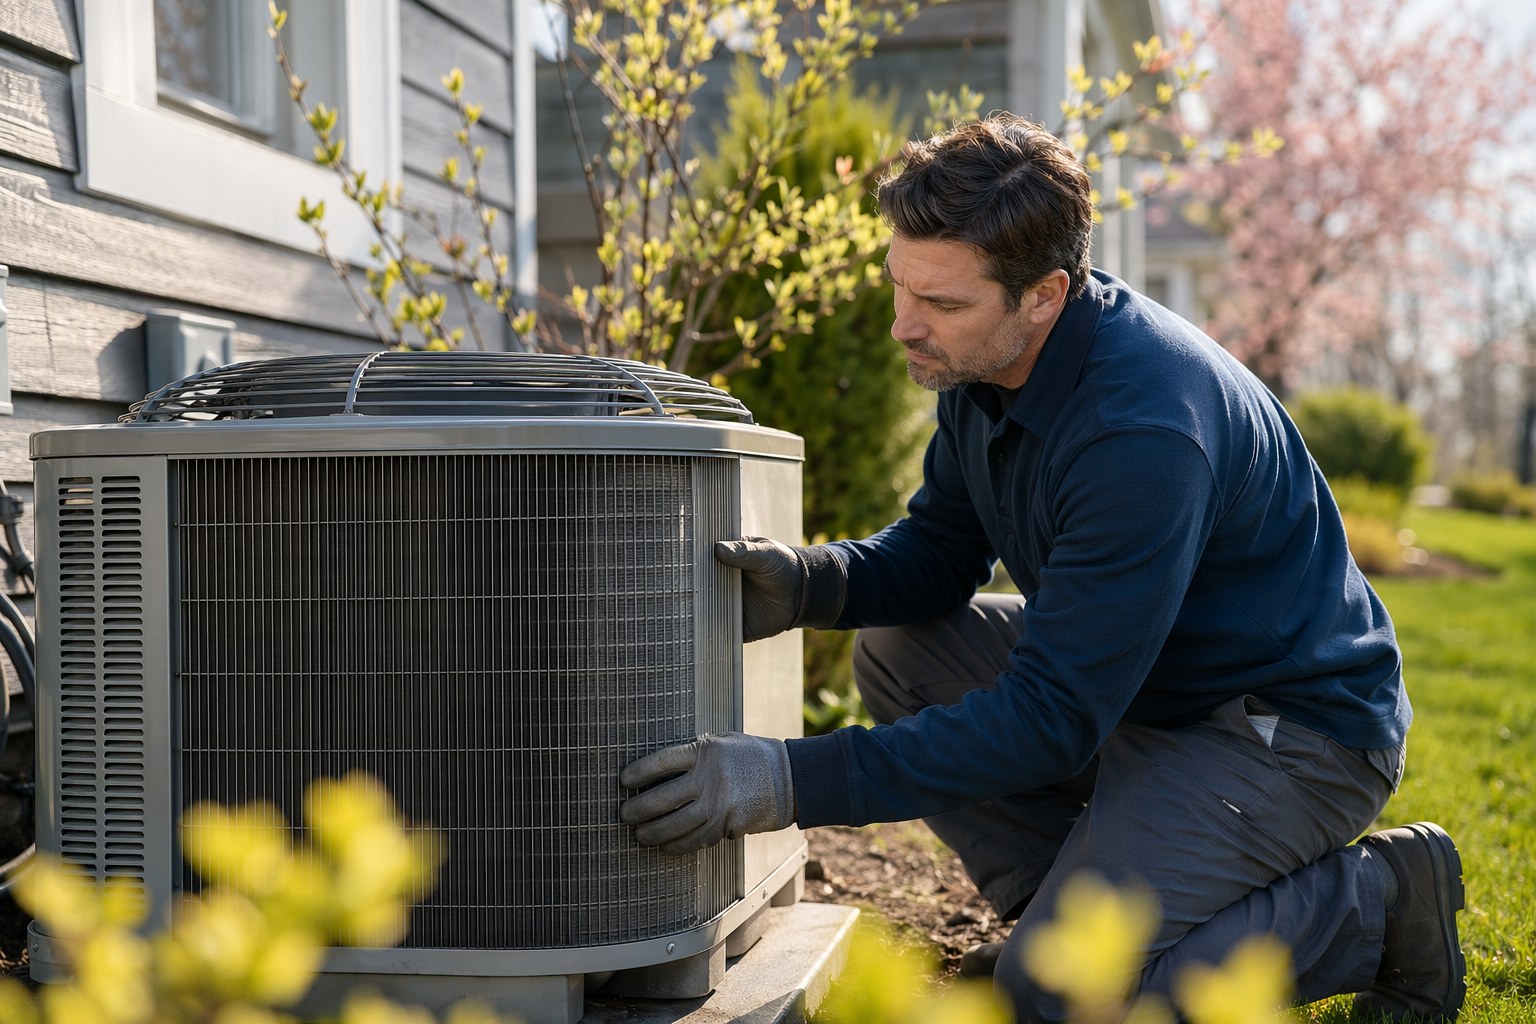
Step 2: Clean the Outdoor Condenser Coil
The outdoor unit (the condenser) is where your system rejects heat, and it cannot do that if the coil fins are caked in pollen, cottonwood fluff, and grass clippings. A blocked condenser raises head pressure, which is exactly the stress that fries capacitors and compressors over a long summer.
Work safely and in order:
- Cut the power. Shut off the breaker for the AC at your panel, and flip the disconnect switch in the box mounted on the wall near the outdoor unit. Both. Do not skip this.
- Clear the surroundings. Pull weeds, trim back any shrubs to maintain at least two feet of clearance on all sides, and rake out leaves from the base.
- Hose the fins gently. Spray from the inside out if you can access it, or straight through from outside, using normal garden-hose pressure. Never use a pressure washer; the fins are thin aluminum and bend instantly, which restricts airflow worse than the dirt did.
- Straighten bent fins carefully with a fin comb or a butter knife if you see flattened areas.
- Let it dry for 30 minutes before restoring power.
For heavy buildup, a no-rinse foaming coil cleaner does a better job than water alone and is genuinely worth the few dollars.
Foaming Coil Cleaner for AC Condensers
Spray-on foam that lifts grease and embedded dirt from condenser and evaporator fins, then rinses or self-evaporates clean.
Check Price on Amazon →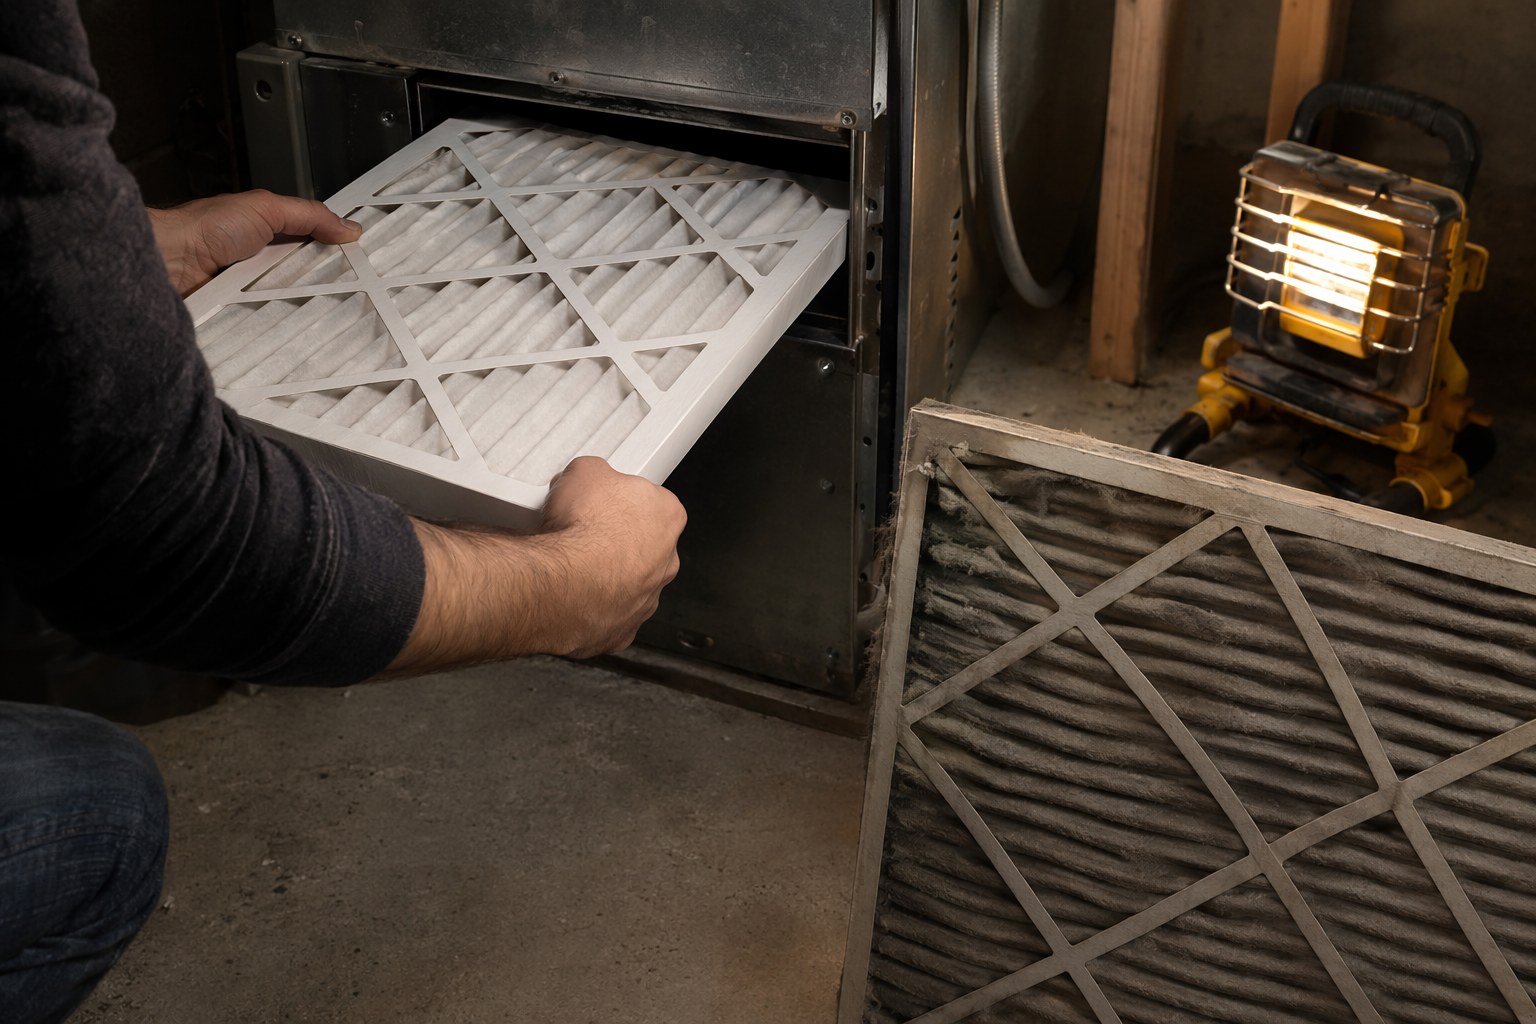
Step 3: Flush the Condensate Drain Line
This is the failure I see most in humid climates, and it is the most preventable. As your AC cools air, it pulls moisture out of it. That water collects in a pan and drains out through a small PVC line. Over time, algae and slime clog that line, the pan overflows, and you get water damage in a ceiling or, on systems with a float switch, the AC simply shuts itself off to protect your home.
Find the drain line (a white PVC pipe, usually with a capped T-shaped access port near the indoor air handler) and the spot where it exits outdoors. Then:
- Pour about a cup of distilled white vinegar into the access port. Vinegar kills the algae without the corrosion risk of bleach on metal pans.
- For a fully clogged line, hold a wet/dry shop vac to the outdoor exit point and pull the clog out by suction for a couple of minutes.
- Check that the pan under the air handler is dry and that the float switch, if present, is seated.
Do this once a month in summer and you will likely never see a clogged-drain shutdown.
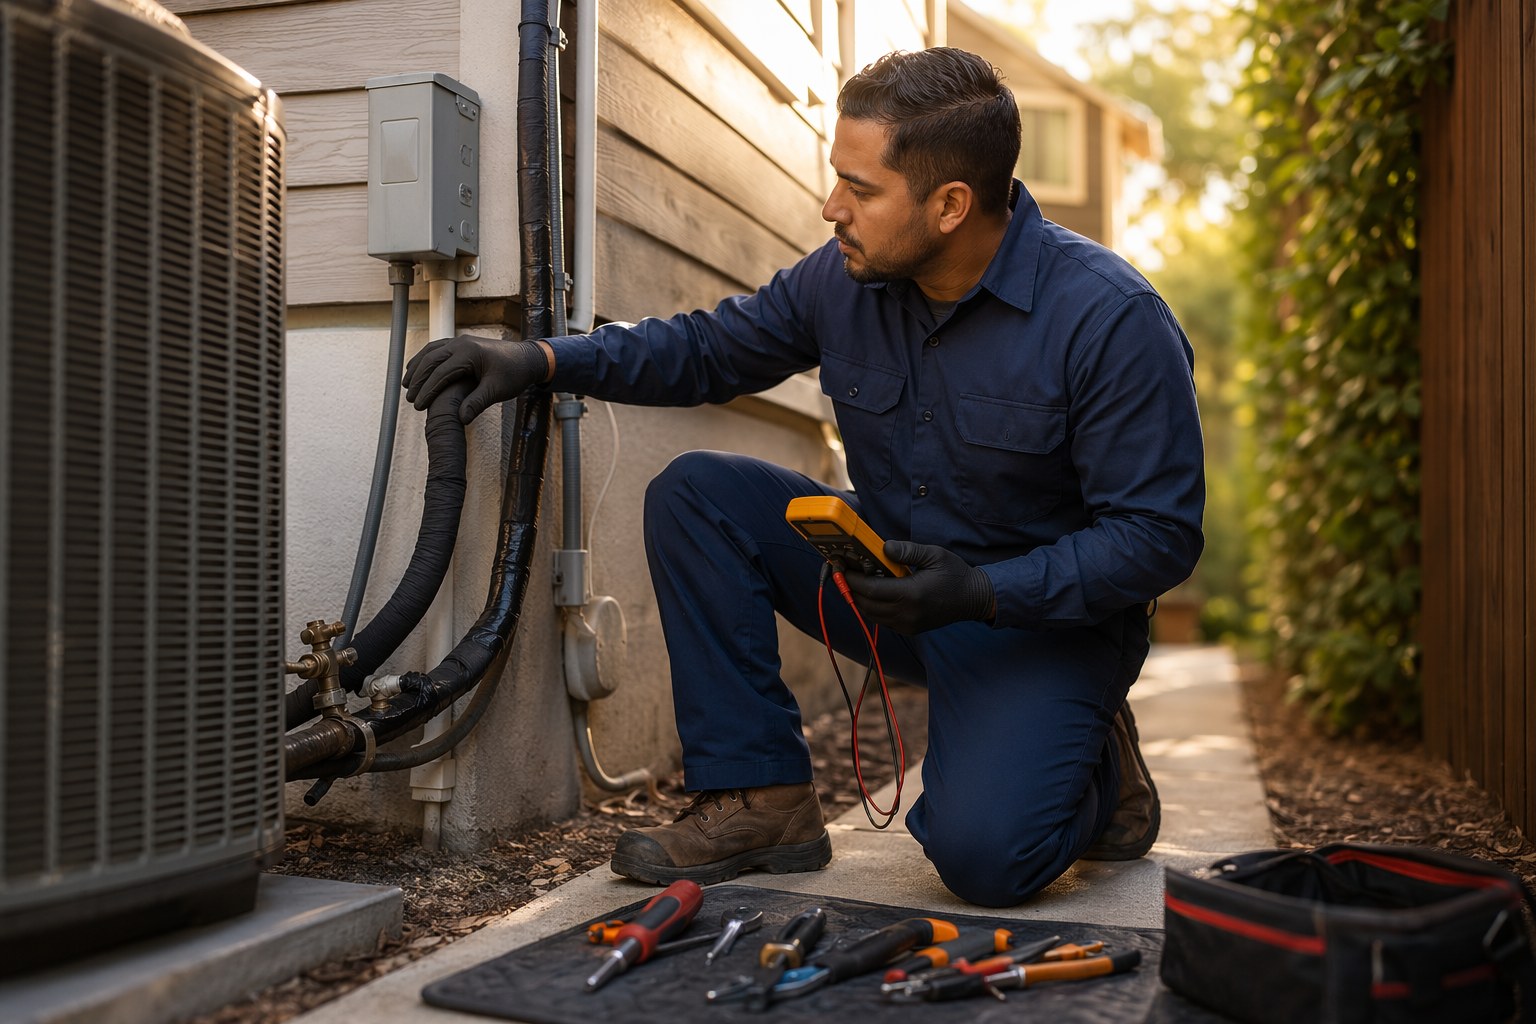
Step 4: Check the Thermostat, Wiring, and Refrigerant Lines
A surprising number of "the AC is broken" calls are actually thermostat problems. Swap in fresh batteries if yours uses them, confirm it is set to "cool" and a few degrees below room temperature, and make sure it actually triggers the system. If you have been meaning to upgrade, this is the natural moment; a programmable model that eases off while you are out is one of the easiest ways to save money on your cooling bill, and the better options are covered in our roundup of smart thermostats that save energy.
While the power is still off, glance at the two refrigerant lines running into the outdoor unit. The larger one (the suction line) should be wrapped in foam insulation. If that insulation is cracked, missing, or sun-rotted, slide on a fresh length of foam line insulation; bare lines waste cooling and can sweat onto whatever is below them. Look at the disconnect box and any visible wiring for scorch marks or chewed insulation from rodents, which is a common spring discovery.
What you should not do: never open the sealed refrigerant system, never attempt a DIY "recharge" from a parts-store can, and never touch the run capacitor unless you know how to safely discharge it. Refrigerant handling is EPA-regulated for a reason, and a low charge almost always means there is a leak that needs to be found and repaired, not topped off.
When to Stop and Call a Technician
The DIY checklist above prevents the majority of breakdowns, but some signs point to a problem that needs professional diagnosis. Call a licensed HVAC tech if you notice any of these:
- The unit blows warm air even though it is running and the filter and coil are clean. This often signals low refrigerant (a leak) or a failing compressor.
- Ice on the refrigerant lines or indoor coil that returns after you thaw it and replace the filter.
- Loud grinding, buzzing, or repeated clicking at startup, which can indicate a failing capacitor, contactor, or fan motor.
- The breaker trips every time the AC kicks on. That is an electrical fault, not a nuisance, and should never be repeatedly reset.
- A burning or chemical smell from the vents or outdoor unit.
A spring professional tune-up runs roughly $75 to $200 and includes checking refrigerant pressures and electrical components you should not handle yourself. Thinking of it the same way I frame any repair-or-replace decision: spending a couple hundred to verify the system is sound beats a peak-season emergency call every time. If your unit is also more than 12 to 15 years old and needing frequent attention, factor in the logic from our guide on when to repair versus replace appliances.
Build a Simple Maintenance Habit
The reason most homeowners get burned is not laziness; it is that AC maintenance has no obvious trigger until something fails. Fix that by attaching it to the calendar. I keep a one-line note on the family schedule, and posting it somewhere visible (the same idea behind a family command center) means it actually gets done.
Here is the rhythm I recommend: full tune-up in May, filter check every month from June through September, condensate flush monthly in humid regions, and a quick condenser rinse mid-summer after the cottonwood and grass season. Keep your filters and a small jug of vinegar on hand so there is no trip to the store standing between you and the five-minute version of each task.
Frequently Asked Questions
How often should I replace my AC filter in summer?
Check it every 30 days during peak cooling season and replace it whenever you cannot see light through the pleats, which is usually every 30 to 60 days. Homes with pets, smokers, or allergy sufferers, and homes running the system constantly in extreme heat, sit at the shorter end of that range. A clean filter protects airflow, prevents the indoor coil from freezing, and keeps energy use down.
Can I add refrigerant to my AC myself?
No. Refrigerant is part of a sealed, EPA-regulated system, and the store-bought "recharge in a can" kits are a poor idea for homeowners. If your system is low on refrigerant, it has a leak somewhere, and simply adding more masks the problem while the leak continues. A technician needs to find and repair the leak, then charge the system to the manufacturer's exact spec. Overcharging or undercharging both damage the compressor.
Why is my AC freezing up?
The two most common causes are restricted airflow from a dirty filter or blocked vents, and low refrigerant from a leak. When airflow drops or refrigerant is low, the evaporator coil gets cold enough that condensation freezes into ice, which blocks airflow even further. Turn the system to "fan only" to thaw the ice, then replace the filter and confirm your vents are open. If it freezes again after that, you likely have a refrigerant problem that needs a technician.
How much does a professional AC tune-up cost?
A standard pre-season maintenance visit typically runs $75 to $200 depending on your region and what the company includes. That usually covers checking refrigerant pressures, testing electrical components and the capacitor, inspecting the contactor, and cleaning the coils. Compared to an emergency compressor replacement, which can run $1,500 to over $5,000 with parts and labor, the annual tune-up is cheap insurance.
Is it normal for the outdoor unit to be hot?
Yes, the outdoor condenser is supposed to feel warm and blow warm air out the top, because its entire job is to release the heat pulled from inside your house. What is not normal is the unit running constantly without cooling the house, a fan that will not spin, or excessive vibration and noise. Warm exhaust air, good. A struggling, screeching, or non-spinning unit, call for service.
Beat the Heat Before It Beats Your AC
None of this is glamorous work, but it is the difference between a quiet, efficient summer and a sweaty emergency you pay a premium to escape. An hour with a hose, a fresh filter, and a cup of vinegar addresses the failures I see most often as a contractor, and it puts you in the small group of homeowners whose systems are actually ready when the first heat wave lands.
Do it before June while the weather is mild and technicians are available. Then enjoy the season knowing the most expensive piece of equipment in your house is running clean, cool, and out of harm's way.
Get weekly home tips that actually work
Join thousands of homeowners getting practical cleaning hacks, DIY fixes, and money-saving tips every week. Free, and you can unsubscribe anytime.

Written by
Marcus ChenDIY & Home Repair Editor
Marcus Chen spent fifteen years as a licensed general contractor in the Pacific Northwest before joining Practical Home Guides full time. He specializes in plumbing, electrical, and weekend warrior projects that save homeowners thousands. Marcus has personally tested every tool he recommends in his own century-old fixer-upper.
Recommended Products
Looking for specific product recommendations? Check out our tested picks.

Best Cordless String Trimmers (2026 Tested)
Battery-powered string trimmers have caught up to gas. We tested the top models on bermuda, fescue, and overgrown areas to find the picks worth your money.

Best Basement Dehumidifiers (2026 Buyer's Guide)
Damp basements destroy stored items, grow mold, and stink. We tested dehumidifiers for capacity, durability, and energy use to find the picks worth the money.

Best Wet/Dry Shop Vacs (2026 Tested)
Whether you need to clean a flooded basement, dust the garage, or pick up workshop debris, here are the wet/dry shop vacs worth the money.

Best Electric Leaf Blowers (2026 Buyer's Guide)
Cordless and corded electric leaf blowers tested for power, runtime, and noise. Our picks for small yards, large yards, and pro-grade home use.

Best Cordless Lawn Mowers (2026 Spring Buyer's Guide)
Battery-powered mowers have caught up to gas. We tested the top cordless mowers on grass length, slopes, and runtime to find the picks worth your money.

5 Best Cordless Drills for Homeowners (2026)
Find the right cordless drill for home projects without overspending. We compared the top drills for DIYers — here are the 5 best for everyday home use.

Best Home Tool Kits for Beginners (2026)
The best home tool kits for new homeowners and renters. We compare 6 tool sets from basic to comprehensive, so you can handle common repairs without calling a handyman.
Related Articles
Cordless vs. Corded vs. Pneumatic: The Homeowner's Tool System Buying Guide
Cordless, corded, or pneumatic? A homeowner's guide to choosing a power tool ecosystem (DeWalt, Milwaukee, Makita, Ryobi) with a starter-to-advanced path.
End-of-May Home Audit: Fix 5 Summer Safety Issues Before June Heat
A contractor's final spring safety audit. Five critical ventilation, electrical, plumbing, and cooling checks to fix before extreme June heat hits your home.

Backyard Lighting Design: Create Ambiance for Summer Evenings
An electrician's guide to safe backyard lighting design. Layer string lights, path lights, and uplighting in zones for ambiance plus task lighting that lasts.

Budget Outdoor Dining: Building a Patio Table & Bench Setup
A carpenter's plans for a sturdy 2x4 outdoor dining table and bench set that seats 8, costs about 300 dollars in materials, and lasts 20 years.